
7 Delicious and Affordable Uni Meals for College Students
Introduction
University life can be an exhilarating journey filled with learning, new friendships, and personal growth. However, it also comes with its fair share of challenges, particularly for students on a tight budget. Balancing academic expenses with daily necessities can often leave you pondering over the contents of your wallet. One aspect that frequently concerns students is food. What can you prepare that’s not only affordable but also delicious? Fear not! In this article, we’re going to explore seven scrumptious and wallet-friendly meals tailored for university students. So, let’s dive into the world of budget-friendly culinary adventures!
Ramen Revamped Recipe
Ramen, a beloved comfort food, gets a flavorful makeover in this recipe. We’ll guide you through creating a revamped ramen bowl that’s bursting with deliciousness.
Ingredients
To create your revamped ramen, gather these flavorful ingredients:
For the Broth:
4 cups chicken or vegetable broth
2 cloves garlic, minced
1-inch piece of ginger, sliced
2 tablespoons soy sauce
1 tablespoon miso paste
1 teaspoon sesame oil
Salt and pepper to taste
For the Ramen:
2 packs of ramen noodles (discard the seasoning packets)
2 cups of assorted vegetables (baby spinach, sliced mushrooms, sliced carrots, and green onions work well)
2 boiled eggs (soft or hard-boiled, depending on your preference)
Cooked protein of your choice (sliced grilled chicken, tofu, or shrimp)
Optional Add-ins:
Sriracha sauce or chili paste (for extra heat)
Nori sheets (for an authentic touch)
Toasted sesame seeds (for added flavor and texture)
Directions
Let’s revamp that ramen:
For the Broth:
Prepare the Aromatics:
In a large pot, heat a bit of oil over medium heat.
Add the minced garlic and sliced ginger. Sauté for a minute until fragrant.
Create the Broth:
Pour in the chicken or vegetable broth.
Stir in the soy sauce, miso paste, and sesame oil.
Season with salt and pepper to taste.
Bring the mixture to a simmer and let it cook for about 10 minutes to meld the flavors.
For the Ramen:
Cook the Noodles:
While the broth simmers, cook the ramen noodles according to the package instructions.
Drain and set aside.
Prepare the Veggies and Protein:
In a separate pan, sauté your assorted vegetables until they’re tender.
Grill or cook your protein choice until it’s cooked through.
Assemble the Bowl:
Divide the cooked ramen noodles into serving bowls.
Pour the hot broth over the noodles.
Add the Goodies:
Arrange the sautéed vegetables and cooked protein on top of the noodles.
Garnish and Spice It Up:
Garnish your revamped ramen with boiled egg halves, sliced green onions, nori sheets, and toasted sesame seeds.
Add a drizzle of Sriracha sauce or chili paste for that extra kick if desired.
Serve and Savor:
Serve your revamped ramen immediately, and savor the incredible flavors that have come together in this upgraded dish.
Garnish Ideas
Make your revamped ramen visually appealing and even more delicious with these garnish ideas:
Fresh cilantro leaves
Sliced red bell peppers for a pop of color
Lime wedges for a zesty squeeze
Bean sprouts for added crunch
Tips and Tricks
Customize your revamped ramen with your favorite vegetables and protein for a personalized touch.
If you’re a fan of spice, adjust the Sriracha or chili paste to your preferred heat level.
Experiment with different types of miso paste (white, red, or yellow) for varied depths of flavor.
Ramen revamped is a delightful and satisfying meal that elevates the humble noodle soup to gourmet status. It’s a bowl of comfort and flavor that’s perfect for cozy evenings or impressing guests. So, go ahead, embrace the delicious transformation, and savor every slurp!
Disclaimer:
Ramen revamped may cause serious cravings for more. Prepare to fall in love with this upgraded classic! ️
Ah, ramen – the quintessential college student meal. It’s quick, easy, and cost-effective. But what if we told you that you could elevate your ramen game without breaking the bank?
How to Revamp Your Ramen
Upgrade with Veggies: Start by tossing in some fresh or frozen vegetables, like broccoli, carrots, or peas. They add a burst of color and nutrients to your bowl.
Protein Power:
Add protein sources like sliced chicken, tofu, or a fried egg. It not only makes your meal more satisfying but also healthier.
Sauces and Spices:
Experiment with different sauces and spices to season your ramen. Soy sauce, sesame oil, and sriracha can work wonders.
Personal Ramen Tales:
I remember one late-night cram session when my roommate and I turned our dorm room into a mini ramen restaurant. We each crafted our own unique ramen masterpiece, and it turned into a fun bonding experience.
Instructions:
Boil the Noodles:
In a pot, bring 4 cups of water to a boil. Add the ramen noodles and cook according to the package instructions.
Add Flavors:
During the last minute of cooking, add the minced garlic, soy sauce, and sesame oil. These will infuse the noodles with deliciousness.
Toppings Galore:
Once your ramen is cooked, add sliced mushrooms and green onions. These add a fresh and earthy crunch.
Soft-Boiled Eggs (Optional):
If you want to take it to the next level, add soft-boiled eggs. Slice them in half for a rich, creamy addition.
Kick it Up:
For those who like it spicy, drizzle some Sriracha sauce over the top. It’s like fireworks for your taste buds.
Serve & Savor:
Your revamped ramen is ready. Serve it up, slurp it down, and enjoy this upgraded classic.
DIY Pizza Pockets Recipe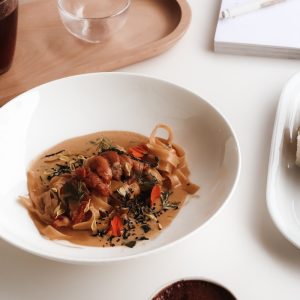
Pizza pockets are a convenient and tasty way to enjoy the flavors of pizza in a handy, portable package. In this recipe, we’ll guide you through creating your very own DIY pizza pockets that are perfect for a quick snack or a fun meal.
Ingredients
To make your DIY pizza pockets, gather these delicious ingredients:
For the Pizza Dough:
2 1/4 teaspoons active dry yeast
1 teaspoon sugar
3/4 cup warm water
2 cups all-purpose flour
1 teaspoon salt
2 tablespoons olive oil
For the Pizza Filling:
1/2 cup pizza sauce
1 1/2 cups shredded mozzarella cheese
1/2 cup diced pepperoni or your favorite pizza toppings
Optional: additional herbs and spices for extra flavor (oregano, garlic powder, red pepper flakes)
For Sealing and Brushing:
1 egg, beaten (for egg wash)
A little extra flour for dusting
Directions
Let’s create these delightful DIY pizza pockets:
For the Pizza Dough:
Activate the Yeast:
In a small bowl, combine the warm water, sugar, and active dry yeast. Let it sit for about 5 minutes until it becomes frothy.
Mix the Dough:
In a large bowl, combine the flour and salt.
Pour in the yeast mixture and add the olive oil.
Mix until a dough forms.
Knead and Rise:
Turn the dough onto a floured surface and knead it for about 5 minutes until it’s smooth and elastic.
Place the dough in a lightly oiled bowl, cover it with a clean kitchen towel, and let it rise for 1-2 hours until it doubles in size.
For Assembling the Pizza Pockets:
Preheat and Prepare:
Preheat your oven to 425°F (220°C).
Line a baking sheet with parchment paper.
Divide and Roll:
After the dough has risen, divide it into small, equal-sized balls (about the size of a golf ball).
Roll each ball into a small, thin circle or rectangle, about 6 inches (15 cm) in diameter.
Add Filling and Seal:
Place a spoonful of pizza sauce on one half of each dough circle or rectangle.
Sprinkle shredded mozzarella cheese and your choice of pizza toppings.
Fold the other half of the dough over the filling to create a pocket.
Press the edges together to seal.
Brush with Egg Wash:
Brush the tops of the pizza pockets with beaten egg. This will give them a beautiful golden-brown finish.
Bake to Perfection:
Place the pizza pockets on the prepared baking sheet.
Bake for about 15-20 minutes or until they are golden brown and the cheese is bubbly.
Serve and Enjoy:
Serve your DIY pizza pockets hot and enjoy the deliciousness of homemade pizza in a convenient pocket form!
Filling Ideas
Get creative with your pizza pocket fillings! Here are some ideas:
Vegetarian:
Sautéed mushrooms, bell peppers, and onions with mozzarella cheese.
Hawaiian:
Diced ham and pineapple chunks with a blend of mozzarella and cheddar cheese.
Margherita:
Fresh tomato slices, basil leaves, and mozzarella cheese with a drizzle of olive oil.
Tips and Tricks
Customize the filling to suit your taste. Don’t forget to season with herbs and spices for extra flavor.
Ensure a good seal on the pizza pockets to prevent any fillings from leaking out during baking.
Serve with extra pizza sauce or marinara sauce for dipping.
DIY pizza pockets are a delightful and versatile snack or meal that you can make from scratch. Whether you’re enjoying them as a quick lunch or a fun party treat, they’re sure to be a hit with everyone at the table. So, roll out that dough, fill it with your favorite toppings, and enjoy your homemade pizza pockets!
Disclaimer:
DIY pizza pockets have been known to disappear quickly, so make sure to grab one for yourself!
Pizza is universally adored, but ordering takeout can dent your budget. Instead, try making your own pizza pockets!
Instructions:
Prepare the Dough:
Roll out your pizza dough and cut it into squares. You’ll use these as the pockets.
Layer & Fill:
On one half of each square, spread a bit of tomato sauce, add cheese, and your chosen toppings.
Fold & Seal:
Fold the other half of the dough over the toppings, creating a pocket. Use a fork to press and seal the edges.
Brush & Season:
Brush the tops of the pizza pockets with olive oil and sprinkle with Italian seasoning. It’s like a little Italian love note.
Bake & Enjoy:
Bake in a preheated oven according to your pizza dough instructions. Once they’re golden and delicious, it’s time to savor your homemade pizza pockets.
Crafting Your Pizza Pockets
Ingredients:
You’ll need pizza dough, tomato sauce, cheese, and your choice of toppings (pepperoni, veggies, or whatever tickles your taste buds).
Assembly Line:
Roll out the dough, cut it into circles, and assemble your pockets. It’s like creating edible art.
Bake to Perfection:
Pop them in the oven until they turn golden brown, and you’ve got yourself a batch of delightful pizza pockets.
Pizza Party Memories:
The best part? You can host a mini pizza party with your friends, everyone customizing their pockets. It’s budget-friendly and a blast!
Directions
Preheat the Oven:
Begin by preheating your oven to 375°F (190°C).
Prepare the Dough:
Roll out the pizza dough on a floured surface. Use a rolling pin to create a thin, even layer.
Cut into Rounds:
Using a round cutter or a glass, cut the dough into circles, about 5-6 inches in diameter. These will be the pockets’ outer layers.
Add Toppings:
In the center of each dough circle, add a spoonful of pizza sauce, a sprinkle of mozzarella cheese, and your chosen pizza toppings. Be mindful not to overstuff.
Fold and Seal:
Carefully fold the dough over the toppings, creating a half-moon shape. Press the edges to seal the pocket. You can use a fork to crimp the edges for a secure seal.
Egg Wash:
In a small bowl, beat the egg, and brush it over the top of each pizza pocket. This will give them a beautiful golden finish.
Bake:
Place your pizza pockets on a baking sheet lined with parchment paper. Bake in the preheated oven for 15-20 minutes or until they turn golden brown.
Optional Garnish:
For an extra burst of flavor, sprinkle Italian seasoning and grated Parmesan cheese on top of your pizza pockets as soon as they come out of the oven.
Serve and Enjoy:
Let your pizza pockets cool for a few minutes, and then serve them hot. They’re fantastic on their own or with a side of extra pizza sauce for dipping.
Instructions:
Dough Time:
Roll out your pizza dough and cut it into rectangles. These will be the base of your pockets.
Toppings Galore:
On one half of each rectangle, layer a spoonful of tomato sauce, cheese, and your preferred toppings.
Fold & Seal:
Fold the other half of the dough over the toppings and press the edges with a fork to seal the pocket. It’s like a savory treasure chest.
Brush & Sprinkle:
Brush the tops of the pockets with olive oil and sprinkle with dried oregano or basil. It’s like a sprinkle of Italian magic.
Bake & Dive In:
Bake in a preheated oven according to your pizza dough instructions. Once they’re golden and the cheese is bubbling, they’re ready to be devoured.
Budget-Friendly Burrito Bowls Recipe
Burrito bowls are a delicious and cost-effective way to enjoy all the flavors of a burrito without the extra cost of the tortilla. In this recipe, we’ll guide you through creating budget-friendly burrito bowls that are both satisfying and easy on the wallet.
Ingredients
To make your budget-friendly burrito bowls, gather these affordable yet flavorful ingredients:
For the Rice:
1 cup long-grain white rice
2 cups water
1 teaspoon salt
1 tablespoon olive oil
For the Burrito Bowl:
1 can (15 oz) black beans, drained and rinsed
1 cup corn kernels (fresh, frozen, or canned)
1 cup diced tomatoes (canned or fresh)
1 cup cooked and shredded chicken (rotisserie chicken works great)
1 cup shredded cheese (cheddar, Monterey Jack, or your favorite)
1 avocado, sliced
Fresh cilantro leaves for garnish (optional)
For the Burrito Bowl Sauce:
1/2 cup sour cream
1 tablespoon lime juice
1 teaspoon chili powder
Salt and pepper to taste
Directions
Let’s create budget-friendly burrito bowls that are both delicious and easy on the wallet:
For the Rice:
Cook the Rice:
In a medium saucepan, combine the rice, water, salt, and olive oil.
Bring to a boil, then reduce the heat to low and cover.
Simmer for about 18-20 minutes until the rice is tender and the water is absorbed.
Fluff the rice with a fork and set aside.
For the Burrito Bowl:
Prepare the Ingredients:
In a large bowl, combine the black beans, corn kernels, diced tomatoes, and shredded chicken.
Mix them together to create a flavorful base for your burrito bowl.
For the Burrito Bowl Sauce:
Whisk the Sauce:
In a small bowl, whisk together the sour cream, lime juice, chili powder, salt, and pepper.
Adjust the seasoning to taste.
Assemble Your Burrito Bowl:
Divide the cooked rice among serving bowls.
Top the rice with the black bean and chicken mixture.
Sprinkle shredded cheese over the top.
Add sliced avocado for creaminess.
Drizzle with Sauce:
Drizzle the prepared burrito bowl sauce over the ingredients.
Garnish and Serve:
Garnish with fresh cilantro leaves if desired.
Serve your budget-friendly burrito bowls and enjoy the delicious flavors!
Topping Ideas
Make your burrito bowl even more exciting with these topping ideas:
Salsa or pico de gallo
Sliced jalapeños for a spicy kick
Diced red onions or green onions for added crunch
Squeeze of fresh lime juice for zesty freshness
Tips and Tricks
Customize your burrito bowls with your favorite ingredients like bell peppers, olives, or diced red cabbage.
Save even more by using leftover cooked rice and roasted chicken.
Double the recipe and enjoy budget-friendly burrito bowls for multiple meals throughout the week.
Budget-friendly burrito bowls are a tasty and wallet-friendly way to enjoy a satisfying meal at home. Whether you’re looking for a quick dinner option or meal prep for the week, these bowls have you covered. So, create your bowl, load it up with your favorite toppings, and savor every budget-friendly bite!
Disclaimer:
Budget-friendly burrito bowls have been known to bring smiles and full bellies without breaking the bank!
Burrito bowls are a fantastic way to enjoy the flavors of a burrito without spending big bucks at a restaurant.
Instructions:
Cook the Meat:
In a skillet, cook your ground beef or turkey. Season it with taco seasoning for a burst of flavor.
Warm the Beans:
In a separate pot, heat up your canned black beans. They’re a fantastic source of protein.
Rice & Build:
In a bowl, start with a layer of cooked rice. Add your seasoned meat, black beans, salsa, and cheese.
Avocado & Cream (Optional):
For some extra creaminess, top with sliced avocado and a dollop of sour cream.
Mix & Enjoy:
Give it all a good mix, and you have a budget-friendly burrito bowl ready to satisfy your taste buds.
Building Your Burrito Bowl
Base:
Start with a base of rice or quinoa. These grains are affordable and filling.
Protein:
Add your protein of choice – beans, grilled chicken, or ground beef.
Veggies Galore:
Pile on colorful veggies like bell peppers, onions, and tomatoes. They’re nutritious and inexpensive.
Toppings and Sauces:
Finish it off with toppings like cheese, salsa, guacamole, or sour cream.
Shared Satisfaction:
I can’t forget the time when my roommates and I gathered around our tiny dorm table, crafting our burrito bowls. It felt like a homemade fiesta!
One-Pot Pasta Pleasure Recipe
One-pot pasta dishes are a time-saving and flavorful way to enjoy a satisfying meal with minimal cleanup. In this recipe, we’ll guide you through creating a one-pot pasta pleasure that’s both convenient and delicious.
Ingredients
To make your one-pot pasta pleasure, gather these convenient and flavorful ingredients:
12 oz pasta (penne, spaghetti, or your choice)
1 tablespoon olive oil
1 small onion, finely chopped
2 cloves garlic, minced
1 can (14 oz) diced tomatoes
2 1/2 cups vegetable or chicken broth
1 teaspoon Italian seasoning (or a blend of dried basil, oregano, and thyme)
Salt and pepper to taste
1 cup fresh spinach leaves
1/2 cup grated Parmesan cheese
Fresh basil leaves for garnish (optional)
Directions
Let’s cook up some one-pot pasta pleasure:
Sauté the Aromatics:
In a large skillet or pot, heat olive oil over medium heat.
Add the chopped onion and minced garlic. Sauté until they become fragrant and translucent.
Add the Pasta:
Add the dry pasta to the skillet. Stir it around to coat it with the aromatic oil.
Pour in the Liquid:
Pour in the diced tomatoes (with their juice) and vegetable or chicken broth.
Sprinkle in the Italian seasoning, salt, and pepper to taste.
Simmer and Stir:
Bring the mixture to a gentle boil, then reduce the heat to low.
Cover and simmer for about 12-15 minutes, or until the pasta is cooked to your desired level of tenderness, stirring occasionally.
Add the Greens:
Stir in the fresh spinach leaves and let them wilt into the pasta.
Finish with Cheese:
Sprinkle the grated Parmesan cheese over the pasta. Stir until the cheese is melted and the pasta is creamy.
Garnish and Serve:
Garnish with fresh basil leaves if desired.
Serve your one-pot pasta pleasure immediately, and enjoy the convenience and deliciousness!
Variation Ideas
Get creative with your one-pot pasta pleasure by trying these variations:
Protein Power:
Add cooked chicken, shrimp, or Italian sausage for a protein-packed meal.
Veggie Delight: Mix in your favorite vegetables like bell peppers, zucchini, or cherry tomatoes for added freshness and flavor.
Creamy Dream:
Make it creamy by stirring in a little heavy cream or cream cheese.
Tips and Tricks
Keep an eye on the liquid level while simmering the pasta. If it’s drying out too quickly, you can add a bit more broth or water.
Customize the seasonings to your taste. Add red pepper flakes for some heat or extra garlic for more flavor.
Use whole wheat or gluten-free pasta if you have dietary preferences or restrictions.
One-pot pasta pleasure is a delightful and efficient way to enjoy a comforting meal without the hassle of multiple pots and pans. It’s perfect for busy weeknights or anytime you crave a satisfying pasta dish. So, grab your skillet, create your one-pot wonder, and savor every bite of this convenient and flavorful pasta pleasure!
Disclaimer:
One-pot pasta pleasure may lead to minimal cleanup and maximum enjoyment!
Cooking in a dorm room can be a challenge, but one-pot pasta dishes come to the rescue. They’re simple, tasty, and require minimal cleanup.
Instructions:
Sauté the Garlic:
In a large pot, sauté the minced garlic in olive oil until it’s aromatic and golden.
Add Tomatoes & Spinach:
Throw in the cherry tomatoes and spinach. Let them cook for a few minutes until the spinach wilts and the tomatoes blister.
Pasta In:
Add your pasta and stir it in with the vegetables.
Broth & Simmer:
Pour in the chicken or vegetable broth. Bring it to a boil, then reduce the heat and simmer until the pasta is cooked to perfection.
Cheese It Up:
Remove from heat, sprinkle with Parmesan cheese, and season with salt and pepper. It’s like a symphony of flavors.
Serve & Savor:
Your One-Pot Pasta Pleasure is ready to be enjoyed. No need for multiple pots and pans – it’s all in one!
Whipping Up One-Pot Pasta
Ingredients:
Gather pasta, vegetables, broth, and your choice of protein (chicken, sausage, or even tofu).
Combine and Simmer:
Toss everything into one pot, simmer, and let the flavors meld together.
Student Kitchen Chronicles:
I recall the first time I attempted a one-pot pasta dish. It saved me from doing a mountain of dishes, and the aroma wafting through my dorm was irresistible.
Veggie-Packed Stir-Fry Recipe
Veggie-packed stir-fry is a wholesome and flavorful way to enjoy a variety of colorful vegetables in one delicious meal. In this recipe, we’ll guide you through creating a veggie-packed stir-fry that’s both satisfying and nutritious.
Ingredients
To make your veggie-packed stir-fry, gather these fresh and vibrant ingredients:
For the Stir-Fry:
2 cups broccoli florets
1 red bell pepper, sliced
1 yellow bell pepper, sliced
1 carrot, thinly sliced
1 cup snap peas or snow peas
1 cup sliced mushrooms
1 cup baby corn, halved
1 cup tofu, chicken, or shrimp (your choice of protein)
2 tablespoons vegetable oil
Salt and pepper to taste
Cooked rice or noodles for serving
For the Stir-Fry Sauce:
Option 1 – Classic Stir-Fry Sauce:
1/4 cup soy sauce
2 tablespoons rice vinegar
2 tablespoons honey or brown sugar
2 cloves garlic, minced
1 teaspoon ginger, grated
Option 2 – Spicy Stir-Fry Sauce:
1/4 cup soy sauce
2 tablespoons rice vinegar
1 tablespoon honey or brown sugar
2 cloves garlic, minced
1 teaspoon ginger, grated
1/2 teaspoon red pepper flakes (adjust to taste for spiciness)
Directions
Let’s create a vibrant and healthy veggie-packed stir-fry:
For the Stir-Fry Sauce:
Choose Your Sauce:
Depending on your preference, you can go with the classic stir-fry sauce or the spicy version.
In a small bowl, combine all the sauce ingredients and whisk until well blended. Set aside.
For the Stir-Fry:
Prepare Your Ingredients:
Slice and chop all your vegetables, ensuring they’re uniform in size for even cooking.
Cut your tofu, chicken, or shrimp into bite-sized pieces.
Heat the Wok or Pan:
Place a wok or large skillet over high heat.
Add the vegetable oil and let it get hot.
Sear the Protein:
If using tofu, chicken, or shrimp, add it to the hot wok.
Stir-fry until the protein is cooked through and slightly browned.
Remove it from the wok and set it aside.
Stir-Fry the Veggies:
In the same wok, add more oil if needed.
Add the sliced bell peppers, broccoli, carrot, snap peas, mushrooms, and baby corn.
Stir-fry the vegetables until they’re crisp-tender and vibrant.
Add the Sauce:
Pour the stir-fry sauce over the cooked vegetables.
Return the cooked protein to the wok.
Toss and Coat:
Stir everything together, ensuring that the sauce coats the vegetables and protein evenly.
Cook for another 2-3 minutes to heat through.
Serve and Enjoy:
Serve your veggie-packed stir-fry hot over cooked rice or noodles.
Garnish with sesame seeds, sliced green onions, or chopped cilantro if desired.
Sauce Options
Choose between the classic stir-fry sauce or the spicy version, depending on your taste preferences. Both are delicious and add a burst of flavor to your stir-fry.
Tips and Tricks
Feel free to customize your stir-fry with your favorite vegetables and protein.
For a gluten-free version, use tamari or a gluten-free soy sauce alternative.
Add a handful of cashews or peanuts for added crunch and flavor.
Veggie-packed stir-fry is a nutritious and satisfying meal that allows you to enjoy the vibrant goodness of a variety of vegetables. Whether you’re following a vegetarian or omnivorous diet, this recipe is versatile and delicious. So, grab your wok, load it up with veggies, and savor the flavors of this wholesome stir-fry!
Disclaimer:
Veggie-packed stir-fry may cause a burst of energy and a newfound love for vegetables! ️
Stir-fry is a brilliant way to incorporate vegetables into your diet while staying on budget.
Stir-Fry Adventure
Fresh Veggies:
Buy a medley of fresh veggies. Bell peppers, broccoli, and snap peas are colorful and flavorful options.
Protein Partners:
Pair your veggies with protein sources like tofu, shrimp, or chicken strips.
Sauce It Up:
Create your stir-fry sauce using soy sauce, garlic, ginger, and a touch of honey for that perfect balance of flavors.
Shared Culinary Tales:
My friends and I once decided to hold a stir-fry competition. We each had our secret ingredients, and it turned into a friendly rivalry.
Instructions:
Garlic Sizzle:
In a large pot, heat olive oil and sauté the minced garlic until it’s aromatic and golden.
Tomato Tango:
Add cherry tomatoes and fresh basil leaves. Cook until the tomatoes blister and basil becomes fragrant.
Pasta Parade:
Stir in your pasta of choice. It’s the star of the show.
Broth & Simmer:
Pour in your choice of broth and bring it to a boil. Then, lower the heat and let it simmer until the pasta reaches perfection.
Cheesy Finish:
Remove from heat, sprinkle with Parmesan cheese, and season with salt and pepper. It’s like a crescendo of flavors.
Serve & Delight:
Your One-Pot Pasta is ready to be served. And the best part? Only one pot to clean afterward.
Savory Oatmeal Surprise Recipe
Oatmeal isn’t just for sweet breakfasts! This savory oatmeal surprise is a flavorful and satisfying way to start your day or enjoy a hearty meal any time. In this recipe, we’ll guide you through creating this delightful dish that combines the comfort of oatmeal with savory goodness.
Ingredients
To make your savory oatmeal surprise, gather these flavorful ingredients:
For the Savory Oatmeal:
1 cup old-fashioned rolled oats
2 cups water
1/2 teaspoon salt
1/4 teaspoon black pepper
1/4 teaspoon garlic powder
1/4 teaspoon onion powder
1/4 teaspoon dried thyme
1/4 teaspoon dried rosemary
1/4 cup grated Parmesan cheese
2 tablespoons butter
For the Savory Toppings:
Fried or poached eggs
Sautéed spinach or kale
Sliced avocado
Sliced cherry tomatoes
Chopped green onions
Red pepper flakes (for a touch of heat)
Directions
Let’s create a surprising twist with savory oatmeal:
For the Savory Oatmeal:
Cook the Oatmeal:
In a medium saucepan, combine the rolled oats, water, salt, black pepper, garlic powder, onion powder, dried thyme, and dried rosemary.
Bring the mixture to a boil, then reduce the heat to low.
Simmer for about 5-7 minutes, stirring occasionally, until the oatmeal is creamy and thickened.
Add Flavor:
Stir in the grated Parmesan cheese and butter until they’re fully melted and incorporated into the oatmeal.
For Assembling the Dish:
Serve Hot:
Divide the savory oatmeal into serving bowls.
For the Savory Toppings:
Add Your Surprising Toppings:
Top each bowl of oatmeal with a fried or poached egg for that creamy yolk surprise.
Arrange sautéed spinach or kale, sliced avocado, cherry tomatoes, and chopped green onions around the egg.
Finish with a sprinkle of red pepper flakes for a touch of heat.
Serve and Enjoy:
Serve your savory oatmeal surprise immediately, and enjoy the delightful combination of flavors and textures!
Topping Ideas
Get creative with your savory oatmeal by experimenting with various toppings:
Crispy bacon or pancetta bits for added crunch and saltiness
Sautéed mushrooms for earthy flavor
Crumbled feta cheese for creaminess and tang
Fresh herbs like parsley or chives for a burst of freshness
Tips and Tricks
Customize your savory oatmeal with your favorite herbs and spices for a unique flavor profile.
Feel free to swap out the toppings with whatever you have on hand or your personal favorites.
Use steel-cut oats for a heartier texture if you prefer.
Savory oatmeal surprise is a delightful and unexpected twist on a classic breakfast favorite. It’s a satisfying and nutritious meal that will pleasantly surprise your taste buds. So, break away from traditional oatmeal and embark on a savory adventure that’s sure to leave you craving for more!
Disclaimer:
Savory oatmeal surprise may cause an addiction to savory breakfasts!
Oatmeal is often associated with breakfast, but it can make for a delightful savory dish too.
Instructions:
Oats in the Pot:
Start by cooking your rolled oats in chicken or vegetable broth. It’s a savory twist on a classic.
Veggie Medley:
Add sautéed vegetables like mushrooms, spinach, and bell peppers. They add a pop of color and nutrition.
Cheese It Up:
Top it all off with a generous sprinkle of shredded cheddar cheese. It’s like the cherry on top.
Season to Perfection:
Season your Savory Oatmeal with a pinch of salt and a twist of pepper.
Mix & Enjoy:
Give it all a good stir, and you’ve got a Savory Oatmeal Surprise that’s sure to delight your taste buds.
Creating Savory Oatmeal
Basic Oatmeal:
Prepare your oatmeal as you would for breakfast but omit the sugar.
Add-Ins:
Top it with sautéed veggies, a fried or poached egg, and a sprinkle of cheese. Voila! Savory oatmeal.
Unexpected Enjoyment:
I remember my initial skepticism about savory oatmeal. However, the savory flavors won me over, and it became a regular in my college meal rotation.
Microwave Mug Desserts Recipes
Microwave mug desserts are the ultimate solution when you’re craving a sweet treat but don’t want to wait. In this article, we’ll explore three delightful microwave mug dessert recipes: Chocolate Mug Cake, Blueberry Muffin Mug, and Peanut Butter Cookie in a Mug. These recipes are simple, quick, and perfect for satisfying your dessert cravings in a snap.
Chocolate Mug Cake
Ingredients:
4 tablespoons all-purpose flour
4 tablespoons granulated sugar
2 tablespoons unsweetened cocoa powder
1/8 teaspoon baking powder
A pinch of salt
3 tablespoons milk
2 tablespoons vegetable oil
1/4 teaspoon vanilla extract
1 tablespoon chocolate chips (optional)
Directions:
In a microwave-safe mug, whisk together the flour, sugar, cocoa powder, baking powder, and salt.
Add the milk, vegetable oil, and vanilla extract to the dry ingredients. Stir until smooth and well combined.
If desired, sprinkle chocolate chips on top of the batter.
Microwave on high for 1-2 minutes, or until the cake has risen and is set in the middle. Cooking times may vary depending on your microwave’s wattage.
Let it cool for a minute, then enjoy your warm and gooey chocolate mug cake straight from the mug or with a scoop of vanilla ice cream on top.
Craving something sweet but don’t want to splurge on a whole dessert? Microwave mug desserts are your sweet saviors!
Instructions:
Mix the Dry Ingredients:
In a microwave-safe mug, combine the all-purpose flour, granulated sugar, unsweetened cocoa powder, and a pinch of salt.
Add the Wet Ingredients:
Stir in the milk, vegetable oil, and vanilla extract. It’s like a mini cake in the making.
Microwave Magic:
Pop the mug into the microwave and cook on high for about 1 minute and 30 seconds. The cake will rise and firm up.
Cool & Indulge:
Let it cool for a moment. Then, dive right into your warm and gooey Chocolate Mug Cake. It’s a sweet delight in a cup.
Mug Dessert Magic
Ingredients:
You’ll need basic baking ingredients like flour, sugar, and cocoa powder.
Mix and Microwave:
Combine the ingredients in a microwave-safe mug, pop it in, and within minutes, you have a warm, gooey treat.
Late-Night Laughs:
My friends and I used to have midnight mug dessert sessions while watching our favorite shows. It was a delightful way to unwind after a long day of classes.
Introduction:
Mug Dessert Magic is the ultimate solution when you’re craving a delicious dessert but don’t want to spend hours in the kitchen. In just a few minutes, you can enjoy a warm, gooey, and oh-so-satisfying treat. Let’s create some magic in a mug.
Directions:
The Mug Matters:
Find a microwave-safe mug or a small microwave-safe bowl. Make sure it’s large enough to prevent any overflow but small enough for the cake to rise and cook evenly.
The Dry Ingredients:
In your chosen mug, add the all-purpose flour, granulated sugar, unsweetened cocoa powder, and a pinch of salt. Use a small whisk or a fork to mix them well.
The Wet Ingredients:
Now, add the milk, vegetable oil, and vanilla extract to the mug. Stir everything together until it forms a smooth batter.
Chocolate Chip Charm (Optional):
This is where the magic happens. Sprinkle chocolate chips on top of your batter. As it cooks, they’ll melt and create pockets of gooey goodness.
Microwave Marvel:
Place your mug in the microwave and cook on high for about 1 minute and 30 seconds. Keep an eye on it, as microwave cooking times can vary. The cake will rise and firm up as it cooks.
Cool & Enjoy:
Let your Mug Dessert Magic cool for a minute or two. It’s easy to get carried away, but this dessert is hot! You can enjoy it straight from the mug, or for an extra touch of indulgence, add a scoop of vanilla ice cream on top.
Tips:
Customize it:
Get creative with your Mug Dessert Magic by adding a dollop of peanut butter, a swirl of Nutella, or even some chopped nuts for extra texture and flavor.
Ice cream is your friend: The warm cake and cold ice cream create a delightful contrast that takes this dessert to the next level. Don’t skip it if you can!
That’s it! In just a few minutes, you’ve conjured up a delectable Mug Dessert Magic that’s perfect for those moments when your sweet tooth demands satisfaction. Enjoy the warm, chocolaty bliss, and savor each magical bite. ✨
Instructions:
The Perfect Mug:
Start by selecting a microwave-safe mug. Ensure it’s large enough to prevent any overflow while allowing the cake to rise and cook evenly.
Dry Ingredients First:
In your chosen mug, add the all-purpose flour, granulated sugar, unsweetened cocoa powder, and a pinch of salt. Use a fork or a small whisk to blend them together well.
Wet Ingredients Next:
Add the milk, vegetable oil, and vanilla extract to the mug. Stir vigorously until the mixture forms a smooth, luscious batter.
Chocolate Chip Charm (Optional):
This is where the enchantment happens. Sprinkle chocolate chips on top of your batter. As the cake cooks, they’ll melt and create pockets of gooey, chocolaty goodness.
Microwave Magic Time:
Place your mug in the microwave and cook on high for about 1 minute and 30 seconds. Keep a watchful eye on it as microwave cooking times can vary. The cake will rise and firm up during this process.
Cool & Enjoy the Magic:
Give your Mug Dessert Magic a moment to cool down. It’s easy to get carried away, but remember, this dessert is piping hot! You can savor it directly from the mug, or for an extra touch of indulgence, add a generous scoop of vanilla ice cream on top.
Tips to Add More Magic:
Customize the Charm:
Get creative with your Mug Dessert Magic by adding a dollop of peanut butter, a swirl of Nutella, or even some chopped nuts for extra texture and flavor.
Embrace the Ice Cream Spell:
The warm cake and the cool ice cream create a delightful contrast that elevates this dessert to new heights. Don’t skip it if you can!
That’s it! In just a few minutes, you’ve summoned a delightful Mug Dessert Magic that’s perfect for satisfying your sweet tooth’s demands. Revel in the warm, chocolaty bliss, and enjoy each enchanting bite. ✨
Conclusion
University life can indeed be challenging, but it doesn’t mean you have to compromise on good food. With these seven budget-friendly meal ideas, you can savor delicious dishes without emptying your wallet. Whether it’s revamping your ramen, crafting pizza pockets, or hosting burrito bowl fiestas, there’s a world of culinary adventures awaiting you in your dorm kitchen.
So, roll up your sleeves, grab your apron (or not), and embark on a tasty journey through your college years. Remember, good food, laughter, and shared memories are some of the best parts of university life. Enjoy your meals, and may your university days be filled with delectable delights!
World Trade Center Footage | Webex Costs | Virtual Data Rooms | Structures Annuity Settlement | Sell Annuity Payment | Neuson | Online Classes | Nunavut Culture | Online College Course | Motor Replacements | Motor Insurance Quotes | Mortgage Adviser | Met Auto | Tax credit | Help desk software | Home refinancing | Urgent care | Marketing integration | Debt relief | Bitcoin | Fitness center software | Insurance | Gas | Electricity | Weight loss | Sell house for cash | Automotive repair | Loans | Internet marketing | Mortgage | Attorney | SEO specialist | Lawyer | Donate | Conference Call | Treatment | Degree | Software | Credit | Classes | Investing | Recovery | Trading | Rehab | Hosting | Cord Blood | Claim | Automotive warranty | Paintless dent repair | Mesothelioma Law Firm | Massage School Dallas Texas | Low Credit Line Credit Cards | Life Insurance Co Lincoln | Insurance Companies | Injury Lawyers | How to Donate A Car in California | Home Phone Internet Bundle | Holland Michigan College | Royalty-Free Images Stock | Register Free Domains | Psychic for Free | Ph.D. in Counseling Education | Personal Injury Lawyers | Personal Injury Law Firm | PaperPort Promotional Code | Online Stock Trading | Online Motor Insurance Quotes | Donate your Car for Money | Online Colleges | Health Records, Personal Health Record | Hard drive Data Recovery Services | Donate Old Cars to Charity | Forex Trading Platform | Forensics Online Course | Donate Car to Charity California | Donate Car for Tax Credit | Car Insurance Quotes PA | Email Bulk Service | Donating Used Cars to Charity | Donating a Car in Maryland | Donate Your Car Sacramento | Online Criminal Justice Degree | Donate Your Car for Kids | Futuristic Architecture | Donate Cars in MA | Data Recovery Raid | Mesothelioma | A car accident lawyer | Personal injury lawyer | AC repair | Lawsuit settlements | Car insurance | Flood recovery | Water damage restoration | Rehab doctors | Online degree | Online master’s degree | Doctoral programs | Hail car insurance