
7 Authentic German Food Recipes
Germany, a land of culture, history, and stunning landscapes, has more to offer than just picturesque views. German cuisine is a delightful fusion of flavors and traditions, with dishes that can tantalize even the most discerning palate. In this article, we’ll embark on a culinary journey through 7 authentic German food recipes that will transport you straight to the heart of Germany. From Bratwurst to Black Forest Cake, we’ve got it all covered.
Introduction
German food is not just about sausages and beer. It’s a rich tapestry of flavors and traditions that reflect the diversity of the country. In this article, we’ll explore 7 authentic German food recipes that are easy to make at home. So, get ready to savor the flavors of Germany.
Recipe 1: Bratwurst with Sauerkraut and Mustard
A German Classic, Done Right
There’s something about bratwurst with sauerkraut and mustard that always hits the spot. Maybe it’s the warmth and heartiness of the dish, or maybe it’s the way the flavors come together effortlessly. Either way, this meal is as comforting as it gets. It’s the kind of food that feels like a big, warm hug from the inside. Let me walk you through how I make it. And believe me, once you try it, you’ll be hooked.
Why I Love Bratwurst with Sauerkraut and Mustard
I first fell in love with bratwurst a few years ago when I visited a small town in Germany. I wandered into this cozy, family-owned restaurant, and the smell of bratwurst sizzling on the grill was just too much to resist. When my plate arrived bratwurst, sauerkraut, and mustard I was in heaven. The bratwurst was juicy and savory, the sauerkraut was tangy with just the right amount of sourness, and the mustard? It was the perfect amount of heat to cut through the richness of the sausage.
Calculate Recipe Calories
That meal stuck with me. Since then, I’ve made it my mission to recreate it at home. And trust me, it’s so easy to make, and it always gets rave reviews from family and friends. It looks impressive, but it takes next to no time to put together. Plus, it’s one of those dishes that everyone loves, no matter who’s eating it.
The Ingredients You’ll Need
The beauty of bratwurst with sauerkraut and mustard is that it doesn’t require a ton of ingredients, which is one of the reasons I adore it. Here’s what you’ll need:
- Bratwurst sausages: I usually go for 4-6 sausages, depending on how many people I’m feeding. Quality bratwurst makes all the difference, so I go for fresh ones when I can. But if you’re in a pinch, pre-cooked ones will work, too.
- Sauerkraut: About 2 cups. Store-bought is fine, but if you’ve got homemade, even better. I adjust the tanginess to my liking, especially if it’s a bit too sour.
- Mustard: I always go with Dijon mustard or, if I’m feeling adventurous, spicy German mustard. I like my mustard with a bit of heat to balance out the richness of the bratwurst.
- Butter: A tablespoon or two for frying the bratwurst.
- Beer (optional, but I highly recommend it): A splash of lager or wheat beer in the sauerkraut brings out a depth of flavor that really elevates the dish.
- Onions (optional): Sometimes, I’ll toss in thinly sliced onions for a bit of sweetness.
- Salt and pepper: To taste.
How I Make It
Step 1: Cook the Bratwurst
For me, bratwurst is the star of this dish, so I want to get it just right. If I’m grilling, I get that smoky char that really adds something special. But on those days when I’m cooking inside, I pan-fry them in a bit of butter. I heat the skillet over medium-high, toss in a tablespoon of butter, and cook the bratwurst for 4-5 minutes on each side. I turn them frequently to get that beautiful golden brown all over. The goal is a crispy, golden crust and a juicy interior.
Step 2: Prepare the Sauerkraut
While the bratwurst is cooking, I focus on the sauerkraut. If you’re using store-bought sauerkraut (which I often do), I heat it up in a pot with a little splash of beer. I let it simmer for about 10 minutes, stirring occasionally to combine the flavors. Occasionally, I’ll add a pinch of brown sugar or throw in some sliced onions for a bit of sweetness to balance out the sourness. But, I don’t overdo it. Sauerkraut is a supporting player, not the star, so I keep it simple with just a pinch of salt and pepper.
Step 3: Assemble the Dish
Once the bratwurst is perfectly golden and the sauerkraut is cooked down to perfection, it’s time to put everything together. I plate the bratwurst and pile the sauerkraut on top. Then, I go to town with the mustard. A generous drizzle or a fancy spread on the bratwurst it’s up to you. There’s no such thing as too much mustard in my book.
A Few of My Favorite Tips
- Don’t Skip the Beer: If you can, add beer to the sauerkraut. It’s a total game-changer. The beer brings out a richness in the sauerkraut that really elevates the dish.
- Grill the Brats: If you’ve got access to a grill, use it. The smoky flavor that comes from grilling bratwurst is unbeatable compared to pan-frying.
- Customize the Mustard: I’ve tried different mustards over the years sometimes spicy brown, sometimes mild Dijon. The mustard you choose can really change the flavor profile of the dish.
- Serve with a Side: I love pairing this dish with roasted potatoes or a fresh salad. But on days when I’m feeling lazy (which happens more often than I care to admit), I’ll just grab some crusty bread to soak up all the mustard and sauerkraut juices.
Pairing It Right
Now, let’s talk drinks. For me, bratwurst with sauerkraut and mustard pairs perfectly with a cold beer. A crisp lager or a wheat beer complements the sausage and sauerkraut in all the right ways. If you’re not into beer, sparkling apple cider is a great non-alcoholic option. It’s refreshing and just tart enough to balance the richness of the dish.
Why This Dish Always Wins
Every time I make bratwurst with sauerkraut and mustard, I think back to that first meal I had in Germany. It’s such a simple dish, but the combination of flavors makes it feel so special. The savory bratwurst, the tangy sauerkraut, and the spicy mustard work together perfectly. And let’s not forget the crispy, smoky exterior of the bratwurst it’s all the little details that make this meal stand out.
Whether I’m cooking for a crowd or just for myself, this dish never disappoints. It’s hearty, comforting, and undeniably delicious. So, the next time you want something satisfying that’ll transport you straight to Germany (without leaving your kitchen), bratwurst with sauerkraut and mustard is the way to go. Trust me, you won’t regret it.
Recipe 2: Kartoffelsalat (German Potato Salad)
A Family Favorite with Heart
Okay, I have to admit Kartoffelsalat holds a special place in my heart. Growing up, this dish was always there. Whether it was a sunny backyard BBQ or a cozy holiday dinner, this was the one I’d eagerly look forward to. There’s just something about the combination of warm, tender potatoes, crispy bacon, and tangy dressing that feels like home. It’s like a hug on a plate. Seriously, I can never get enough of it. And once you try it, you’ll get why it’s been a family favorite for generations!
So, if you’re thinking of making Kartoffelsalat yourself, get ready for a dish that’s packed with flavor. It’s more than just potatoes it’s all about those little layers that come together perfectly when made with love (and maybe a dash of patience). Let me take you through it.
What You’ll Need
Before we dive into the fun part, let’s talk ingredients. Here’s what you’ll need to make the best Kartoffelsalat:
- 2 lbs (900g) waxy potatoes – I swear by Yukon Golds for this. They’re perfect for keeping their shape.
- 4 slices of thick-cut bacon – We want crispy bacon. Trust me.
- 1 small onion, finely chopped – Yellow or white works wonders.
- 1 cup (240ml) chicken or vegetable broth – This is key for flavor, don’t skip it!
- 2 tablespoons white wine vinegar – For that signature tang.
- 1 tablespoon Dijon mustard – Just a tiny bit adds so much depth.
- 1 teaspoon sugar – It balances out the vinegar’s acidity.
- Salt and freshly ground black pepper – For seasoning, of course.
- 1/4 cup (60ml) fresh parsley, chopped – It’s the pop of green that makes it shine.
- Optional: 1/4 cup sour cream or mayo – I add this sometimes if I’m in the mood for a creamier texture.
Let’s Get Cooking!
Alright, now we’re ready. Let me walk you through this step by step. You’ll be enjoying your Kartoffelsalat in no time!
Step 1: Cook the Potatoes
Start by scrubbing the potatoes. Don’t peel them the skin gives the salad a great texture. I usually go for Yukon Golds, since they’re perfect for this dish.
Put the potatoes in a large pot, cover them with cold water, and bring them to a boil. Once boiling, lower the heat and let them simmer for about 15-20 minutes, or until they’re tender but not falling apart. You want them just soft enough to slice without them turning mushy.
Once done, drain the water and let the potatoes cool for a few minutes. I leave them on the counter to cool while I prep everything else.
Step 2: Fry the Bacon
Now, let’s talk bacon because, let’s be real, who doesn’t love crispy bacon? Chop your bacon into small pieces and toss them into a pan over medium heat. Cook until they’re nice and crispy. The sizzle? It’s music to my ears. Once crispy, take them out and place them on a paper towel to soak up the grease. This bacon will give the salad that irresistible salty crunch.
Don’t toss that bacon fat, though! You’re going to use it to make the dressing.
Step 3: Make the Dressing
With the bacon done, it’s time for the dressing. In the same pan with the bacon fat, toss in the finely chopped onion. Let it cook for about 3-5 minutes until soft and translucent. The smell? Oh, it’s heavenly.
Then, pour in the broth, vinegar, mustard, and sugar. Stir it all together and let it simmer for about 5 minutes. This lets the flavors meld and reduces slightly, creating a perfect balance between tangy and savory. I usually give it a taste to see if it needs more salt, pepper, or maybe a little extra vinegar.
Step 4: Slice the Potatoes
By now, your potatoes should be cool enough to handle. Slice them into about 1/4-inch thick slices. The goal here is to keep them firm soft enough to absorb the dressing, but not so soft that they fall apart. I usually slice them right over the bowl where I’ll mix everything.
Step 5: Toss It All Together
Now comes the fun part! Pour the hot dressing over the sliced potatoes. The warmth of the dressing will help the potatoes soak up all that delicious flavor. Gently toss it all together be careful not to break up the potatoes too much.
Once everything’s coated, toss in the crispy bacon bits. Give it one last gentle mix. I like to add fresh parsley at this stage to brighten things up.
If you’re craving a creamier version, this is where you can add some sour cream or mayo, but that’s entirely up to you.
Step 6: Taste and Adjust
Now’s the time to taste and make sure everything’s perfect. I usually check to see if it needs more salt, pepper, or even a little more vinegar. You can adjust the sugar if it’s too tangy. A quick little tweak, and you’re good to go!
Serving and Storing Kartoffelsalat
Once your Kartoffelsalat is ready, it’s time to serve it. I love it warm, but it’s just as good at room temperature. If you’re planning to make it ahead, don’t worry it’ll still taste amazing. Leftovers (if you’re lucky enough to have any) can be stored in the fridge for up to two days. But honestly, it’s usually gone way before that!
Why This Kartoffelsalat is Special to Me
For me, Kartoffelsalat isn’t just a recipe; it’s a piece of my childhood. I can still picture my grandmother making it, adding a little of this and a pinch of that. It was her dish, and now it’s mine. Every bite brings back memories of family dinners, laughter, and love around the table.
There’s something magical about how the warm potatoes soak up that tangy dressing, paired with the crispy bacon. It’s comfort food at its finest, and honestly, it pairs perfectly with just about anything. Whether it’s grilled sausages, roast chicken, or a simple veggie dish, this potato salad is always the star.
So, the next time you’re hosting a family gathering or just want something comforting, give this Kartoffelsalat a try. It’s simple, satisfying, and will make you feel like you’re sharing a piece of German tradition with everyone around your table.
Guten Appetit!
Recipe 3: Sauerbraten (Pot Roast with Sweet and Sour Gravy)
A German Comfort Dish That Hits Home
If you’ve ever craved a warm, hearty meal that hugs you from the inside, Sauerbraten is the dish you need. This German pot roast isn’t just your average roast it’s slow-braised beef that’s marinated for days in a tangy mix of vinegar, spices, and vegetables, then simmered in a rich, sweet-and-sour gravy. When I first heard about Sauerbraten, I was a little overwhelmed by the idea of marinating beef for days, but let me tell you once it’s done, every minute of waiting is worth it. The first bite of tender, juicy beef swimming in that deep, flavorful gravy is an experience unlike any other.
What Makes Sauerbraten Special
When I first came across Sauerbraten, I was curious, especially because “Sauer” means “sour” in German, hinting at the tangy vinegar that’s such a key part of the dish. But what really draws me to Sauerbraten is the balance of flavors. The sourness of the vinegar plays off the sweetness of sugar and raisins, and the beef soaks up all that goodness during the marination. It’s this perfect marriage of sour, sweet, and savory that makes this dish stand out. If you’ve ever wanted something that warms you to your core on a chilly evening, this is it.
Now, let’s get into the fun part: making this beauty of a meal. Fair warning it’s not a quick fix, but once you taste it, you’ll know that the wait was totally worth it.
Ingredients You’ll Need
To make a truly great Sauerbraten, you’ll need a bit of patience and the right ingredients. But don’t let the list intimidate you; it’s mostly basics that come together to create something truly magical.
For the Marinade:
- 3 cups red wine vinegar (I love the punch it brings, but white vinegar works if you want something milder)
- 1 cup water
- 1 onion, sliced
- 2 cloves garlic, smashed
- 2 carrots, cut into chunks
- 2 celery stalks, cut into chunks
- 1 tablespoon salt
- 1 tablespoon sugar (this helps balance the sourness)
- 2 teaspoons whole black peppercorns
- 2 teaspoons mustard seeds
- 4-5 whole cloves
- 3-4 bay leaves
- 1-2 teaspoons dried thyme
For the Pot Roast:
- 3-4 pounds beef roast (Chuck roast works beautifully here because it holds up to the long cooking time)
- 2 tablespoons vegetable oil (for browning)
- 1 large onion, chopped
- 1/2 cup beef broth (I keep this around for a little extra moisture)
- 2 tablespoons tomato paste
- 1 tablespoon sugar (for the gravy)
- 1/2 cup raisins or currants (optional, but I swear by these for a sweet bite)
Step 1: Preparing the Marinade (Patience is Key)
This is where the patience comes in. The beef needs to marinate for at least 3-4 days, which sounds like a lot of time, but it’s essential for tenderizing and infusing the flavors.
- Combine the marinade ingredients: In a large bowl or resealable bag, I combine the vinegar, water, onion, garlic, carrots, celery, salt, sugar, and spices (peppercorns, mustard seeds, cloves, bay leaves, and thyme). I make sure the liquid is enough to fully cover the beef, so I usually check the proportions to be sure.
- Add the beef: Once the marinade is mixed, I add the beef and make sure it’s fully submerged. I cover the bowl tightly or seal the bag, and then pop it in the fridge. Every day, I give the bag a little turn to make sure the beef marinates evenly.
Step 2: Cooking the Sauerbraten
Now that the beef has marinated, it’s time to bring it to life. Don’t rush this part the slow cooking is what makes this dish unforgettable.
- Brown the meat: I remove the beef from the marinade (but don’t toss the marinade hold onto it for later!). In a large pot, I heat the vegetable oil over medium-high heat. Once the oil’s hot, I sear the beef on all sides until it’s browned. This step adds an extra layer of flavor that really makes the dish sing.
- Sauté the onions: After the beef is browned, I remove it and set it aside. In the same pot, I toss in the chopped onion and cook them for about 5 minutes until they’re soft and golden. The smell at this point? Pure heaven.
- Add the liquids: Next, I pour in the beef broth and the reserved marinade, scraping up the little browned bits from the pot (that’s all flavor). Then, I stir in the tomato paste and sugar, which help give the gravy that perfect balance of sweet and sour.
- Braise the beef: I return the beef to the pot, making sure it’s mostly covered in liquid. I bring everything to a simmer, then reduce the heat, cover the pot, and let it cook slowly for 2.5-3 hours. I check it occasionally to make sure there’s enough liquid, and it’s done when the meat is fork-tender and practically falling apart.
Step 3: Making the Gravy
This is where the magic happens. The gravy is the soul of this dish, and a little bit of attention here goes a long way.
- Remove the beef: Once the meat is perfectly tender, I take it out of the pot and set it aside to rest for a few minutes.
- Strain the gravy: I strain the cooking liquid through a fine mesh sieve into a saucepan. This gets rid of the vegetables and spices, leaving behind a smooth, flavorful gravy.
- Thicken the gravy: To thicken the gravy, I make a simple slurry by mixing a bit of flour with water, then stir that into the strained gravy. I let it simmer for a few minutes until it thickens up. The goal is to have a gravy that’s rich but not too thick just enough to coat the beef.
- Taste and adjust: This is the fun part! I taste the gravy and tweak it as needed. If it’s too sour, I add a little more sugar or raisins. If it’s too sweet, a splash more vinegar does the trick. The perfect gravy is all about balance.
Step 4: Serving the Sauerbraten
Finally, after all that work, it’s time to enjoy. I slice the beef thinly against the grain, then pour the thick, sweet-and-sour gravy over the top. Traditional sides include red cabbage and boiled potatoes, but I’ve also served it with mashed potatoes or buttered noodles whatever sounds good to you.
Final Thoughts
I won’t sugarcoat it making Sauerbraten takes time and effort. But the moment you take that first bite, with the melt-in-your-mouth beef and the rich gravy, you’ll understand why it’s such a beloved dish. It’s the kind of meal that feels like home, no matter where you’re from. Trust me, every step is worth it, and when you’re sitting down to that first plate, you’ll know it was all worth it.
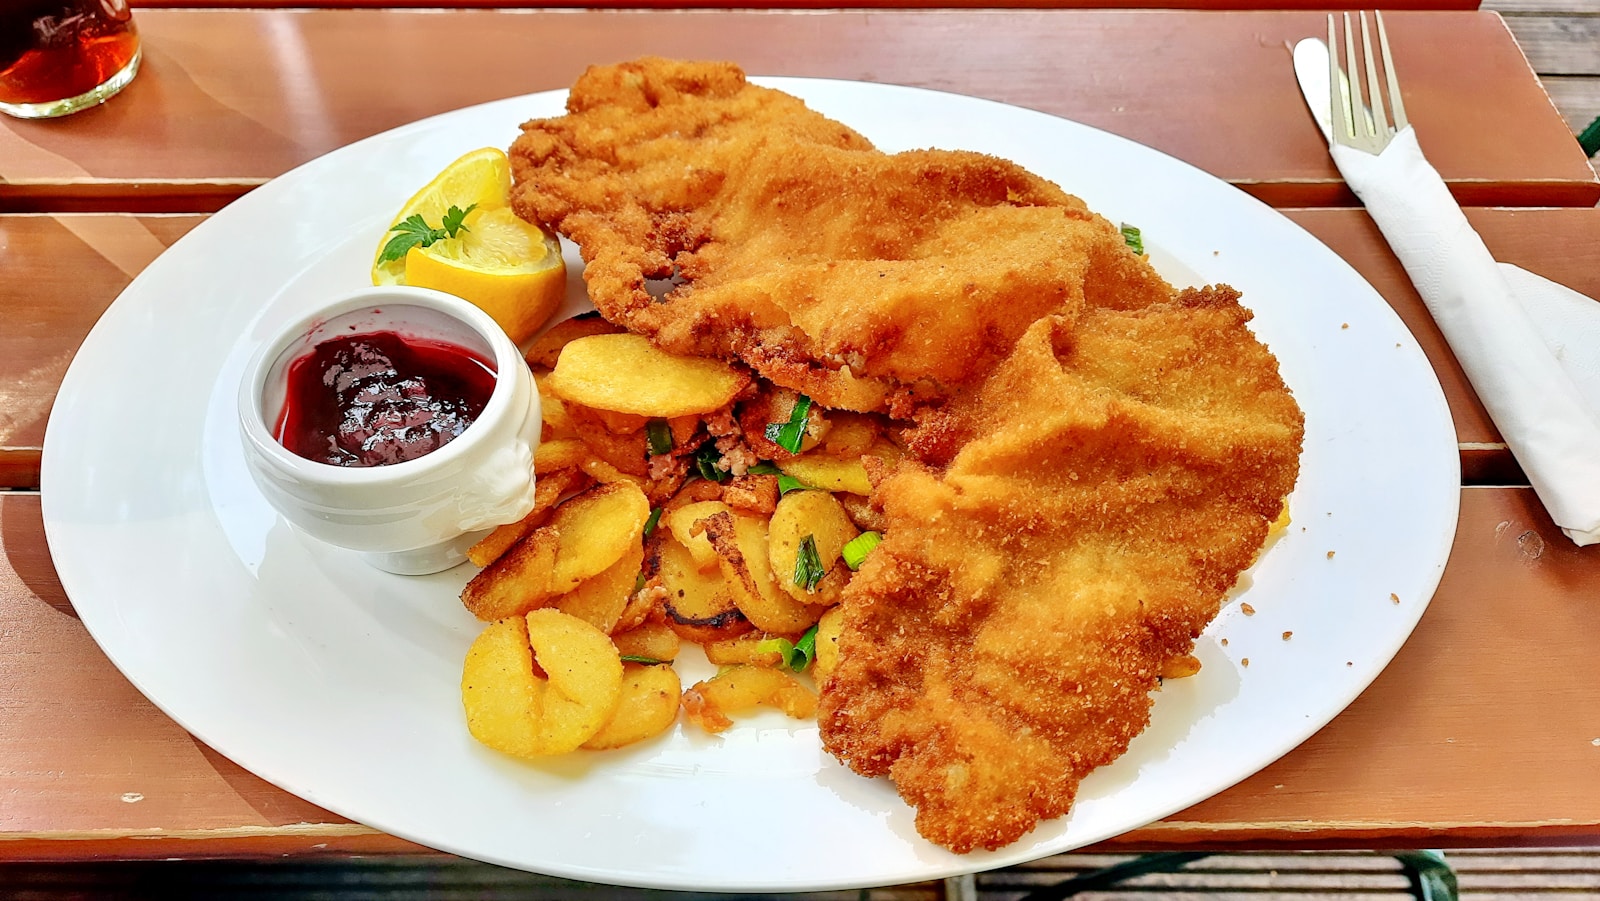
Recipe 4: Schnitzel with Jäger Sauce
The Heart of the Dish: Schnitzel
Alright, let’s dive into the magic of schnitzel. Picture this: a thin, tender piece of meat be it pork, veal, or chicken perfectly breaded and fried until it’s golden, crispy, and irresistibly delicious. You get that satisfying crunch on the outside, while the inside stays juicy and tender. Simple, yet oh-so-satisfying.
For me, the key to a perfect schnitzel is making sure the meat is thin enough to cook through quickly while still retaining its juiciness. I tend to use pork chops, but veal or chicken works just as well. The coating? Just flour, eggs, and breadcrumbs. But, it’s the frying process that turns it into something special trust me, it’s all in the technique.
What You’ll Need to Make Schnitzel
Before we get into the decadent Jäger sauce, let’s cover the basics of schnitzel. Here’s what you’ll need:
- 4 boneless pork chops (or veal/chicken breasts): The thinner, the better. Aim for about 1/4-inch thickness. This ensures you get that crispy golden crunch without drying out the meat.
- Salt and pepper: Simple seasonings, but don’t skip them. A little goes a long way.
- 1 cup all-purpose flour: For dredging the meat before dipping it in the egg wash.
- 2 large eggs: For the egg wash that helps those breadcrumbs stick.
- 1 cup breadcrumbs: Panko or fresh breadcrumbs work best panko adds a perfect extra crunch.
- Vegetable oil: For frying. You’ll need enough oil to get that golden color and crispy texture.
- Lemon wedges: A squeeze of fresh lemon on the schnitzel before serving adds that zingy freshness.
Jäger Sauce: The Real Star
Now, here’s where the magic happens the Jäger Sauce. This rich, creamy sauce is packed with earthy mushroom flavors and a touch of umami that brings everything together. Seriously, this sauce is so good, it might just make you want to lick the plate clean.
Here’s what you’ll need to whip up the sauce:
- 1 tablespoon butter: For sautéing the onions and mushrooms. Butter makes everything better.
- 1 small onion: Finely chopped. It adds a hint of sweetness to the sauce.
- 2 cups fresh mushrooms (button or cremini): Mushrooms are the star of this sauce, so go for whatever you prefer. Cremini offers a deeper, earthier flavor, but button mushrooms work just fine.
- 1/2 cup dry red wine: Choose a dry red nothing too sweet. The wine helps balance the richness of the sauce.
- 1/2 cup beef or chicken broth: This adds depth and richness to the sauce.
- 1/2 cup heavy cream: For that smooth, velvety texture.
- 1 teaspoon Dijon mustard: A little tang goes a long way in balancing the richness.
- Salt and pepper: To taste.
- Fresh parsley: For that pop of color and freshness when you serve.
How to Make Schnitzel with Jäger Sauce
I’ll walk you through this step-by-step. It might seem like a lot, but trust me, once you taste that first bite, you’ll agree it’s totally worth it.
Step 1: Prepare the Schnitzel
- Pound the Meat: Take your meat mallet (or a heavy pan, if you don’t have one) and gently pound the pork, veal, or chicken to about 1/4-inch thickness. This step is key the thinner the meat, the crispier the schnitzel.
- Season the Meat: Season both sides of the meat with salt and pepper. Don’t be shy here; you want that seasoning to shine through.
- Set Up Your Dredging Station: Get three shallow dishes ready for the dredging process:
- One for flour.
- One for beaten eggs.
- One for breadcrumbs.
First, coat each piece of meat in flour, then dip it into the egg wash, and finally coat it in breadcrumbs. Press down a little to make sure the breadcrumbs stick. Repeat for each piece.
- Fry the Schnitzels: Heat about 1/4-inch of vegetable oil in a large pan over medium-high heat. The oil should be hot enough that when you drop a small breadcrumb in, it sizzles immediately. Fry the schnitzels for 3-4 minutes per side, until they’re golden and crispy. Once done, transfer them to a paper towel-lined plate to drain any excess oil.
Step 2: Make the Jäger Sauce
While the schnitzels are frying, let’s get to work on the sauce. Bonus: you can use the same pan for this no need to dirty another dish!
- Sauté the Onions and Mushrooms: In the same pan, melt the butter over medium heat. Add the chopped onion and cook it for about 3 minutes until it softens. Then toss in the sliced mushrooms and cook until they’re golden brown and have released their juices, about 5 minutes. Don’t rush this step; it’s where all the flavor develops.
- Deglaze the Pan: Once the mushrooms are nice and brown, pour in the dry red wine. Use a wooden spoon to scrape up all the delicious brown bits stuck to the bottom of the pan. That’s where the real flavor is hiding.
- Add the Broth and Cream: Stir in the broth and heavy cream. Let the sauce simmer for about 5 minutes until it thickens slightly. Taste it, and if it needs more seasoning, add salt and pepper to taste.
- Finish the Sauce: Stir in the Dijon mustard, then taste again. If the sauce is too thick, add a little more broth or cream. If it’s too thin, let it simmer a bit longer to thicken up.
Step 3: Plate and Serve
Now for the fun part: plating! Place your schnitzels on a plate, then spoon that rich, creamy Jäger sauce over the top. I like to finish it off with a sprinkle of fresh parsley for a burst of color and freshness. Serve with a wedge of lemon on the side for that perfect zesty kick.
What to Serve with Schnitzel
Schnitzel with Jäger Sauce is rich and filling, so I like to keep the sides simple. Here are a few ideas:
- Mashed Potatoes: Creamy mashed potatoes are perfect for soaking up that delicious sauce.
- Boiled Potatoes: If you’re looking for something a little lighter, boiled potatoes are a great option.
- Sauerkraut or Pickled Vegetables: The tang of sauerkraut cuts through the richness of the schnitzel.
- A Green Salad: A fresh salad with a tangy vinaigrette helps balance out the meal.
Why This Dish Works
There’s something magical about the crispy schnitzel paired with the rich, creamy Jäger sauce. It’s comfort food at its finest. The schnitzel gives you that satisfying crunch, while the sauce adds depth and smoothness. Every bite is a little piece of heaven trust me, you’ll want to go back for seconds.
Recipe 5: Pretzels: A Taste of Tradition
Pretzels have always had a special place in my heart. But not the kind you grab out of a bag at the store, oh no. I’m talking about the real deal those homemade, golden, warm beauties straight from the oven. The ones with that perfect crunch on the outside and the soft, chewy interior. The first time I made them at home, I was hooked. There’s something magical about it. It’s not just baking it’s connecting with something that’s been part of our history for centuries.
For me, pretzels aren’t just a snack. They’re a slice of culture, a piece of tradition. But before I go on, let me take a step back and share why these twists of dough mean so much to me. It’s not just about eating them it’s about the process, the ritual, and the joy of pulling a fresh batch out of the oven. So, here’s why I think pretzels are such a timeless treat.
The Story Behind Pretzels
The history of pretzels is one of those fascinating stories that’s been passed down for generations. It’s full of twists no pun intended. The most popular legend goes like this: in the 7th century, Christian monks in Europe started baking these simple, twisted breads. They believed the shape symbolized arms crossed in prayer. Isn’t that beautiful? A humble snack representing something so meaningful.
But it doesn’t stop there. The word “pretzel” actually comes from the Latin bracella, meaning “little arms.” Imagine this: monks giving these pretzels to children who had memorized their prayers. You can almost picture the pride in a child’s eyes, holding that twisted little reward. Over time, pretzels became part of religious traditions and festivals, eventually spreading across Europe. By the time German immigrants came to America in the 18th century, pretzels were already a beloved snack.
Every time I twist dough into that familiar shape, I can’t help but feel connected to that long history.
Why I Love Making Pretzels
There’s something deeply satisfying about making pretzels at home. It’s a process that demands time, patience, and a bit of love with each step. The beauty of homemade pretzels is in their simplicity. They’re easy, but when done right, they’re incredible. Getting that golden-brown crust with the perfect chewy inside? There’s no greater feeling in the kitchen.
The first time I made pretzels, I thought it would be complicated, but honestly, it wasn’t. It’s all about patience letting the dough rise, allowing it to develop that soft, elastic texture. And that moment when you dip the pretzels into the baking soda bath? It feels a little quirky, but it’s what gives them that signature look and texture. It’s like a secret ingredient that unlocks the magic.
The Ingredients: Simple Yet Essential
Making pretzels at home is all about simplicity. You don’t need fancy ingredients just basic pantry staples. But each one plays a key role in creating the perfect balance of flavor and texture. Here’s what you’ll need:
For the Dough:
- 2 ½ cups of all-purpose flour
- 1 packet of active dry yeast (2 ¼ teaspoons)
- 1 teaspoon of sugar
- 1 teaspoon of salt
- 1 cup of warm water (around 110°F)
For the Baking Soda Bath:
- 10 cups of water
- 2/3 cup of baking soda
For the Topping:
- Coarse sea salt (for that finishing touch)
I’ll be honest the baking soda bath is always a weird step at first. But trust me, it makes all the difference. It’s what gives the pretzels their deep golden color and that perfect crispiness on the outside, while keeping the inside soft and chewy.
Step-by-Step: How I Make Pretzels
If you’ve never made pretzels before, don’t worry. It might seem intimidating, but I promise, it’s not as hard as it sounds. I’ll guide you through it so you can make this delicious snack from scratch.
- Activate the Yeast
First, dissolve the sugar in warm water (about 110°F). Sprinkle the yeast over the water and let it sit for 5 minutes. It should get nice and bubbly. If it doesn’t, your yeast might be too old so check the expiration date. - Mix the Dough
In a large bowl, combine the flour and salt. Pour in the yeast mixture and stir it all together until it forms a dough. It’ll be a bit sticky at first that’s okay. Turn it out onto a floured surface and start kneading. Knead for about 8 minutes until the dough is smooth and elastic. Honestly, it’s kind of therapeutic. If the dough is too sticky, just add a little more flour, but don’t go overboard. - Let it Rise
Place the dough in a bowl, cover it with a damp towel, and let it rise in a warm spot for about an hour. It should double in size. This is the perfect time to grab a coffee or just chill for a bit. - Shape the Pretzels
Once the dough has risen, punch it down (it’s oddly satisfying). Divide the dough into 8 equal pieces. Roll each piece into a rope about 18 inches long and twist it into the classic pretzel shape. Don’t stress if it’s not perfect the rustic, homemade look is what makes them special. - Boil the Pretzels
Bring a large pot of water to a boil and stir in the baking soda. It’ll bubble up, which is totally normal. One by one, drop the pretzels into the water and let them sit for about 30 seconds. This is where the magic happens the crust starts to form. - Bake the Pretzels
Preheat your oven to 425°F. Place the pretzels on a parchment-lined baking sheet, sprinkle them with coarse sea salt, and bake for about 12-15 minutes. Keep an eye on them they’re done when they turn a deep golden brown.
The Joy of Eating Homemade Pretzels
When those pretzels come out of the oven, it’s a moment of pure anticipation. The smell? Incredible. It’s warm, salty, and oh-so-nostalgic. I like to dip mine in mustard (classic), but sometimes I’ll go for cheese or just enjoy them plain. Either way, they’re delicious. The outside is perfectly crisp, and the inside is soft and chewy. It’s the perfect balance.
Pretzels have this magical way of bringing people together. I’ve had friends over to bake with me, and we’ve spent hours laughing, twisting dough, and munching on fresh pretzels straight from the oven. There’s something timeless about the whole process. Each twist of dough feels like a small tribute to the generations before us who baked the same way, with the same love and care.
A Final Thought
Making pretzels is more than just following a recipe. It’s about connecting with something bigger than yourself. It’s about tradition, patience, and savoring the small moments. So, the next time you’re in the kitchen, give pretzels a try. It’s an experience you won’t forget, and I promise, you’ll never look at a store-bought pretzel the same way again.
Recipe 6: Schwarzwälder Kirschtorte (Black Forest Cake)
A Sweet Journey into Tradition
If there’s one dessert that’s truly won my heart, it’s Schwarzwälder Kirschtorte, or as it’s better known around the world, Black Forest Cake. Every time I think about it, I can’t help but feel a sense of joy and excitement. The layers of rich chocolate sponge, plump cherries soaked in kirsch, and the fluffy whipped cream that ties it all together make it the perfect cake for any celebration. The combination of textures and flavors is pure magic, and let me tell you, making it from scratch was just as rewarding as that very first bite.
The First Time I Tried Schwarzwälder Kirschtorte
To be honest, I wasn’t always someone who appreciated elaborate desserts. I was perfectly content with simple cookies or cakes that didn’t require much fuss. But then, during a trip to Germany, I wandered into a small bakery and came face to face with Black Forest Cake. After my first bite, I was hooked. The chocolate was rich yet light, the cherries were a perfect balance of tart and sweet, and the whipped cream? It was pure heaven. I couldn’t get enough.
From that moment, I knew I had to try making it at home. The recipe might seem a bit complex at first glance, but trust me, it’s totally doable with a little patience and love. So, if you’re ready to bring the taste of the Black Forest into your kitchen, follow along as I share my experience making this iconic cake.
The Ingredients: What You’ll Need
Before diving into the baking, let me just say the ingredient list is part of the fun! Some of these might be pantry staples, but others might need a trip to the store (hello, kirsch). Don’t worry though, I’ve got your back, and I’ll guide you through the process.
For the Chocolate Sponge Cake:
- 6 large eggs (make sure they’re room temperature this makes a big difference!)
- 1 cup sugar
- 1 teaspoon vanilla extract
- 1 cup all-purpose flour
- 1/3 cup unsweetened cocoa powder
- 1 teaspoon baking powder
- 1/4 teaspoon salt
- 1/4 cup unsalted butter, melted
- 1/4 cup milk
For the Cherry Filling:
- 2 cups fresh or jarred cherries (I personally go for fresh because the flavor is unbeatable)
- 1/4 cup sugar
- 1/4 cup kirsch (don’t stress about the booze; most of it cooks off but leaves a lovely kick)
- 1 tablespoon cornstarch (to thicken things up)
For the Whipped Cream:
- 2 cups heavy whipping cream
- 1 tablespoon powdered sugar
- 1 teaspoon vanilla extract
For Garnishing:
- Chocolate shavings (dark chocolate, because why not go big or go home?)
- Fresh cherries (because there can never be too many cherries on a Black Forest Cake)
Step 1: Baking the Chocolate Sponge Cake
The chocolate sponge is the heart and soul of this cake. I won’t lie getting it just right took a couple of tries, but once I nailed it, I knew I had a winner. Here’s how I do it:
- Preheat your oven to 350°F (175°C). Grease and line the bottom of a 9-inch round cake pan. I swear by parchment paper it makes removing the cake so much easier.
- Beat the eggs and sugar together until they’re fluffy and pale. This takes a good 5 minutes of whisking, so get your arms moving! Then, add the vanilla extract and mix it in.
- Sift the dry ingredients (flour, cocoa powder, baking powder, and salt) into a bowl. This helps everything blend evenly and gives the cake a soft, smooth texture.
- Fold the dry ingredients into the egg mixture gently, being careful not to deflate the air you’ve worked so hard to create. Once that’s done, add in the melted butter and milk, stirring until it’s smooth.
- Pour the batter into your prepared cake pan and bake for 25-30 minutes. You’ll know it’s ready when a toothpick inserted into the center comes out clean. Let the cake cool in the pan for about 10 minutes before transferring it to a wire rack to cool completely.
Step 2: Cherry Filling
The cherry filling is what really gives this cake its character. The first time I made this, I couldn’t stop snacking on the cherries as they cooked. It’s that good.
- Pit the cherries (if you’re using fresh) and place them in a saucepan with the sugar. If you’re using jarred cherries, just drain them and save the syrup for later.
- Stir the cherries and sugar over medium heat until the sugar dissolves, and the cherries start to release their juices. It smells incredible, so make sure you don’t skip this step.
- Add the kirsch and let it simmer for 5 minutes. The alcohol will cook off, but the flavor will remain. If you want a thicker consistency, mix the cornstarch with a bit of water and stir it into the mixture. Let it simmer for another 2 minutes to thicken.
- Set the cherries aside to cool. I like to let them cool to room temperature while I prepare the whipped cream.
Step 3: Whipping the Cream
Ah, the whipped cream. This is where you want it to be just perfect fluffy, soft, and silky. A little tip: you want to chill your bowl and beaters before you start. Trust me, it helps!
- Chill your bowl and beaters in the fridge for 15-20 minutes before whipping. It helps the cream whip up faster and hold its shape longer.
- Whip the heavy cream until soft peaks form. Once you’ve reached that point, add in the powdered sugar and vanilla extract. Continue whipping until you get stiff peaks. Don’t overdo it, though if the cream starts to look like butter, you’ve gone too far!
Step 4: Assembling the Cake
Now, this is the fun part! The layers come together, and you can see all your hard work pay off.
- Slice the cooled cake into three even layers. I use a serrated knife for this, but I’ve heard some people use dental floss. Weird, but it works!
- Place the first layer of cake on your serving platter. Drizzle it generously with the cherry syrup. Don’t hold back you want that flavor to soak in!
- Spread a layer of whipped cream on top of the cake, then add half of the cherry filling.
- Place the second layer of cake on top and repeat: soak with cherry syrup, add whipped cream, and top with cherries. Once you’ve added the final layer of cake, soak it, then cover the whole cake with the remaining whipped cream.
- Decorate the cake with chocolate shavings and fresh cherries on top. If you’re feeling fancy, you can use a piping bag to add a little extra flair.
Step 5: Let It Chill
I know, the waiting is the hardest part, but trust me it’s worth it. Let the cake chill in the fridge for at least 3-4 hours (overnight if you can wait that long). This helps all the flavors meld together and lets the whipped cream firm up.
Step 6: Time to Serve
When it’s time to cut into this beauty, it’s like magic. The layers of chocolate, cherries, and cream come together in the perfect bite. The kirsch adds a little something special, and every layer complements the other so perfectly.
The Final Verdict
Making Schwarzwälder Kirschtorte was definitely an adventure, but the end result was so worth it. Every bite takes me straight to the Black Forest. Whether you’re making it for a celebration or just to treat yourself, this cake is bound to impress. And once you’ve made it yourself, you’ll feel like a true cake artist. Trust me, if I can do it, so can you. Enjoy the process, and, of course, the cake!
Recipe 7: Königsberger Klopse (Meatballs in Creamy Caper Sauce)
If you’ve ever found yourself craving something hearty, comforting, and just a little different, I’ve got the perfect dish for you: Königsberger Klopse. This classic German recipe is one of those meals that instantly wraps you in warmth, with tender meatballs floating in a velvety, creamy caper sauce. Trust me, once you taste it, you’ll understand why it’s loved not only in Germany but all around the world. And don’t worry, even though it might seem a bit fancy at first, it’s really straightforward and full of flavor just the way I love it.
Cooking, to me, is all about those little moments the balance of flavors, the texture that just feels right, and that sense of accomplishment when a dish turns out perfect. With Königsberger Klopse, it’s all about those juicy, tender meatballs resting in a creamy sauce with a salty, briny pop from the capers. It’s comfort food with a little extra flair. So, let’s get started, step by step.
A Little History Behind Königsberger Klopse
Before we dive into the cooking, let me tell you a bit about the history of this dish. Königsberger Klopse hails from Königsberg (now Kaliningrad, Russia), a city that was once part of Germany. It’s a traditional East Prussian recipe, and while there are variations, the core elements meatballs, capers, and a creamy sauce remain unchanged. I love the rich history behind this dish, how it’s been passed down through generations, and how it has adapted over time. It’s a piece of history on your plate, and that makes it even more special.
Ingredients You’ll Need
Let’s talk ingredients. The best part? You probably already have most of them sitting in your kitchen. The flavor combination here is pure magic, and the list of ingredients is simpler than you might think. Here’s what you’ll need:
For the Meatballs:
- 500g (about 1 lb) ground beef (or a mix of beef and pork for extra richness)
- 1 small onion, finely chopped
- 1 egg
- 2 tablespoons breadcrumbs
- 2 tablespoons milk
- 1 teaspoon salt
- 1/2 teaspoon pepper
- 1/2 teaspoon ground allspice (this is a must for that unique flavor)
- 1/2 teaspoon mustard (I like to add this for a little extra kick, but you can skip it if you prefer)
- 1 tablespoon butter or oil (for frying)
For the Sauce:
- 1 tablespoon butter
- 1 medium onion, finely chopped
- 2 tablespoons flour (this helps thicken your sauce)
- 1 cup beef or vegetable broth
- 1 cup heavy cream (rich and indulgent don’t skimp!)
- 2 tablespoons capers, chopped (the star of the dish)
- 1 tablespoon lemon juice (to balance the richness)
- Salt and pepper to taste
- Fresh parsley, chopped (for garnish)
Step 1: Making the Meatballs
Let’s start with the meatballs. Don’t be intimidated by the word “meatball.” This part is super simple, and I promise, the smell as these cook will have your mouth watering.
- Mix the Ingredients: In a large bowl, combine the ground beef, chopped onion, egg, breadcrumbs, milk, salt, pepper, allspice, and mustard. I always use my hands for this step it’s just more satisfying, you know? Mix everything well, but don’t overdo it. Overworking the meat will give you tough meatballs, and nobody wants that.
- Shape the Meatballs: Once the mixture is ready, grab about a tablespoon of the meat and roll it into a meatball. I tend to make mine on the smaller side, about the size of a golf ball, but feel free to go bigger if you like.
- Brown the Meatballs: Heat some butter or oil in a large frying pan over medium-high heat. Add the meatballs in batches (don’t overcrowd the pan!) and brown them on all sides. You’re not cooking them through yet just getting a nice sear. Once they’re browned, set them aside for later.
Step 2: Making the Sauce
Now, let’s get to the fun part the sauce. Honestly, this is what makes the dish stand out. It’s creamy, comforting, and then the capers? They bring a salty, briny bite that takes the flavor to a whole new level.
- Sauté the Onions: In the same pan you used for the meatballs (don’t wash it, you want all that flavor!), melt the butter over medium heat. Toss in the chopped onions and sauté them for about 3-4 minutes, until they’re soft and translucent. The sweet onions are going to pair so well with the tangy capers later.
- Make the Roux: Sprinkle the flour over the onions and cook for about 1-2 minutes, stirring constantly. This will help thicken the sauce. Be sure to cook the flour long enough so it doesn’t taste raw, but don’t let it brown.
- Add the Broth and Cream: Slowly pour in the broth, stirring as you go to avoid lumps. Then, add in the heavy cream. Bring everything to a simmer and cook for about 5-7 minutes, until the sauce thickens up. The cream gives it a velvety, rich texture that’s just irresistible.
- Stir in the Capers and Lemon Juice: Here’s where the magic happens. Stir in the capers and lemon juice. The capers bring that sharp, salty flavor that balances the richness of the cream, while the lemon juice adds a fresh zing. Taste the sauce and adjust the seasoning with salt and pepper if needed.
- Add the Meatballs: Gently place the browned meatballs back into the sauce. Let them simmer in the sauce for about 20-25 minutes, until they’re cooked all the way through. The meatballs should feel firm to the touch, and there should be no pink inside.
Step 3: Serving
Königsberger Klopse is best served with something to soak up that creamy sauce. I usually go for boiled potatoes, but rice works just as well. The meatballs are packed with flavor, but that sauce? It’s the real showstopper. Spoon a generous amount of sauce over the meatballs, sprinkle some fresh parsley on top for a pop of color, and dig in.
Tips for Perfection
- Don’t Overwork the Meatballs: Be gentle when mixing and shaping the meatballs. This keeps them nice and tender.
- Capers Are Key: The capers give the dish its signature flavor, so don’t skimp on them! If you’re not a fan, you can reduce the amount or even leave them out, but it won’t be quite the same.
- Make-Ahead Option: You can prepare the meatballs and sauce ahead of time and simply simmer everything together when you’re ready to serve.
Final Thoughts
Königsberger Klopse has become one of my absolute favorite comfort meals. It’s satisfying without being too heavy, and that creamy caper sauce? I can never get enough. The beauty of this dish is that it’s rich in flavor but surprisingly simple to make. It’s perfect when you want something a little different but still familiar. Whether I’m cooking for family or hosting friends, Königsberger Klopse never disappoints. It’s a meal that’s both comforting and special, and it always brings a little bit of history to the table.
Conclusion
These 7 authentic German food recipes offer a taste of the rich and diverse culinary heritage of Germany. From the beloved Bratwurst to the heavenly Schwarzwälder Kirschtorte, each dish reflects the traditions and flavors of this beautiful country. Whether you’re trying these recipes for the first time or reminiscing about a trip to Germany, they are sure to delight your taste buds and transport you to the heart of this remarkable cuisine. Enjoy the flavors of Germany, one recipe at a time. Guten Appetit!
Calculate Recipe Calories
World Trade Center Footage | Webex Costs | Virtual Data Rooms | Structures Annuity Settlement | Sell Annuity Payment | Neuson | Online Classes | Nunavut Culture | Online College Course | Motor Replacements | Motor Insurance Quotes | Mortgage Adviser | Met Auto | Tax credit | Help desk software | Home refinancing | Urgent care | Marketing integration | Debt relief | Bitcoin | Fitness center software | Insurance | Gas | Electricity | Weight loss | Sell house for cash | Automotive repair | Loans | Internet marketing | Mortgage | Attorney | SEO specialist | Lawyer | Donate | Conference Call | Treatment | Degree | Software | Credit | Classes | Investing | Recovery | Trading | Rehab | Hosting | Cord Blood | Claim | Automotive warranty | Paintless dent repair | Mesothelioma Law Firm | Massage School Dallas Texas | Low Credit Line Credit Cards | Life Insurance Co Lincoln | Insurance Companies | Injury Lawyers | How to Donate A Car in California | Home Phone Internet Bundle | Holland Michigan College | Royalty-Free Images Stock | Register Free Domains | Psychic for Free | Ph.D. in Counseling Education | Personal Injury Lawyers | Personal Injury Law Firm | PaperPort Promotional Code | Online Stock Trading | Online Motor Insurance Quotes | Donate your Car for Money | Online Colleges | Health Records, Personal Health Record | Hard drive Data Recovery Services | Donate Old Cars to Charity | Forex Trading Platform | Forensics Online Course | Donate Car to Charity California | Donate Car for Tax Credit | Car Insurance Quotes PA | Email Bulk Service | Donating Used Cars to Charity | Donating a Car in Maryland | Donate Your Car Sacramento | Online Criminal Justice Degree | Donate Your Car for Kids | Futuristic Architecture | Donate Cars in MA | Data Recovery Raid | Mesothelioma | A car accident lawyer | Personal injury lawyer | AC repair | Lawsuit settlements | Car insurance | Flood recovery | Water damage restoration | Rehab doctors | Online degree | Online master’s degree | Doctoral programs | Hail car insurance