
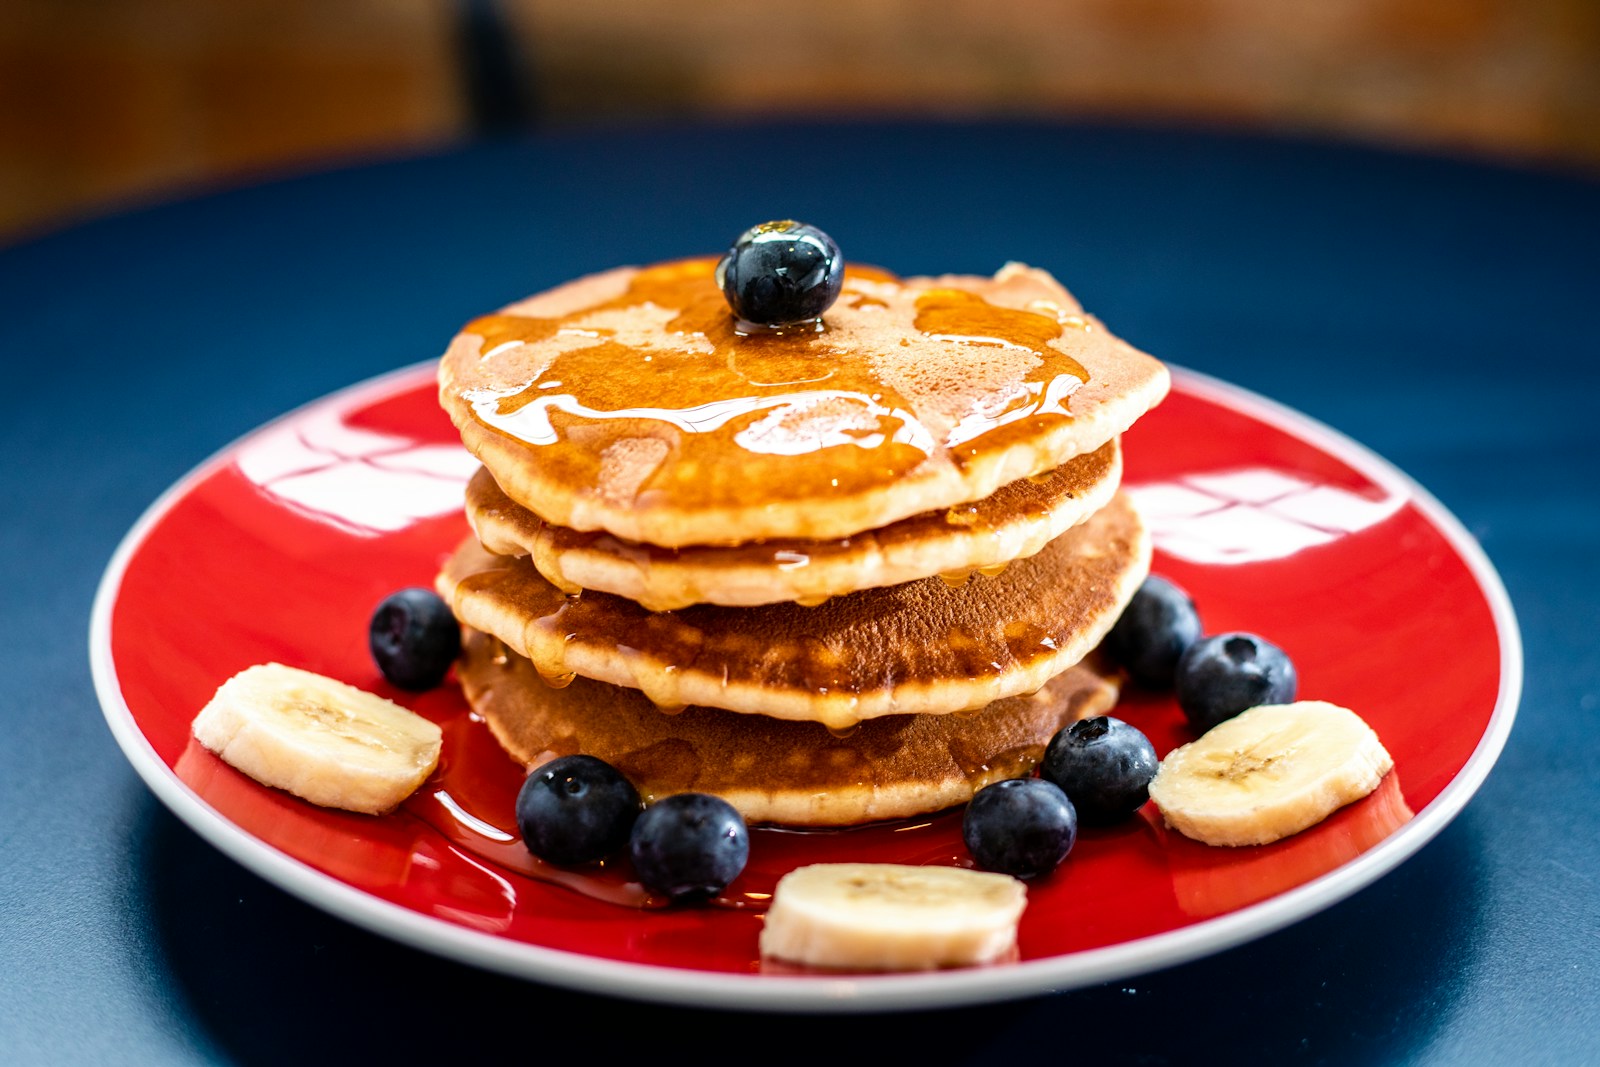
How to Make Fluffy Pancakes
Tired of pancakes that feel like frisbees?
Yeah, me too. I’ve had my fair share of sad, rubbery pancakes that could double as coasters. If you’ve ever followed a pancake recipe to the letter and still ended up with a stack of flat disappointment, I’ve been in your shoes.
But here’s the good news: pancake fluff isn’t some mystical magic reserved for diners or food bloggers. After countless weekend experiments (and some stubborn failures), I found 7 specific tricks that actually work. And I’m not talking about vague “just follow the recipe” advice. I mean real methods that give you clouds on a plate.
Keep reading your weekend brunch is about to level up.
1. Don’t Overmix the Batter
This was my first big mistake, and I bet it’s a common one.
Calculate Recipe Calories
I used to whisk pancake batter like it owed me money getting every lump out, turning it into a smooth, pourable stream. Seemed logical, right? Wrong. Every time I did that, my pancakes came out sad and flat. The texture was dense and chewy, not airy and soft.
Here’s the thing: overmixing activates gluten, and that’s great for bread… not pancakes. When you stir and stir, you’re basically tightening the batter and squeezing out all the potential fluff.
The fix? Stir just until the dry ingredients disappear.
That’s it. If you see lumps, leave them. I know it feels wrong, but those lumps are your fluffy insurance policy. I now mix by hand with a fork or spatula instead of a whisk less temptation to go overboard. I count to about 15-20 gentle stirs and then walk away.
Seriously, walk away. The batter doesn’t need your help anymore.
2. Let the Batter Rest
This one felt unnecessary to me at first. I used to mix the batter and go straight to the pan because who wants to wait when there’s syrup involved? But once I gave my batter a breather, I never looked back.
Resting the batter changes everything.
Here’s why: when you mix the flour with your wet ingredients, the starches in the flour need time to absorb the liquid. This process is called hydration, and it’s not just science jargon it directly affects how your pancakes turn out.
Without rest, the batter is more likely to be loose, uneven, and prone to spreading too much on the skillet. But after 15 to 30 minutes? It thickens just enough, and the pancakes puff up more evenly as they cook. The texture gets noticeably softer and creamier on the inside, with those golden edges we all love.
If you’re really short on time, even a 10-minute rest helps. But 15 to 30 minutes is that sweet spot. I usually prep the batter first, then use the waiting time to preheat the pan, get my toppings ready, or make coffee. It turns breakfast into a smoother operation.
Bonus tip: if you let the batter rest in the fridge, cover it with a towel or plastic wrap. Keeps the surface from drying out.
3. Use Buttermilk
Let me just say it buttermilk is the secret weapon for pancakes that actually taste like something. It’s not just there for show. The tangy flavor, the soft interior, the picture-perfect rise it all comes from what buttermilk does behind the scenes.
So what’s so special about it?
Buttermilk is acidic, which means it reacts with the baking soda or baking powder in your batter. That reaction creates little bubbles of carbon dioxide. Translation? More lift. More fluff. Better bite.
On top of that, it gives pancakes a slight tang that balances the sweetness. Not overpowering, just a little extra depth that makes them taste like you picked them up from a diner instead of your kitchen.
Now, I don’t always have buttermilk sitting in the fridge. If you’re in the same boat, no stress. You can make a quick substitute by adding 1 tablespoon of lemon juice or white vinegar to 1 cup of milk. Stir it and let it sit for 5–10 minutes it’ll curdle slightly, and boom: homemade buttermilk.
Do I prefer the real thing? Yes. But the DIY version still works like a charm when I’m running low on supplies.
4. Whip and Fold in Egg Whites
Okay, I’ll admit this one sounds like something out of a fancy cooking show. And I avoided it for years because separating eggs and whipping them felt… extra. But if you want pancakes so fluffy they almost float, this step is absolutely worth the effort.
Here’s how it works:
You start by separating your eggs. Yolks go into the main batter with your wet ingredients. The whites? Those get a little VIP treatment. Use a clean bowl (and I mean spotless any grease or yolk messes up the process), and beat the whites until they form soft peaks. If you’re using a hand mixer, it only takes a couple of minutes. You’ll know they’re ready when you lift the beaters and the tips gently fold over, not stiff and spiky.
Now, the magic part: folding those whipped whites into the batter. Don’t stir aggressively or you’ll undo all that fluff you just created. I use a rubber spatula and work slowly, folding in thirds and turning the bowl as I go. The goal is to keep the batter airy, not deflate it.
The result? Pancakes that feel almost soufflé-like. They rise higher, stay tender, and have this amazing light texture that absorbs syrup like a sponge. Honestly, it’s one of the most dramatic improvements I’ve seen in my pancake game.
If I’m making pancakes for guests or just want to impress myself I always go with this method. It’s a flex, but a tasty one.
5. Use Both Baking Powder and Baking Soda
Here’s a quick chemistry lesson that pays off in pancake stacks:
Most recipes call for either baking powder or baking soda. But the best pancakes? They use both. And each one pulls a different kind of weight.
Baking powder is your base leavener. It’s a combination of an acid and a base, so it works all on its own. It activates once it hits moisture and again when heated, giving your pancakes that initial lift and then a little boost on the skillet.
Baking soda, on the other hand, needs an acid to activate and that’s where your buttermilk comes in. When the two meet, they create bubbles. And bubbles = fluff. Without an acid, baking soda won’t do much besides leave a weird taste. But with buttermilk? Perfect match.
The key is balance. Too much baking soda and your pancakes might taste metallic. Too little, and they fall flat (literally). I usually go with about 1 teaspoon of baking powder and ¼ teaspoon of baking soda per cup of flour, but adjust based on your recipe and how acidic your liquid is.
And here’s something most people forget: check your leavening’s expiration date. If your baking powder is older than 6–9 months, it might be dead weight. I learned that the hard way after a sad pancake morning with what looked like flatbread on my plate.
So yeah when baking powder and baking soda team up, they basically become pancake superheroes.
6. Preheat the Pan Properly
This is one of those little things I used to overlook. I’d mix the batter, heat the pan for maybe 30 seconds, and then start pouring. Big mistake. The temperature of your pan can make or break your pancake fluff.
Medium heat is your best friend here.
Too hot and the outside burns before the inside cooks resulting in scorched pancakes with raw middles. Too cool and they spread out thin like crepes, never rising like they should.
Here’s how I test if the pan is ready: I flick a tiny drop of water onto the surface. If it just sits there? Too cold. If it instantly sizzles and dances around like it’s doing the cha-cha? Perfect. If it evaporates the second it hits the surface? That pan’s too hot let it cool for a bit.
I usually give the pan a solid 5 minutes on medium heat before doing anything. And I use a non-stick skillet or griddle, lightly oiled or buttered, but not swimming in fat that can mess with texture and cook time.
One more tip: once the pan’s hot, don’t walk away. It holds heat, and over time, it might creep too hot. I adjust the temp between batches to keep things consistent. Pancakes are sensitive like that.
7. Don’t Press the Pancakes
I’m not proud of this, but I used to be a pancake smusher. I’d pour the batter, watch it rise a bit, and then gently press it down with my spatula like I was helping it cook faster. Turns out, I was ruining everything.
Pressing the pancake is like popping a balloon.
When those bubbles form in the batter and lift the pancake, they’re creating that soft, fluffy texture. Pressing it down forces all that air out, leaving you with a denser, sadder result.
So now, I do the opposite I leave it alone. Once I pour the batter into the pan, I wait until bubbles start forming on the surface and the edges look slightly set. That’s my cue to flip. Not before. And definitely not more than once.
I only flip each pancake once, gently, and then let the other side finish cooking. It only takes a minute or so. No pushing, no poking, no spatula gymnastics. Just a little patience and some visual cues.
And the difference is wild. They stay thicker, more tender, and honestly just look better. No more lopsided pancakes with uneven browning and squished middles.
Bonus Tip – Freeze for Later Without Losing Fluff
Let’s be honest sometimes the dream of pancakes collides with the reality of weekday chaos. That’s why I started freezing my leftovers. And no, they don’t turn into rubbery disks. If you do it right, they’ll taste just as fluffy and fresh as the day you made them.
Storing Cooked Pancakes
I let the pancakes cool completely first. That’s key. If you stack them while they’re still warm, condensation builds up and they get soggy. Once they’re room temp, I layer them between sheets of parchment paper and place them in a freezer-safe bag or airtight container. This keeps them from sticking together like a brick.
Reheating Like a Pro
When I want one (or five), I don’t microwave them straight from the freezer unless I’m desperate. The best method I’ve found is to reheat in a toaster or toaster oven. That way, the edges crisp up and the inside stays tender. If I’m reheating a whole batch, I wrap them in foil and warm them in the oven at 350°F for about 10 minutes.
What About Batter?
Storing batter is hit or miss, but here’s what’s worked for me: if I have leftover batter and I plan to use it within 24 hours, I store it in an airtight container in the fridge. But here’s the trick I hold back on adding the baking powder or baking soda until I’m ready to cook. That way, the chemical reaction happens fresh, and I still get lift. Just stir it in right before pouring.
Honestly, pancake prep on a Sunday that lasts through Wednesday? That’s the kind of meal planning I can get behind.
Common Mistakes That Kill Pancake Fluff
I’ve made every mistake in the book usually while half-asleep on a Saturday morning. So consider this your pancake warning label. If your pancakes come out flat, rubbery, or just sad, one of these could be the culprit:
1. Using Old Baking Powder
This one sneaks up on you. I once made an entire batch with baking powder that had expired… two years earlier. No rise. Just floppy sadness on a plate.
Tip: Drop a little baking powder into hot water. If it fizzes, it’s good. If nothing happens, toss it. Baking soda? Same test, but use vinegar instead of water.
2. Cooking Over High Heat
It’s tempting to crank the heat to get things done faster, especially when the kitchen smells like heaven. But high heat scorches the outside and leaves the middle raw. You end up with pancakes that look done on the outside but collapse when you cut into them.
Medium heat is the way. It gives your pancakes time to rise and cook through without burning.
3. Mixing Aggressively
I used to treat pancake batter like I was trying to win a tug-of-war. But every time I stirred it like I was mad at it, I got chewy, dense pancakes.
Solution: Stir until the dry spots are just gone. Lumps are your friend. Overmixing develops gluten, which is great for bread, but not so much for pancakes.
Final Words:
Fluffy pancakes aren’t magic they’re science, patience, and a few smart choices. Whether you’re making a fresh batch or pulling a frozen one from the stash, these small steps are what take your stack from “meh” to memorable.
Now go make pancakes that make people stop mid-bite and say, “Wait… did you make these?”
Calculate Recipe Calories
World Trade Center Footage | Webex Costs | Virtual Data Rooms | Structures Annuity Settlement | Sell Annuity Payment | Neuson | Online Classes | Nunavut Culture | Online College Course | Motor Replacements | Motor Insurance Quotes | Mortgage Adviser | Met Auto | Tax credit | Help desk software | Home refinancing | Urgent care | Marketing integration | Debt relief | Bitcoin | Fitness center software | Insurance | Gas | Electricity | Weight loss | Sell house for cash | Automotive repair | Loans | Internet marketing | Mortgage | Attorney | SEO specialist | Lawyer | Donate | Conference Call | Treatment | Degree | Software | Credit | Classes | Investing | Recovery | Trading | Rehab | Hosting | Cord Blood | Claim | Automotive warranty | Paintless dent repair | Mesothelioma Law Firm | Massage School Dallas Texas | Low Credit Line Credit Cards | Life Insurance Co Lincoln | Insurance Companies | Injury Lawyers | How to Donate A Car in California | Home Phone Internet Bundle | Holland Michigan College | Royalty-Free Images Stock | Register Free Domains | Psychic for Free | Ph.D. in Counseling Education | Personal Injury Lawyers | Personal Injury Law Firm | PaperPort Promotional Code | Online Stock Trading | Online Motor Insurance Quotes | Donate your Car for Money | Online Colleges | Health Records, Personal Health Record | Hard drive Data Recovery Services | Donate Old Cars to Charity | Forex Trading Platform | Forensics Online Course | Donate Car to Charity California | Donate Car for Tax Credit | Car Insurance Quotes PA | Email Bulk Service | Donating Used Cars to Charity | Donating a Car in Maryland | Donate Your Car Sacramento | Online Criminal Justice Degree | Donate Your Car for Kids | Futuristic Architecture | Donate Cars in MA | Data Recovery Raid | Mesothelioma | A car accident lawyer | Personal injury lawyer | AC repair | Lawsuit settlements | Car insurance | Flood recovery | Water damage restoration | Rehab doctors | Online degree | Online master’s degree | Doctoral programs | Hail car insurance