
7 Authentic German Recipes
If you’re in the mood for a culinary adventure, look no further than Germany. German cuisine is a delightful journey through a world of flavors, from savory sausages to mouthwatering pastries. In this article, we’ll take you on a gastronomic tour of Germany with 7 authentic recipes that are sure to tickle your taste buds. So, don your apron and get ready to cook up some German goodness!
Recipe 1: Sausages Galore: Bratwurst and Sauerkraut
From My Stovetop to Yours
I’ll be straight with you there’s something deeply comforting about bratwurst and sauerkraut. No frills, no fancy plating, no need for a Michelin star. Just real food that hits you right in the gut… in the best possible way. Whether it’s a freezing night or a lazy Tuesday when I forgot to plan anything, this is the dish that saves me. When in doubt? I bring out the brats.
I didn’t grow up in some gourmet kitchen where the word infused was used like salt. Our meals were humble, sure, but when sausage hit the pan now we were talking. Sizzling bratwurst, tart sauerkraut, the smell of onions browning in butter? That was the smell of home, even if the wallpaper was peeling and the stove leaned slightly to the left.
This recipe? It’s not just food. It’s therapy. It’s tradition. It’s the one dish I know will never let me down.
Calculate Recipe Calories
The Lineup – Straight from My Kitchen
Nothing wild here just good ingredients that get the job done.
| Item | How Much | Why I Bother with It |
|---|---|---|
| Bratwurst | 4–6 links | Porky perfection. No skinny sausages allowed. |
| Sauerkraut | 2 cups, drained | Sharp, bold, unapologetic. Just like your aunt with no filter. |
| Yellow Onion | 1 large, thinly sliced | Sweetens the deal. Smells like grandma’s house, but in a good way. |
| Apple (optional) | 1, peeled and sliced | Brings a little sunshine. Tartness balances the kraut. |
| Beer | 1 bottle | Fuel for the brats and for me. Lager works best. |
| Butter | 2 tablespoons | The golden sear MVP. Don’t skimp. |
| Brown Sugar | 1 tablespoon | A whisper of sweet to tame the kraut. |
| Caraway Seeds | 1 teaspoon (optional) | Feels like old Europe in your mouth. I throw ’em in when I’m feeling nostalgic. |
| Salt & Pepper | To taste | Wake up the flavors. That’s their job. |
| Grainy Mustard | Big spoonful per plate | Non-negotiable. It’s the glue of the dish. |
| Bread, Buns, or Potatoes | Optional | For mopping up the goodness. Or just stuffing your face. |
My Method – Not Scientific, Just Real
1. Brats Get Their Glamour Shot
I start by firing up my cast iron skillet. Not negotiable it’s the only pan I trust with sausage. I drop in a bit of butter and give the brats a golden tan. Not too much flipping. No stabbing or poking either. That’s bratwurst murder. Let ‘em sizzle in peace until both sides are seared and sexy.
Then I pull ‘em out. Don’t eat them yet, I tell myself. I rarely listen, but I try.
2. Onion and Apple Tag In
Same pan, because duh flavor. I toss in the onions. Let them soften and catch some color. If I’m feeling fancy or fruity, in goes a sliced apple. They melt into the mix, turning into these sneaky little flavor bombs. Totally optional, but highly recommended.
3. Enter the Kraut
Now the magic starts. I dump in the sauerkraut no rinsing. I want that funk. That punch-you-in-the-nose kind of tang. I stir it around with the onions, maybe a sprinkle of brown sugar, and if I’m in the mood, some caraway seeds.
The smell at this point? Somewhere between Oktoberfest and an old German grandma’s kitchen. And I mean that in the best way.
4. Everything Gets Cozy
Time to reunite the band. I nestle the brats back into the pan and pour in the beer. Not drowning them just enough to come halfway up. It’ll bubble and hiss like a tiny beer volcano. I lower the heat, slap on a lid, and let it all simmer for about 25 minutes.
During this part, I usually open the lid once or twice to sneak a sniff. Honestly? Smelling it is half the joy.
Serving Time – Pick Your Poison
This dish is versatile. Dress it up, dress it down, or eat it straight from the skillet like a caveman with good taste.
- On Toasted Buns – Think of it as a brat sandwich with kraut piled high and mustard everywhere.
- Over Mashed Potatoes – The sauerkraut and beer seep into the spuds… it’s ridiculously good.
- Solo – Just a fork, a plate, and a cold beer. Simplicity never tasted so good.
| Serving Style | Extras | The Mood |
|---|---|---|
| Bun | Mustard, crispy onions | BBQ with flair |
| Mashed potatoes | Parsley, butter | Cozy night in |
| No carbs | Green beans, cabbage | Pretending to be healthy |
Why I Keep Coming Back to This
Because it’s real. It’s hearty, simple, unapologetic food. No social media filter needed. No calorie math. Just good, honest grub. It fills you up and warms your soul. And every time I make it, I feel like I’m doing something right even if the laundry’s not done and my inbox is a dumpster fire.
The brat brings the bite. The kraut adds zing. The beer smooths it all out like butter on toast. It’s a trio that just works. Like a band that never broke up.
Leftovers: Trust Me, You’ll Want Them
Don’t toss anything out. This dish keeps on giving.
- Brat Hash: Chop it all up, pan-fry it with potatoes, and drop a runny egg on top. That’s a breakfast that slaps.
- Quesadillas: You’re laughing but I’ve done it. Add cheese, grill it up. Weirdly amazing.
- Rustic Soup: Throw everything into some broth with a handful of beans or greens. Warm, comforting, kinda fancy without trying.
- Reheat As-Is: Honestly, it’s better the next day. I don’t know why. Maybe it’s brat magic.
Final Thoughts – From Me to You
If you’ve never cooked bratwurst and sauerkraut before, let this be the nudge. You don’t need to be a chef. You don’t need a 10-step tutorial with background music and dramatic lighting. You just need good sausage, sharp kraut, a cold beer, and a hot skillet.
And once you’ve made it? You’ll make it again. Not because someone told you to, but because you want to. It sticks with you. In your belly and in your bones.
I make it when I’m tired. I make it when I’m celebrating. I make it just because I feel like it.
And right now? I’m about to sneak the last brat from the fridge before anyone else gets to it. No regrets.
Here’s to simple meals that taste like home. Cheers.
Recipe 2: Pretzels: A Bavarian Specialty
A story of obsession, failed twists, and finally… buttery glory
Let me tell you something straight up I didn’t grow up eating soft pretzels. Where I’m from, the closest thing we had to a pretzel was that stale, salt-dusted knot you’d get in a bag of party mix. You know the one. Bland, dry, breaks your tooth if you dare eat it without coffee. That was the extent of my pretzel knowledge. And then Bavaria happened.
I was in Munich on a last-minute trip one of those “I need to get out of here before I scream” kind of escapes. Cold air, cobblestone streets, and beer the size of my head. Classic. But what changed me what truly altered my carb-loving soul was a pretzel. A warm, golden, soft pretzel that I bought from a bakery window at 7 AM because I couldn’t sleep, and it smelled like pure magic.
It was chewy, buttery, slightly crisp on the outside, with this unmistakable tang from the lye bath. My fingers were greasy. My face? Shamelessly stuffed. And that was it. Love at first bite.
So, naturally, the first thing I did when I got home? Tried to make it. Bad idea. That first batch looked like roadkill and tasted like gym socks. But after months of tinkering, crying, and probably scaring the neighbors with my doughy experiments, I cracked it. I finally figured out how to bring that authentic Bavarian beauty into my own kitchen. And now? I want to help you do the same.
Here’s What You’re Gonna Need
Let me keep it real these aren’t five-minute, one-bowl microwave miracles. You’re gonna get messy. There’s yeast involved. Kneading. Boiling. Shaping. But holy heck, is it worth it.
Here’s my go-to list:
| Stuff You Need | Amount |
|---|---|
| Warm water | 1 ½ cups (around 110°F) |
| Active dry yeast | 2¼ teaspoons (1 packet) |
| Brown sugar | 1 tablespoon |
| All-purpose flour | 4 cups (plus some for kneading) |
| Unsalted butter | 2 tablespoons, melted |
| Fine salt | 2 teaspoons |
| Baking soda | ½ cup (for the fake lye bath) |
| Coarse salt (for topping) | As much as your soul says |
| Egg yolk + water (optional) | 1 yolk + 1 tbsp water |
I’ve tried fancier flours, subbed in honey instead of sugar, even used beer once. But honestly, this basic lineup never lets me down.
Let’s Make Some Dough
1. Wake Up That Yeast
I start by mixing the warm water, brown sugar, and yeast in a big bowl. You wait about 5–10 minutes until it gets all foamy and puffed up like it’s showing off. If nothing’s happening after 10 minutes, it’s dead yeast. Dump it. Don’t argue. Old yeast has no place in a pretzel party.
2. Build the Dough
Once the yeast looks alive and kicking, I toss in the melted butter and salt, then slowly add the flour. I mix it until it forms a shaggy, sticky mess. Then comes kneading. And yeah, your arms will curse you. I knead for a good 8 minutes on a floured surface until the dough is smooth but still has a little tack to it like soft Play-Doh.
3. Let It Rise
I plop the dough in a greased bowl, cover it with a towel, and forget about it for an hour. By the time I remember, it’s doubled in size and smells like a bakery in there. That’s when I know things are getting serious.
The Twist (Literally)
After I punch the dough down (because it deserves it), I divide it into 8 equal-ish chunks. I roll each one out into a long rope like 20 inches. It’s basically edible jump rope at this point.
Now for the twist: I make a U-shape, cross the ends, twist once, and fold the tips down to touch the bottom of the U. Bam. Pretzel. Mine don’t always look Instagram-worthy, but they taste like heaven and that’s what matters.
The Secret Step: The Bath
Here’s where a lot of people mess up. You can’t skip this. You just can’t. Bavarian pretzels owe their color and flavor to an alkaline bath.
Now traditionally, that’s food-grade lye. But I’m not about to mess with chemical burns. So I do the home-baker version baking soda bath.
Here’s how:
- Boil 8 cups of water in a wide pot.
- Slowly, and I mean sloooowly, add in ½ cup baking soda. It’ll fizz up like it’s mad at you. This part always makes me feel like a witch with a cauldron.
Then I drop each pretzel into the bath for about 30 seconds, flipping once. Don’t leave them in too long or they get this weird metallic taste. Trust me, I learned that the gross way.
Place them back on a parchment-lined tray. They’ll look a little bloated and weird, but they bake up beautifully.
Dress ‘Em Up
Right before baking, I brush them with an egg yolk wash (totally optional, but it gives that extra shine) and then sprinkle a small mountain of coarse salt. Or sesame seeds. Or everything bagel seasoning. Whatever floats your Bavarian boat.
Bake Time
I bake at 450°F (232°C) for about 12–15 minutes until they’re deep golden brown. Like that perfect leather shoe you can never afford. The smell? It’s the kind that makes you peek through the oven window every two minutes like a kid waiting for Christmas.
When they come out, I give them a few minutes to cool so I don’t burn the roof of my mouth (again), but honestly, I’ve definitely burned myself out of impatience and zero regrets.
What Do You Eat Them With?
Short answer: everything.
Long answer:
- Warm with mustard? YES.
- With melted cheese dip? Don’t tease me.
- Split it, throw in some ham and Swiss? Game over.
- Dipped in Nutella? I won’t judge. I’ve been there.
If I’m feeling extra Bavarian, I serve it with Obatzda, a funky German cheese spread that’s basically beer cheese on steroids.
A Few Tips So You Don’t Cry Later
- Flour is your friend during kneading. Sticky dough is a liar.
- Don’t over-bake. If they’re too dark, they’ll taste bitter.
- Freeze extras if you have willpower. Reheat in the oven, not the microwave unless you want chewy sadness.
- Make a double batch. Trust me. Eight is never enough.
Final Thoughts from My Crumb-Covered Counter
Here’s the truth I didn’t set out to master pretzels. I just missed that feeling I got that morning in Munich. The warmth. The smell. The simplicity of dough transformed into something magical. But somewhere between the failed batches and sticky counters, I fell in love with the process.
These pretzels taught me patience, persistence, and the joy of flour in places flour should not be. Every time I bake them now, it’s like a little piece of Germany sneaks into my kitchen, arms wide open, handing me a warm, salty hug.
And that, my friend, is what makes Bavarian pretzels so special. They’re not just food. They’re comfort. They’re memory. They’re a quiet rebellion against bland, soulless snacks.
So go make a batch. Twist some dough. Burn your tongue. Fall in love.
You’re only one salty, buttery bite away from believing in carbs again.
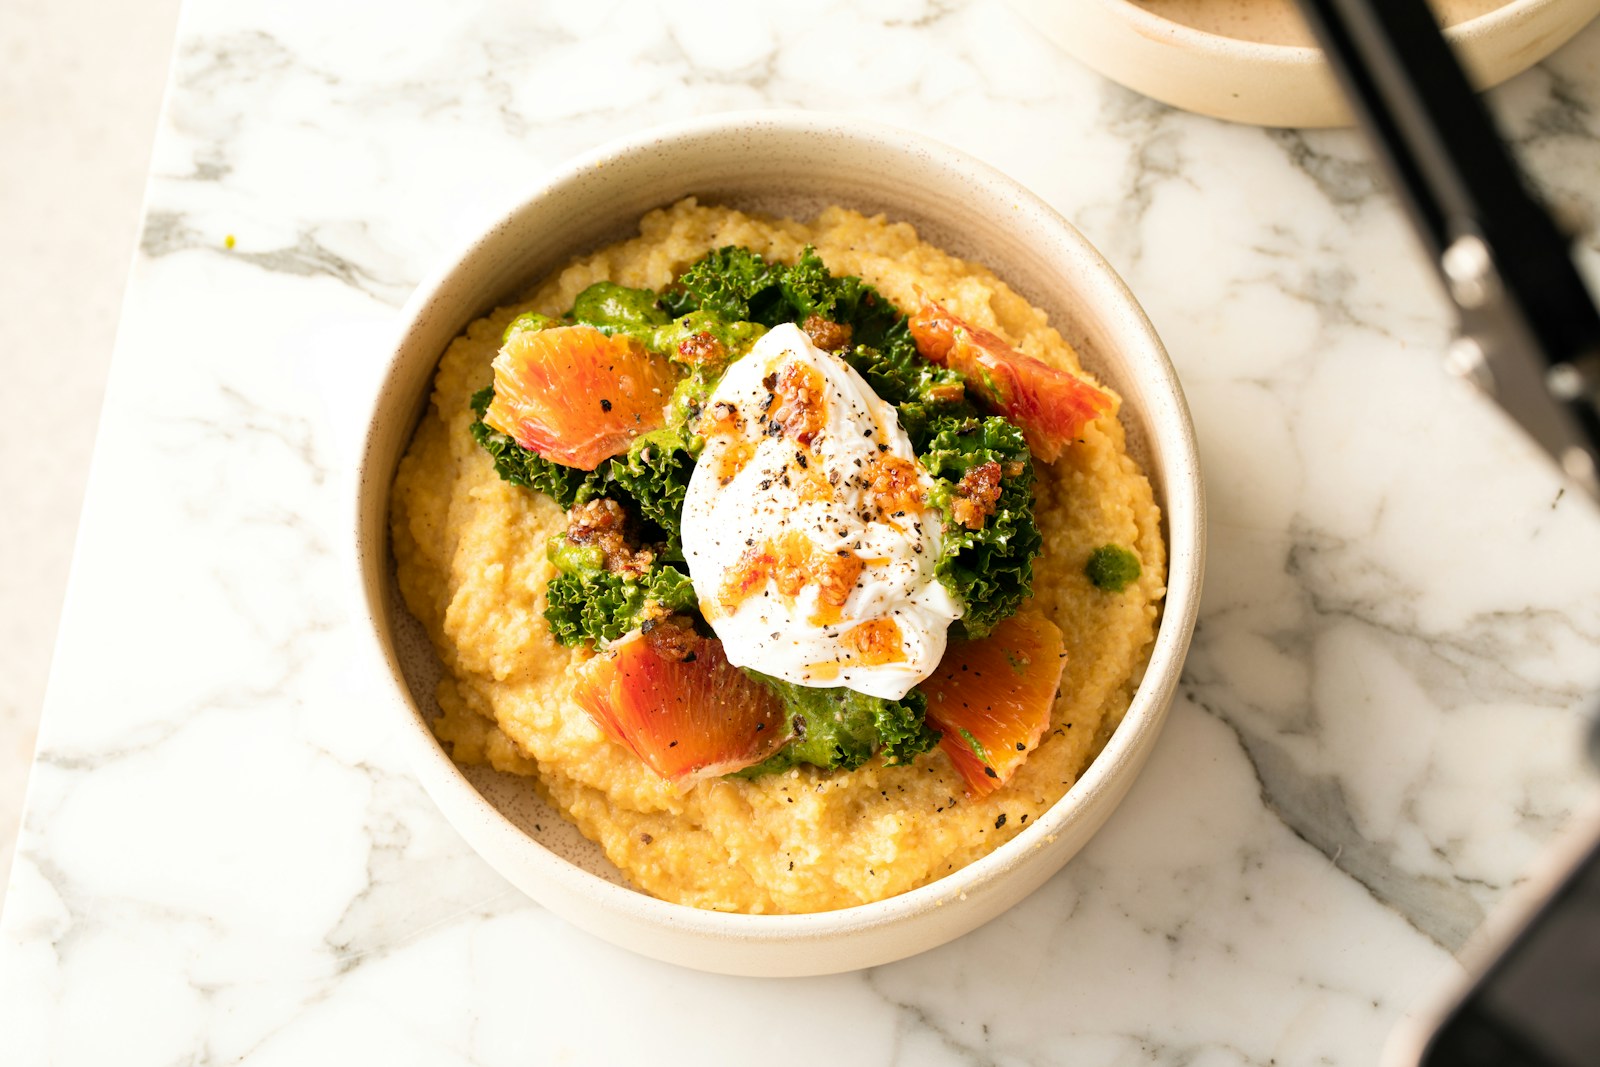
Recipe 3: Classic Pork Knuckle (Eisbein)
My Go-To Eisbein Recipe: How I Fell in Love with a Pork Knuckle
Let me tell you a story about love at first crackle. Not a person nope. A pork knuckle. Sounds strange? Stick with me. The first time I had Eisbein, I didn’t expect much. Just a slab of pork, right? But one bite in juicy, tender, skin crackling like fireworks in my mouth and I was ruined for life. Since then, this dish has been my secret weapon. When I want to impress, comfort, or just satisfy a deep, primal hunger, I go for Classic Pork Knuckle.
This isn’t a quick Tuesday night meal. It’s a ritual. A feast. A “loosen-your-belt-and-still-ask-for-seconds” type of thing. And honestly? I wouldn’t have it any other way.
What I Use (And You Should Too)
Every great meal starts with solid ingredients. This one’s no different. Here’s everything I grab when I’m prepping my knuckles pork ones, that is.
| Ingredient | Amount | My Notes |
|---|---|---|
| Pork knuckles | 2 large (1.2–1.5 kg each) | Fresh, not smoked. Bigger is better. |
| Onion | 2 medium | Quartered, skins on adds depth. |
| Garlic | 5–6 cloves | Give ‘em a smash, no need to mince. |
| Bay leaves | 3–4 | Non-negotiable. Adds subtle warmth. |
| Peppercorns | 1 tbsp | Whole, so you don’t get mouthfuls of grit. |
| Carrots | 2 large | Rough chop, nothing fancy. |
| Celery stalks | 2 | Just enough to boost the broth. |
| Salt | Be generous | Don’t hold back this flavors everything. |
| Water | Enough to cover the meat | Use a deep pot. Trust me. |
| Beer (optional) | 1 bottle (500ml) | Dark, malty lager gives depth. Also, sip some. |
| Mustard | To serve | The spicier the better. |
| Sauerkraut or red cabbage | Side dish | One’s sharp, one’s sweet both are gold. |
| Mashed potatoes or bread dumplings | Sidekick | Something carby to soak up the glory. |
My Step-by-Step Breakdown
You don’t need to be a chef. You just need a bit of time and a decent appetite. Here’s how I do it.
Step 1: Pick Your Knuckle Like You Mean It
If it’s your first time, get the rear hock they’ve got more meat, more flavor, and more bang for your buck. Tell your butcher you want fresh hind pork knuckles. Not cured. Not smoked. Just raw, fatty goodness.
Step 2: Simmer Till It Sings
This step’s where the magic begins. You’re building flavor and tenderness.
- Rinse and dry your knuckles.
- Throw them in a big ol’ pot with your veggies, garlic, bay leaves, and peppercorns.
- Add salt. Then, if you’re smart (and you are), pour in that dark beer. Cover it all with water.
- Bring it to a boil, then drop the heat and simmer gently for 2 to 2.5 hours.
How do I know it’s ready? I stab it with a fork. If it glides in like a hot knife through butter, it’s ready. If not, keep simmering and sip that beer.
Step 3: Air Dry Like a Pro
Once you’ve fished them out, don’t rush it. Let them rest on a wire rack for 10–15 minutes. No foil. No covering. Just let ‘em breathe. Moisture is the enemy of crispy skin. This step’s crucial don’t skip it, or you’ll regret it at crunch time.
Step 4: Roast to Golden Glory
Alright, you’ve got tender pork. Now let’s make it sexy.
- Preheat the oven to 230°C (450°F).
- Place the knuckles on a rack over a tray. Heat circulation = crispy everywhere.
- Roast for 30–40 minutes, flipping once halfway through.
You want the skin to go from pale and soft to crackly and golden. If it’s not crisping up, flick on the broiler for the last 5 minutes but watch it like it owes you money. It’ll go from golden to burnt in a blink.
Step 5: Serve With Swagger
Plate it up like you mean business. Pork knuckle, some spicy mustard, a mound of tangy sauerkraut or sweet red cabbage, and something creamy like mashed potatoes or chewy like a bread dumpling. Bonus points if you pour a frothy beer and crank up some German tunes.
My Favorite Variations
I’m a traditionalist most days, but sometimes I like to shake things up.
- Smoked Knuckles: Already cooked, so you just need to roast for crunch. Faster, smokier, saltier.
- Sweet & Spicy Glaze: Mix honey and mustard, brush it on before roasting. Turns into sticky gold.
- Slow Cooker Simmering: Pop the knuckles and aromatics in the slow cooker. Set to low for 6–8 hours. Then finish in the oven.
Tips I Swear By
| What | Why It Works |
|---|---|
| Boil before roasting | Skips the “tough meat” heartbreak. |
| Dry them before roasting | Crispy skin depends on it. Moisture ruins dreams. |
| Use beer | Adds complexity and a touch of bitter magic. |
| Let them rest | Nobody wants meat juice on their plate instead of in the meat. |
| Eat hot | This is not a leftover meal. It shines straight from the oven. |
My First Eisbein Experience
I still remember the first time I cooked this beast. I was sweating over the pot, trying to figure out if it looked “right.” It didn’t. It looked prehistoric. But when I pulled it out of the oven, skin all puffed and golden, my jaw actually dropped.
My guests thought I was some culinary god. One guy cried. Okay, he just teared up from the mustard, but still it was a moment.
Now, whenever I want to bring the house down (and fill it with the smell of roasted dreams), this is the dish I reach for.
Recipe 4: German Potato Salad: A Side Dish Star
The Dish That Totally Changed My Mind
Alright, cards on the table I didn’t grow up eating German potato salad. In my family, “potato salad” meant cold, mayo-heavy goop that showed up at cookouts in a sad plastic container. You know the one. It sat on the table sweating in the sun next to the mystery meat. We ate it, sure, but no one ever said, “Wow, I need more of that.”
Then everything changed.
It happened on a post-college Euro trip classic backpack, too many hostels, not enough socks. I ended up visiting a friend in Munich. We’d been wandering through cobblestone streets, the air filled with the smell of bread, roasted nuts, and bicycles whizzing past like missiles. She took me to this hole-in-the-wall diner. No menu in English, no frills just a man behind the counter who looked like he’d been cooking since World War II.
That’s where I had it. The German potato salad that split my life into two chapters: before and after that bite.
Warm Potatoes? I Was Not Prepared
So here’s the thing I wasn’t ready for it to be warm. That threw me. I stared at the plate like, “Did someone forget to put this in the fridge?” But then I took a bite.
Oh man. Game over.
It was tender, smoky, tangy, and had just enough sweetness to keep me guessing. Bacon? Crispy. Onions? Perfectly soft. The dressing? Tangy, silky, sharp. The potatoes were just right firm but fluffy. Each bite had that balance you can’t fake. I cleaned the plate and then sat there wondering how I’d lived so long without it.
When I got back home, I became obsessed. I had to recreate it.
The Ingredients That Make It Magic
Now, I’m no fancy chef. I don’t have a collection of knives that cost more than my rent. But I care about flavor, and this dish brings it all with real ingredients you’ve probably already got.
Here’s what I use:
| Ingredient | Why It Matters |
|---|---|
| Red potatoes (2 lbs) | Hold their shape and have that earthy vibe |
| Thick-cut bacon (6–8 slices) | Smoky, salty, and honestly, just happiness |
| Yellow onion (1) | Softens things up, adds sweetness |
| Apple cider vinegar (⅓ cup) | Brings the tangy punch |
| Sugar (1 tbsp) | Balances the bite of the vinegar |
| Dijon mustard (1 tbsp) | Adds a little fire to the flavor party |
| Salt + pepper | This ain’t the time to be shy |
| Fresh parsley (2 tbsp) | For brightness and a splash of green |
Simple stuff. No mystery powders. No weird “salad seasoning.” Just the good stuff.
Making It: No Fuss, No Frills
I don’t cook in a pristine kitchen. I cook with music blasting, flour on my shirt, and usually a glass of something nearby. But I take this salad seriously. Here’s how I get it done:
Step 1: Potatoes First, Don’t Overdo It
- I wash the red potatoes and chop them into bite-sized chunks. No peeling. Life’s too short.
- I throw them in a pot of cold, salted water and bring it to a boil.
- Once they’re fork-tender not mush off the heat they go. Drain and let them steam for a minute. That’s how you keep them from turning into potato mush.
Step 2: Enter Bacon, the Real MVP
- I cook thick-cut bacon in a large skillet until it’s crunchy enough to crumble.
- I transfer it to a plate and do not drain the grease. That bacon fat? That’s flavor currency.
Step 3: The Sauce That Ties It All Together
- In that glorious bacon fat, I sauté chopped onions until soft and golden.
- Then I stir in the vinegar, sugar, Dijon, salt, and pepper.
- Let it simmer for a couple minutes. It starts to smell like something you’d want to bottle and wear as cologne. Not even kidding.
Step 4: Mix and Mingle
- I toss the warm potatoes right into the skillet. Yes, directly in there.
- I gently fold in the bacon, making sure not to smash the spuds.
- Parsley goes in last. Not for decoration it lifts the whole thing with fresh flavor.
And there you have it. No tricks. No “chef’s secrets.” Just food made with intention.
How I Serve It and Why It Never Lasts
This salad doesn’t play backup. It steals the spotlight every time. I serve it warm, straight out of the skillet, and people lose their minds.
Here’s how I usually roll with it:
- With grilled bratwurst or sausage (match made in heaven)
- Alongside roast chicken
- As a meal on its own, topped with a sunny-side-up egg (trust me on this one)
It even tastes great the next day, cold or reheated. It’s like the dish that just keeps showing up and nailing the vibe every time.
Lessons I Learned from Screwing It Up
Cooking is messy. You burn things. You forget salt. You drop a spoon into boiling water and scream like a cartoon. Here’s what I figured out along the way:
- Use waxy potatoes – Russets go all mashed and weird.
- Don’t overcook – You want a little bite, not baby food.
- Go hard on the vinegar – That zing is the soul of the dish.
- Make it fresh – Warm is where it shines.
- Reheat like a pro – Add a splash of water or broth in the microwave. Still tastes like a hug.
Where the “German” Part Comes In
This salad is rooted in Southern Germany Bavarian-style. No mayo. No eggs. Just vinegar, bacon, and potatoes doing their thing. It was born out of practicality. You used what you had, and you made it sing. And man, does it sing.
Even though I didn’t grow up with this dish, it feels like it found me. There’s something timeless about it. Like it could sit at any table in any decade and still be the best thing there.
Recipe 5: Black Forest Cake: A Sweet Finale
A Sweet Finale
There’s this moment when you want to bake something so extraordinary, something that’ll have everyone talking. That’s Black Forest Cake for me. Seriously, every time I make it, I get this excited buzz. It’s one of those cakes that never disappoints and always wows the crowd. The layers of rich chocolate cake, fluffy whipped cream, and tangy cherries come together like a perfect storm of flavor. It’s not just a cake, it’s a celebration in every bite. Let me walk you through how to make this indulgent beauty the kind of dessert that’s bound to steal the show.
Why Black Forest Cake?
Cake is an art form, and let’s face it, Black Forest Cake is a masterpiece. The cake itself is dense and deeply chocolatey, but it’s the layers of cherries and whipped cream that take it to another level. When you cut into it, the balance of flavors hits just right: rich chocolate, sweet-tart cherries, and light, airy cream. And for a little grown-up twist, you can add a splash of kirsch (that’s cherry schnapps for you) for some extra oomph. Trust me, it’s worth it.
What You’ll Need
Before we dive into the fun stuff, let’s make sure you’ve got everything you need. There’s nothing worse than getting halfway through a project and realizing you’re missing a key ingredient (been there, done that, not fun!).
For the Cake:
- 1 ¾ cups all-purpose flour
- 1 ½ teaspoons baking powder
- 1 ½ teaspoons baking soda
- ¼ teaspoon salt
- ¾ cup unsweetened cocoa powder
- 1 ½ cups granulated sugar
- 2 large eggs (room temperature)
- ½ cup vegetable oil
- 1 teaspoon vanilla extract
- 1 cup buttermilk (or 1 tbsp lemon juice mixed with regular milk, let it sit for 10 minutes)
- 1 cup boiling water
For the Cherry Filling:
- 1 jar (24 oz) Morello cherries (or your favorite dark cherries)
- 2 tablespoons sugar (adjust to taste)
- 2 tablespoons cornstarch
- ¼ cup kirsch (optional, but trust me, it elevates the flavor)
For the Whipped Cream:
- 2 cups heavy cream (make sure it’s chilled!)
- ½ cup powdered sugar
- 1 teaspoon vanilla extract
For Decorating:
- Shaved chocolate (because, why not?)
- Whole cherries (for that classic Black Forest touch)
- A little extra kirsch (for soaking the cake layers)
Let’s Get Baking
Alright, it’s time to get our hands dirty (in the best way). Here’s how I do it.
Step 1: Bake the Cake Layers
First thing’s first, preheat your oven to 350°F (175°C) and grease two 9-inch round cake pans. I like to line the bottoms with parchment paper for good measure; it helps the cakes come out without sticking.
In a big bowl, whisk together all your dry ingredients flour, baking powder, baking soda, salt, cocoa powder, and sugar. Take your time to mix it well. In a separate bowl, whisk together your wet ingredients eggs, oil, vanilla, and buttermilk.
Now here’s the fun part: slowly mix the wet ingredients into the dry ingredients, then gradually stir in the boiling water. Don’t freak out if the batter looks thin it’s supposed to. It’ll bake up perfectly moist.
Divide the batter between your two cake pans and pop them into the oven. Bake them for about 30 minutes, but keep an eye on them. You’ll know they’re ready when a toothpick comes out clean. Once they’re done, let them cool in the pans for about 10 minutes before moving them to a wire rack to cool completely.
Step 2: Prepare the Cherry Filling
While your cakes are cooling, let’s tackle those cherries. Drain them, but save that juice don’t toss it! You’ll need some for soaking the cake layers later. In a saucepan, combine the cherry juice with sugar and cornstarch. Heat it over medium heat, stirring constantly, until it thickens up. Once it’s nice and thick, take it off the heat and stir in the cherries (and kirsch, if you’re using it). Set it aside and let it cool.
Step 3: Make the Whipped Cream
Now, whipped cream is key to this cake, and the secret to making it perfect is chilling everything. Make sure your heavy cream is super cold before you start. Pour the cream into a mixing bowl and beat it on medium-high speed. After a minute or so, add the powdered sugar and vanilla extract. Keep beating until you hit stiff peaks this is what gives your whipped cream that fluffy texture.
Step 4: Assemble the Cake
Now for the fun part! By now, your cakes should be cool, and everything else is prepped and ready to go.
First, cut the tops off your cakes if they’ve domed up. This helps the layers stack better. Place one cake layer on your cake stand or serving plate. Using a pastry brush, gently soak it with some of that reserved cherry juice (or kirsch). Don’t go overboard a little goes a long way.
Spread a nice, generous layer of whipped cream over the cake. Then, spoon some of those juicy cherries and syrup on top, making sure they’re spread evenly.
Place the second cake on top, gently pressing it down, and repeat the process: soak, cream, cherries. You’ll end up with a beautifully layered cake, each layer bursting with flavor.
Step 5: Decorate
Now for the cherry on top (literally!). Spread a final layer of whipped cream all over the top and sides of the cake. Don’t be shy with it cover it all! For the finishing touch, decorate the top with whole cherries, shaved chocolate, and maybe some extra whipped cream piped around the edges. This is your chance to get creative and really make the cake your own.
Let It Set
Before you dive in, let the cake chill for a bit. Ideally, you’ll want to let it sit in the fridge for a couple of hours, or even overnight. This lets all the flavors marry and gives the whipped cream time to firm up.
Serving the Cake
When it’s time to serve, be gentle while slicing the layers are delicate, and you want those perfect chocolate-cherry layers to shine through. When you cut into it, you’ll see the beautiful layers of chocolate, whipped cream, and cherries. It’s like cutting into a little piece of heaven.
Each bite is a perfect mix of sweet chocolate, tart cherries, and that fluffy whipped cream. And if you’ve added kirsch? That little pop of flavor makes everything feel a bit more grown-up and luxurious.
Why I Love Black Forest Cake
Honestly, every time I make Black Forest Cake, I feel like I’m working some kind of kitchen magic. The layers, the flavors, the look it all comes together so beautifully. It’s one of those cakes that makes even a regular Tuesday night feel special.
Perfect for any occasion from birthdays to family gatherings to just treating yourself on a random Saturday this cake is guaranteed to be the star of the show wherever you bring it.
Spätzle: Homemade German Pasta
Ingredients
- 2 cups all-purpose flour
- 1/2 teaspoon salt
- 2 large eggs
- 1/2 cup whole milk
- 1/2 cup water
- 2 tablespoons butter
- 2 tablespoons chopped fresh parsley
Directions
Prepare the Batter: In a large mixing bowl, combine the flour, salt, and nutmeg. Create a well in the center of the flour mixture.
Add the Eggs: Crack the eggs into the well. Begin whisking them in the center, gradually incorporating the flour from the edges.
Add Milk: Slowly add the milk while continuing to mix. The batter should be thick but smooth. You can use a wooden spoon or an electric mixer with a dough hook.
Let it Rest: Allow the batter to rest for about 30 minutes. This step allows the flour to fully absorb the liquid, resulting in a smoother consistency.
Boil Water: Bring a large pot of salted water to a boil.
Prepare the Dough: Once the batter has rested, it’s time to shape the Spätzle. You can use a Spätzle maker, a colander, or a slotted spoon.
With a Spätzle Maker: Place the Spätzle maker over the pot of boiling water and fill it with some batter. Move the slider back and forth to let small dumplings drop into the boiling water. Cook for about 2-4 minutes or until they float to the surface.
With a Colander: Hold the colander over the boiling water and use a spatula to push the batter through the holes. The dough will drop into the water as irregularly shaped pieces.
With a Slotted Spoon: Another method is to place a spoonful of dough on a slotted spoon and press it through the holes directly into the boiling water.
Cook the Spätzle: Let the Spätzle boil for 2-4 minutes or until they float to the surface. Remove them with a slotted spoon and place them in a bowl.
Sauté with Butter: In a large skillet, melt the butter over medium heat. Add the boiled Spätzle and sauté for a few minutes until they turn slightly golden and get a nice, buttery coating.
Serve and Garnish: Plate your homemade Spätzle and sprinkle them with chopped fresh parsley for a burst of color and flavor.
Enjoy your homemade Spätzle, which are incredibly versatile. You can serve them as a side dish, tossed with butter and herbs, or even topped with a flavorful sauce or grated cheese. This delicious German pasta will transport your taste buds straight to the heart of Europe. Guten Appetit!
Instructions
In a large bowl, mix flour and salt.
In another bowl, beat eggs, milk, and water together.
Pour the wet mixture into the dry mixture and stir until smooth.
Let the dough rest for about 30 minutes.
Bring a large pot of
salted water to a boil.
Push the dough through a Spätzle press or a colander with large holes into the boiling water.
Cook until the Spätzle float to the surface, about 2-4 minutes.
Drain the Spätzle and sauté them in butter.
Sprinkle with chopped parsley before serving.
Taste of Tradition: Spätzle is the epitome of German comfort food, simple yet incredibly satisfying.
Recipe 6: Sauerkraut Soup
The Comfort of Sauerkraut Soup: My Go-To Recipe for Cozy Days
There’s something about Sauerkraut Soup that feels like home to me. Maybe it’s the warm, tangy broth, or the tender chunks of pork that swim in it, making every spoonful so satisfying. I first tried it on a cold, rainy day when I was craving something hearty but comforting. From that moment on, I’ve been hooked.
This isn’t your average soup. The beauty of Sauerkraut Soup lies in how the sauerkraut, with all its tart, fermented goodness, mingles perfectly with savory pork and vegetables. The flavors just work. It’s the kind of dish that feels like it has a story to tell, a recipe passed down in families, generation after generation. You can almost taste the history in each bite. And I get it. This is the kind of food that feels made to be shared with loved ones.
Let me take you through how I make it. It’s a little bit of a labor of love, but trust me the results are totally worth it.
What You’ll Need
I’m all about keeping things simple in the kitchen, but that doesn’t mean I skimp on flavor. Here’s what you’ll need to make Sauerkraut Soup:
- 2 cups of sauerkraut (drained and rinsed) – You want that tang, but you don’t want it too salty. A good rinse does the trick.
- 1 lb pork shoulder or smoked sausage – I like using both. The pork adds richness, while the sausage gives it that extra depth.
- 3-4 medium potatoes – These help give the soup body, making it feel like a full meal.
- 2 carrots, chopped – Adds a little sweetness to balance the tanginess of the sauerkraut.
- 1 large onion, diced – The foundation of flavor, no question about it.
- 3 cloves of garlic, minced – Because garlic is life.
- 2 bay leaves – For a subtle, aromatic touch.
- 1 tsp dried thyme – This herb is the secret that brings everything together.
- 4 cups of broth (chicken or vegetable) – This is the soup’s base. I typically go with chicken broth for extra richness.
- 1 tsp smoked paprika – Just a touch of smokiness adds another layer of flavor.
- Salt and pepper – Season it to taste.
- Sour cream – Totally optional, but I love a dollop on top for that extra creaminess and tang.
Let’s Get Cooking
Here’s how I go from a pile of ingredients to a steaming pot of delicious Sauerkraut Soup:
Step 1: Brown the Meat
I start by cutting the pork shoulder (if I’m using it) into chunks and slicing the sausage. If you’re like me, you’re probably already getting hungry just reading this. Heat a large pot over medium-high heat and add a little oil. When it’s hot enough, I throw the pork in first, browning it on all sides takes about 5 minutes. Then, I add the sausage to the mix, letting it crisp up a bit, too. The smell of the meat browning is seriously heavenly.
Once the pork and sausage are browned, I take them out of the pot and set them aside. I don’t clean the pot. Those little brown bits at the bottom? Pure gold. I want every bit of that flavor.
Step 2: Sauté the Veggies
Next, I toss in the onions and carrots. I let them cook until they soften and the onions turn translucent usually takes about 5 minutes. You’ll start to smell that savory base coming together. After that, I throw in the garlic and cook it for another minute, just long enough for it to become fragrant. By this time, my kitchen is filled with all the right smells.
Step 3: Add the Sauerkraut and Broth
Time to add the sauerkraut. I give it a good rinse first because I don’t want the soup to be too salty. I let it cook with the onions and garlic for a few minutes so the flavors can meld. Then, I pour in the broth. I usually go with chicken broth, but vegetable broth works just as well if I want something a little lighter. Bring everything to a boil, then lower the heat and let it simmer.
Step 4: Bring the Meat Back In
Once the broth is simmering, I add the browned pork and sausage back into the pot. I toss in the bay leaves and thyme, then stir in the smoked paprika. This is when the magic happens. The meat, sauerkraut, and spices start to combine, creating a rich, savory base. I let the soup simmer for about 45 minutes, giving the pork plenty of time to become tender and letting all those flavors really come together. Sometimes, I’ll add a little more broth if the soup’s getting too thick it’s meant to be hearty, but you still want it to be a nice, drinkable soup, not a stew.
Step 5: Add the Potatoes
After about 45 minutes, I add the potatoes. They soak up all that rich flavor, and by the time they’re soft (usually 20-30 minutes), the soup is perfect. It’s thick, it’s flavorful, and the potatoes have absorbed all that delicious broth.
At this point, I taste the soup to check the seasoning. A little more salt? A pinch more pepper? Maybe a dash of smoked paprika? I like to make sure everything is balanced just right.
Step 6: Serve It Up
Now, the best part eating it! I ladle the soup into bowls, and sometimes I add a dollop of sour cream on top. The creaminess helps balance out the tang of the sauerkraut, and it’s just the best thing ever. If I’m feeling fancy, I sprinkle a little fresh parsley on top. But honestly, most of the time I’m just so eager to dive in that I skip the garnish.
Why I Love This Soup
What I love most about Sauerkraut Soup is how it feels like a cozy, old-fashioned meal. It’s rich, hearty, and soul-soothing. The sauerkraut gives it just the right amount of tang, while the pork adds that deep, savory flavor that makes every bite feel like a warm hug.
This soup is a meal in itself, but I’ll often serve it with a thick slice of crusty bread to mop up all that flavorful broth. And as much as I love it fresh, this soup tastes even better the next day, after all the flavors have had a chance to settle in and mingle.
A Few Extra Tips:
- Storage: This soup keeps beautifully in the fridge for a few days. In fact, I actually think it gets better over time, so don’t be afraid to make a big batch and enjoy it throughout the week.
- Freezing: If you want to freeze it, let it cool completely before transferring it to airtight containers. It’ll last up to 3 months in the freezer.
- Vegetarian Version: If you’re not into meat, feel free to skip it entirely. Add in some beans or mushrooms for a hearty, filling soup that’s still rich in flavor.
There you have it my favorite way to make Sauerkraut Soup. It’s comfort in a bowl, and I know it’ll be your go-to on those cozy, rainy days, just like it is for me.
Conclusion
Congratulations, you’ve just embarked on a culinary journey through Germany, and you’ve got a treasure trove of authentic recipes at your fingertips. From the sizzle of Bratwurst to the sweetness of Black Forest Cake, each dish tells a story of German culture and tradition. So, next time you’re in the mood for something authentic and delicious, give these recipes a try. Your taste buds will thank you!
These recipes not only bring the flavors of Germany to your kitchen but also offer a glimpse into the heart of a country with a rich and diverse culinary heritage. Whether you’re savoring a hearty pork knuckle or indulging in a slice of Black Forest Cake, each dish carries with it a piece of German history and culture.
So, gather your ingredients, don your apron, and get cooking. It’s time to experience the authentic tastes of Germany right in your own home. Guten Appetit! ️
a Guy Who’s Cooked Too Many of These
Listen, Eisbein isn’t just food. It’s an experience. A glorious, meaty, messy one. It takes time. You’ll need a pot bigger than your head. But when that crispy skin shatters under your fork and the tender meat melts on your tongue… it’s all worth it.
It’s not fancy. It’s not delicate. But it’s real. And it’s damn good.
So if you’re tired of bland dinners and ready to cook something that’ll make you feel like a Viking king with a beer stein in hand, make this. And don’t forget to leave room for seconds. You’ll need it.
A Side Dish That Became Center Stage
Look, I’ve made plenty of food in my life. Some of it? Total disasters. Some? Forgettable. But this one? This salad became mine. It’s the one I bring to gatherings with a smug little smirk. It’s the one that gets eaten first. It’s the one people text me about weeks later, asking for the recipe.
It doesn’t need to be trendy. It doesn’t care if it’s photogenic. It just shows up, does the job, and leaves people stunned.
So yeah, call it a side dish if you want. But let’s be honest this salad is the moment. And if you ever find yourself in a tiny diner in Munich, do yourself a favor and try the potato salad.
It just might change your life. It sure changed mine.
Calculate Recipe Calories
World Trade Center Footage | Webex Costs | Virtual Data Rooms | Structures Annuity Settlement | Sell Annuity Payment | Neuson | Online Classes | Nunavut Culture | Online College Course | Motor Replacements | Motor Insurance Quotes | Mortgage Adviser | Met Auto | Tax credit | Help desk software | Home refinancing | Urgent care | Marketing integration | Debt relief | Bitcoin | Fitness center software | Insurance | Gas | Electricity | Weight loss | Sell house for cash | Automotive repair | Loans | Internet marketing | Mortgage | Attorney | SEO specialist | Lawyer | Donate | Conference Call | Treatment | Degree | Software | Credit | Classes | Investing | Recovery | Trading | Rehab | Hosting | Cord Blood | Claim | Automotive warranty | Paintless dent repair | Mesothelioma Law Firm | Massage School Dallas Texas | Low Credit Line Credit Cards | Life Insurance Co Lincoln | Insurance Companies | Injury Lawyers | How to Donate A Car in California | Home Phone Internet Bundle | Holland Michigan College | Royalty-Free Images Stock | Register Free Domains | Psychic for Free | Ph.D. in Counseling Education | Personal Injury Lawyers | Personal Injury Law Firm | PaperPort Promotional Code | Online Stock Trading | Online Motor Insurance Quotes | Donate your Car for Money | Online Colleges | Health Records, Personal Health Record | Hard drive Data Recovery Services | Donate Old Cars to Charity | Forex Trading Platform | Forensics Online Course | Donate Car to Charity California | Donate Car for Tax Credit | Car Insurance Quotes PA | Email Bulk Service | Donating Used Cars to Charity | Donating a Car in Maryland | Donate Your Car Sacramento | Online Criminal Justice Degree | Donate Your Car for Kids | Futuristic Architecture | Donate Cars in MA | Data Recovery Raid | Mesothelioma | A car accident lawyer | Personal injury lawyer | AC repair | Lawsuit settlements | Car insurance | Flood recovery | Water damage restoration | Rehab doctors | Online degree | Online master’s degree | Doctoral programs | Hail car insurance