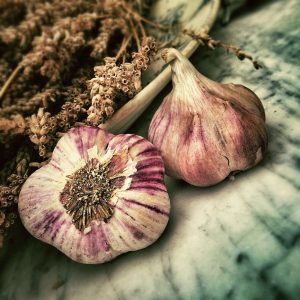
Mastering the Art of Roasting Garlic in 7 Easy Steps
When it comes to elevating your culinary game, one simple yet transformative technique stands out: roasting garlic in the oven. The magic of roasted garlic lies in its ability to turn a pungent and spicy bulb into a sweet and mellow paste that can enhance countless dishes. Whether you’re a seasoned cook or just starting your culinary journey, mastering the art of roasting garlic is a must.
The Magic of Roasted Garlic:Before we dive into the nitty-gritty of roasting garlic, let’s take a moment to appreciate the magic that happens during this process. Raw garlic is known for its strong, sometimes overpowering, flavor and pungent aroma. However, when garlic is roasted in the oven, a remarkable transformation occurs.
The high heat softens and caramelizes the garlic cloves, reducing their spiciness and enhancing their natural sweetness. The result is a creamy, spreadable, and utterly delicious roasted garlic paste that can be used in a wide variety of dishes.
Culinary Uses of Roasted Garlic:The culinary world treasures roasted garlic for its versatile applications. Here are just a few ways you can use it:
Mashed Potatoes:Mix a few cloves of roasted garlic into your mashed potatoes for a delightful twist.
Pasta Sauces:Add roasted garlic to your pasta sauces for a rich and deep flavor.
Spreads:Blend roasted garlic with butter or cream cheese for a delectable spread on bread or crackers.
Roasted Vegetables:Toss your favorite vegetables with roasted garlic for a fragrant side dish.
Soups:Enhance the flavor of your soups by stirring in some roasted garlic paste.
Meats:Use it as a flavorful rub for meats, such as chicken or beef.
Salad Dressings:Incorporate roasted garlic into salad dressings for a unique taste.
Now, let’s get into the heart of the matter and learn how to roast garlic in 7 simple steps.
Preparation and Ingredients
Ingredients You’ll Need
Before you start roasting garlic, make sure you have these simple ingredients on hand:A head of garlic
Olive oil
Salt
Aluminum foil
Choose the Right Garlic
The first step in this flavorful journey is selecting the right garlic. Look for a medium-sized head of garlic with firm, unblemished cloves. The variety isn’t particularly important, but most people prefer using regular white garlic for roasting.
Step-by-Step Guide
Are you ready to roast some garlic? Let’s dive into the 7 simple steps that will turn your garlic into a delectable masterpiece.
Step 1: Preheating the Oven:Start by preheating your oven to 400°F (200°C). This moderate heat ensures that the garlic roasts evenly without burning.
Step 2: Cutting the Garlic Bulb:While the oven is heating up, take your head of garlic and slice off the top to expose the cloves. You want to make sure that each clove is slightly exposed but still attached to the root base.
Step 3: Drizzling with Olive Oil:Place the prepared garlic head on a small piece of aluminum foil. Drizzle a generous amount of olive oil over the exposed cloves. The oil will help in the roasting process and infuse the garlic with its rich flavor.
Step 4: Wrapping in Foil:Now, wrap the garlic head snugly in the aluminum foil, creating a little packet. Ensure that it’s well-sealed to trap the steam inside during roasting.
Step 5: Roasting:Place the foil-wrapped garlic packet directly on the oven rack. Roast it for about 30-35 minutes. During this time, the garlic cloves will become tender and take on a beautiful golden hue.
Step 6: Testing for Doneness:After about 30 minutes, carefully remove the garlic packet from the oven. Allow it to cool for a few minutes. Then, gently open the foil and check the cloves. They should be soft, fragrant, and lightly browned.
Step 7: Extracting the Roasted Cloves:Once the garlic is cool enough to handle, use a fork or your fingers to extract the roasted garlic cloves. They should slip out of their papery skins easily, leaving you with creamy, golden cloves.
Creative Uses:With your freshly roasted garlic in hand, you’re now equipped to take your culinary creations to the next level. Here are some creative ideas for using your roasted garlic:
Roasted Garlic and Herb Butter:Mash your roasted garlic with some butter and fresh herbs to create a
delightful spread for bread or rolls.
Creamy Roasted Garlic Mashed Potatoes:Mix the roasted garlic into your mashed potatoes for a subtle yet rich flavor.
Roasted Garlic Aioli:Blend the cloves with mayonnaise and a touch of lemon juice to make a flavorful dip or sauce.
Roasted Garlic Pizza:Spread the roasted garlic paste on pizza crust as a base sauce, then add your favorite toppings.
Roasted Garlic Hummus:Incorporate roasted garlic into your hummus recipe for an earthy twist.
Roasted Garlic Soup:Make a creamy roasted garlic soup by blending the cloves with stock and cream.
Troubleshooting and Tips:As with any culinary adventure, you might encounter a few challenges along the way. Here are some common issues and tips for perfecting your roasted garlic:
Bitterness:If your roasted garlic turns bitter, it may be overcooked. Keep an eye on it in the oven, and don’t let it become too dark.
Inconsistent Roasting:To ensure even roasting, select garlic bulbs with uniform-sized cloves and make sure the cloves are exposed evenly.
Storing Roasted Garlic:You can store roasted garlic cloves in the refrigerator in an airtight container for up to a week or freeze them for longer-term use.
Simple Roasted Garlic Paste
Ingredients:
1 head of garlic
Olive oil
Salt and pepper to taste
Directions
Preheat your oven to 400°F (200°C).
Slice off the top of the garlic head to expose the cloves.
Place it on a piece of foil, drizzle with olive oil, and season with salt and pepper.
Wrap the garlic head tightly in foil and roast for 30-35 minutes.
Let it cool, then squeeze out the roasted cloves. Mash them into a paste. Enjoy as a spread or flavor enhancer.
Preheat the Oven:Start by preheating your oven to 400°F (200°C).
Prepare the Garlic:Take whole garlic bulbs and remove any loose outer layers, leaving the cloves intact. You can choose to cut off the top of the bulbs to expose the cloves, but this is optional.
Roast the Garlic:Place the prepared garlic bulbs in a baking dish. Drizzle olive oil over the garlic, ensuring each bulb is coated. You can sprinkle a pinch of salt and pepper if you desire some seasoning.
Cover and Roast:Cover the baking dish with aluminum foil. Roast the garlic in the preheated oven for about 40-45 minutes, or until the cloves become soft and golden. Roasting time may vary depending on the size of the garlic bulbs.
Cool and Extract Paste:Once the garlic is roasted to perfection, allow it to cool slightly. Then, simply squeeze the roasted garlic cloves out of their skins. They should come out easily and have a creamy texture.
Mash into Paste:Use a fork or the back of a spoon to mash the roasted garlic cloves into a smooth paste. You can also use a food processor for a finer consistency.
Store:Transfer the roasted garlic paste to an airtight container. It can be stored in the refrigerator for up to a week, or you can freeze it for longer preservation.
Use:Your Simple Roasted Garlic Paste is ready to enhance the flavor of various dishes. Use it in sauces, soups, spreads, or as a flavorful condiment.For precise measurements and detailed steps, please consult a comprehensive recipe source. Happy cooking, and enjoy the rich, roasted garlic goodness! ️
Instructions
Preheat your oven to 400°F (200°C).
Cut the top off the garlic head to expose the cloves.
Drizzle with olive oil and season with salt and pepper.
Wrap the garlic head in aluminum foil and place it in the oven.
Roast for 30-40 minutes until the cloves are soft and golden.
Squeeze the roasted cloves into a bowl and mash them into a paste.
Use this aromatic paste in soups, spreads, or as a marinade.
Rosemary Roasted Garlic
Ingredients
1 head of garlic
Olive oil
Fresh rosemary
Salt and pepper to taste
Directions
Preheat your oven to 400°F (200°C).
Prepare the garlic head as in the previous recipe.
Add fresh rosemary leaves to the olive oil, then drizzle this mixture over the garlic.
Wrap in foil and roast for 30-35 minutes.
Once cool, serve the aromatic roasted garlic alongside roasted meats or as a condiment for bread.
Preheat the Oven:Start by preheating your oven to 400°F (200°C).
Prepare the Garlic:Take whole garlic bulbs and remove any loose outer layers, leaving the cloves intact. Optionally, cut off the top of the bulbs to expose the cloves.
Roast the Garlic:Place the prepared garlic bulbs in a baking dish. Drizzle olive oil over the garlic, ensuring each bulb is coated. You can also sprinkle a pinch of salt and pepper for seasoning.
Add Rosemary:Place fresh rosemary sprigs around and on top of the garlic bulbs to infuse the flavor of rosemary.
Cover and Roast:Cover the baking dish with aluminum foil. Roast the garlic in the preheated oven for about 40-45 minutes, or until the cloves become soft and golden. The roasting time may vary depending on the size of the garlic bulbs.
Cool and Serve:Once the garlic is roasted to perfection, allow it to cool slightly. Remove the rosemary sprigs. Then, simply squeeze the roasted garlic cloves out of their skins. They should come out easily and have a creamy texture.
Use:Your Rosemary Roasted Garlic is ready to enhance the flavor of various dishes. Use it in sauces, spreads, mashed potatoes, or as a flavorful condiment. The addition of rosemary gives it a delightful herbal aroma and taste.For precise measurements and detailed steps, please consult a comprehensive recipe source. Happy cooking, and enjoy the aromatic and roasted garlic with a hint of rosemary! ️
Instructions
Preheat your oven to 400°F (200°C).
Cut the top off the garlic head.
Drizzle with olive oil and season with salt and pepper.
Place a few rosemary sprigs on top.
Wrap the garlic head in aluminum foil.
Roast for 30-40 minutes until the cloves are tender and have a rosemary aroma.
Squeeze the roasted cloves onto bread or use in mashed potatoes for a fragrant twist.
Lemon Infused Roasted Garlic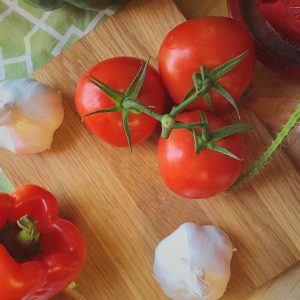
Ingredients
1 head of garlic
Olive oil
Zest and juice of 1 lemon
Salt and pepper to taste
Directions
Preheat your oven to 400°F (200°C).
Follow the same preparation steps as in the previous recipes.
Mix the lemon zest and juice with olive oil, then drizzle it over the garlic.
Roast in foil for 30-35 minutes.
After cooling, use the lemony roasted garlic in salad dressings or to brighten up roasted vegetables.
Preheat the Oven:Start by preheating your oven to 400°F (200°C).
Prepare the Garlic:Take whole garlic bulbs and remove any loose outer layers, leaving the cloves intact. Optionally, cut off the top of the bulbs to expose the cloves.
Roast the Garlic:Place the prepared garlic bulbs in a baking dish. Drizzle olive oil over the garlic, ensuring each bulb is coated. You can also sprinkle a pinch of salt and pepper for seasoning.
Lemon Infusion:Sprinkle lemon zest from one lemon over the garlic bulbs. Then, drizzle lemon juice from the same lemon on top.
Cover and Roast:Cover the baking dish with aluminum foil. Roast the garlic in the preheated oven for about 40-45 minutes, or until the cloves become soft and golden. The roasting time may vary depending on the size of the garlic bulbs.
Cool and Serve:Once the garlic is roasted to perfection, allow it to cool slightly. Then, simply squeeze the roasted garlic cloves out of their skins. They should come out easily and have a creamy texture with a delightful lemony aroma and taste.
Use:Your Lemon Infused Roasted Garlic is ready to enhance the flavor of various dishes. Use it in sauces, spreads, as a condiment, or in any recipe where you want a zesty garlic twist.For precise measurements and detailed steps, please consult a comprehensive recipe source. Happy cooking, and enjoy the citrusy delight of lemon-infused roasted garlic! ️
Instructions
Preheat your oven to 400°F (200°C).
Cut the top off the garlic head.
Drizzle with olive oil and season with salt and pepper.
Squeeze the lemon juice and sprinkle the zest over the garlic.
Wrap the garlic head in aluminum foil.
Roast for 30-40 minutes until the cloves are soft and infused with lemony goodness.
Squeeze the roasted cloves onto roasted vegetables or grilled chicken for a zesty flavor.
Roasted Garlic Butter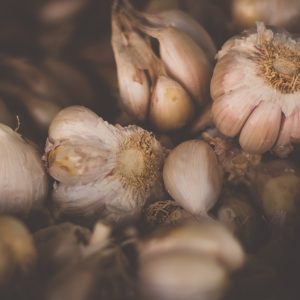
Ingredients
1 head of garlic
Olive oil
1/2 cup unsalted butter, softened
Salt and pepper to taste
Directions
Preheat your oven to 400°F (200°C).
Prepare the garlic as in the earlier recipes.
While roasting, mix the softened butter with salt and pepper.
Squeeze out the roasted cloves and mash them into the butter.
Use this delectable roasted garlic butter on bread, as a steak topping, or to sauté vegetables.
Roast the Garlic:Start by roasting whole garlic bulbs. To do this, preheat your oven to 400°F (200°C). Take whole garlic bulbs, remove any loose outer layers, and optionally cut off the top of the bulbs to expose the cloves. Place them in a baking dish, drizzle a little olive oil over them, and season with a pinch of salt and pepper if desired. Cover the dish with aluminum foil and roast the garlic in the preheated oven for about 40-45 minutes, or until the cloves become soft and golden. The roasting time may vary depending on the size of the garlic bulbs.
Cool and Extract Paste:Once the roasted garlic bulbs have cooled slightly, simply squeeze the cloves out of their skins. They should come out easily and have a creamy texture.
Prepare Garlic Butter:In a mixing bowl, combine the softened unsalted butter with the roasted garlic paste. You can use a fork or a food processor to blend the two until the mixture is smooth and well incorporated.
Season:Taste the garlic butter and adjust the seasoning with salt and pepper to your preference.
Store:Transfer the Roasted Garlic Butter to an airtight container or shape it into a log using plastic wrap. Store it in the refrigerator. It can also be frozen for longer preservation.
Use:Your Roasted Garlic Butter is now ready to be used in a variety of dishes. Spread it on bread, use it to flavor vegetables, or as a topping for grilled meats and seafood.For precise measurements and comprehensive instructions, please consult a detailed recipe source. Enjoy your flavorful homemade Roasted Garlic Butter! ️
Instructions
Preheat your oven to 400°F (200°C).
Cut the top off the garlic head.
Drizzle with olive oil and season with salt and pepper.
Wrap the garlic head in aluminum foil and roast for 30-40 minutes.
Meanwhile, simmer crushed tomatoes in a saucepan and add fresh basil leaves.
Squeeze the roasted garlic cloves into the tomato sauce.
Simmer for a few more minutes, then serve over pasta or as a dipping sauce.
Roasted Garlic and Tomato Sauce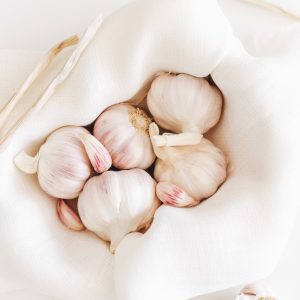
Ingredients
1 head of garlic
Olive oil
2 cups of canned tomatoes
Salt and pepper to taste
Directions
Preheat your oven to 400°F (200°C).
Prepare the garlic as usual.
In an oven-safe dish, combine olive oil, canned tomatoes, and the roasted garlic head.
Roast for 30-35 minutes.
Use a blender to blend the tomatoes and roasted garlic into a flavorful sauce for pasta or pizza.
Preheat the Oven:Start by preheating your oven to 400°F (200°C).
Prepare the Tomatoes:Wash the tomatoes and cut a small X at the bottom of each one. This helps with the peeling process. Place them in a baking dish.
Roast the Garlic:Take whole garlic bulbs, remove any loose outer layers, and optionally cut off the top to expose the cloves. Drizzle a little olive oil over the garlic, wrap them in aluminum foil, and place them in the same baking dish as the tomatoes.
Roast Tomatoes and Garlic:Drizzle olive oil over the tomatoes, season with salt and pepper, and roast both the tomatoes and garlic in the preheated oven for about 40-45 minutes, or until the tomatoes are soft and their skins start to peel. The roasted garlic cloves should become soft and golden. The roasting time may vary depending on the size of the tomatoes and garlic bulbs.
Cool and Peel:Once the roasted tomatoes and garlic have cooled slightly, remove the skins from the tomatoes (the X you made at the bottom makes this easier) and squeeze the garlic cloves out of their skins. Discard the garlic skins.
Blend:Place the roasted tomatoes and garlic in a food processor or blender. Add fresh basil leaves and red pepper flakes for extra flavor if desired. Blend until the mixture is smooth.
Simmer:Transfer the tomato and garlic puree to a saucepan and simmer over low heat. This allows the flavors to meld and the sauce to thicken. Season with more salt and pepper if needed.
Serve:Your Roasted Garlic and Tomato Sauce is ready to enhance a variety of dishes. Use it as a pasta sauce, pizza sauce, or a flavorful dip.For precise measurements and detailed steps, please consult a comprehensive recipe source. Enjoy your homemade Roasted Garlic and Tomato Sauce! ️
Instructions
Preheat your oven to 400°F (200°C).
Cut the top off the garlic head.
Drizzle with olive oil and season with salt, pepper, and a pinch of red pepper flakes.
Wrap the garlic head in aluminum foil and roast for 30-40 minutes.
Squeeze the roasted garlic cloves onto pizza, pasta, or into a spicy hummus dip for a flavorful kick.
Spicy Roasted Garlic
Ingredients
1 head of garlic
Olive oil
1 teaspoon paprika
1/2 teaspoon cayenne pepper
Salt and pepper to taste
Directions
Preheat your oven to 400°F (200°C).
Prepare the garlic as in previous recipes.
Mix paprika, cayenne, salt, and pepper with olive oil.
Drizzle this spicy blend over the garlic and roast for 30-35 minutes.
Enjoy as a fiery condiment or as an ingredient to add a kick to various dishes.
Preheat the Oven:Start by preheating your oven to 400°F (200°C).
Prepare the Garlic:Take whole garlic bulbs, remove any loose outer layers, and optionally cut off the top of the bulbs to expose the cloves.
Spice It Up:Sprinkle red pepper flakes over the garlic bulbs, adjusting the quantity to achieve your preferred level of spiciness.
Roast the Garlic:Place the prepared garlic bulbs in a baking dish. Drizzle olive oil over them, ensuring each bulb is coated. You can also sprinkle a pinch of salt and pepper if you desire some seasoning.
Cover and Roast:Cover the baking dish with aluminum foil. Roast the garlic in the preheated oven for about 40-45 minutes, or until the cloves become soft and golden. Roasting time may vary depending on the size of the garlic bulbs.
Cool and Serve:Once the garlic is roasted to perfection, allow it to cool slightly. Then, simply squeeze the roasted garlic cloves out of their skins. They should come out easily and have a creamy texture with a spicy kick.
Use:Your Spicy Roasted Garlic is ready to enhance the flavor of various dishes. Use it in sauces, spreads, mashed potatoes, or as a flavorful condiment, adding a delightful touch of spiciness.For precise measurements and comprehensive instructions, please consult a detailed recipe source. Enjoy your spicy roasted garlic! ️️
Instructions
Preheat your oven to 400°F (200°C).
Cut the top off the garlic head.
Drizzle with olive oil, balsamic vinegar, and season with salt and pepper.
Place a few fresh thyme sprigs on top.
Wrap the garlic head in aluminum foil and roast for 30-40 minutes.
Squeeze the roasted garlic cloves onto grilled meats or as a topping for bruschetta.
Balsamic Roasted Garlic with Thyme
Ingredients
1 head of garlic
Olive oil
2 tablespoons balsamic vinegar
Fresh thyme leaves
Salt and pepper to taste
Directions
Preheat your oven to 400°F (200°C).
Prepare the garlic as in the earlier recipes.
Drizzle olive oil, balsamic vinegar, fresh thyme leaves, salt, and pepper over the garlic.
Roast in foil for 30-35 minutes.
Use this balsamic-infused roasted garlic to elevate your salads or to marinate meats.
Preheat the Oven:Start by preheating your oven to 400°F (200°C).
Prepare the Garlic:Take whole garlic bulbs, remove any loose outer layers, and optionally cut off the top of the bulbs to expose the cloves.
Roast the Garlic:Place the prepared garlic bulbs in a baking dish. Drizzle olive oil over them, ensuring each bulb is coated. You can also sprinkle a pinch of salt and pepper if you desire some seasoning.
Balsamic Infusion:Drizzle balsamic vinegar over the garlic bulbs to infuse them with the rich, tangy flavor of balsamic.
Add Fresh Thyme:Place fresh thyme sprigs around and on top of the garlic bulbs to enhance the aroma and taste.
Cover and Roast:Cover the baking dish with aluminum foil. Roast the garlic in the preheated oven for about 40-45 minutes, or until the cloves become soft and golden. The roasting time may vary depending on the size of the garlic bulbs.
Cool and Serve:Once the garlic is roasted to perfection, allow it to cool slightly. Then, simply squeeze the roasted garlic cloves out of their skins. They should come out easily and have a creamy texture with the delightful combination of balsamic and thyme.
Use:Your Balsamic Roasted Garlic with Thyme is ready to enhance the flavor of various dishes. Use it in sauces, spreads, as a condiment, or in any recipe where you want a touch of balsamic richness and thyme freshness.For precise measurements and detailed steps, please consult a comprehensive recipe source. Enjoy your flavorful homemade Balsamic Roasted Garlic with Thyme! ️
Instructions
Preheat the Oven:Start by preheating your oven to 400°F (200°C). This ensures that your garlic roasts to perfection.
Prepare the Garlic:Take a head of garlic and cut off the top to expose the cloves. This allows the garlic to roast evenly and develop a rich, roasted flavor.
Season the Garlic:Drizzle the exposed garlic cloves with a generous amount of olive oil. This not only infuses them with a delightful richness but also helps achieve a tender and golden-brown texture. Season the garlic with a pinch of salt and pepper to enhance its flavor.
Balsamic Vinegar Magic:Here’s where the magic happens. Drizzle a moderate amount of balsamic vinegar over the garlic. The combination of sweetness and tanginess from the vinegar will add a unique dimension to the roasted garlic.
Thyme to Infuse Aroma:To elevate the aroma and flavor, place several fresh thyme sprigs on top of the garlic. Thyme’s earthy and herbaceous notes will infuse into the garlic as it roasts.
Wrap and Roast:Carefully wrap the garlic head in aluminum foil, ensuring it’s sealed tightly. This allows the garlic to roast in its own juices and the added flavors.
Roasting Time:Place the wrapped garlic in the preheated oven and let it roast for approximately 30-40 minutes. You’ll know it’s ready when the garlic cloves are soft, fragrant, and have a golden-brown hue.
Squeeze and Serve:Once the roasted garlic is done, carefully unwrap it. To extract the aromatic roasted cloves, simply squeeze them out. They should be tender and practically melt in your fingers.
Serve and Enjoy:Balsamic roasted garlic with thyme is a versatile and delightful condiment. You can serve it as a topping for grilled meats, use it to flavor vegetables, spread it on fresh bread or crackers, or incorporate it into your favorite recipes for an extra layer of flavor.
Conclusion
Congratulations! You’ve now mastered the art of roasting garlic in the oven. The ability to turn a humble bulb of garlic into a delectable and versatile ingredient is a skill that will serve you well in the kitchen. Experiment with your roasted garlic in various dishes, and you’ll quickly discover why it’s a favorite among chefs and home cooks alike.
Incorporate the tips and troubleshooting advice provided, and soon you’ll be roasting garlic like a pro, adding depth and flavor to your favorite recipes. Happy roasting!
Roasted garlic is a culinary gem that elevates the flavors of your dishes. Whether you prefer the simplicity of classic roasted garlic or the complexity of balsamic and thyme-infused garlic, these recipes offer a range of flavors to suit your palate. Enjoy the versatility of roasted garlic in your favorite dishes and savor the aromatic delights it brings to your culinary creations.
World Trade Center Footage | Webex Costs | Virtual Data Rooms | Structures Annuity Settlement | Sell Annuity Payment | Neuson | Online Classes | Nunavut Culture | Online College Course | Motor Replacements | Motor Insurance Quotes | Mortgage Adviser | Met Auto | Tax credit | Help desk software | Home refinancing | Urgent care | Marketing integration | Debt relief | Bitcoin | Fitness center software | Insurance | Gas | Electricity | Weight loss | Sell house for cash | Automotive repair | Loans | Internet marketing | Mortgage | Attorney | SEO specialist | Lawyer | Donate | Conference Call | Treatment | Degree | Software | Credit | Classes | Investing | Recovery | Trading | Rehab | Hosting | Cord Blood | Claim | Automotive warranty | Paintless dent repair | Mesothelioma Law Firm | Massage School Dallas Texas | Low Credit Line Credit Cards | Life Insurance Co Lincoln | Insurance Companies | Injury Lawyers | How to Donate A Car in California | Home Phone Internet Bundle | Holland Michigan College | Royalty-Free Images Stock | Register Free Domains | Psychic for Free | Ph.D. in Counseling Education | Personal Injury Lawyers | Personal Injury Law Firm | PaperPort Promotional Code | Online Stock Trading | Online Motor Insurance Quotes | Donate your Car for Money | Online Colleges | Health Records, Personal Health Record | Hard drive Data Recovery Services | Donate Old Cars to Charity | Forex Trading Platform | Forensics Online Course | Donate Car to Charity California | Donate Car for Tax Credit | Car Insurance Quotes PA | Email Bulk Service | Donating Used Cars to Charity | Donating a Car in Maryland | Donate Your Car Sacramento | Online Criminal Justice Degree | Donate Your Car for Kids | Futuristic Architecture | Donate Cars in MA | Data Recovery Raid | Mesothelioma | A car accident lawyer | Personal injury lawyer | AC repair | Lawsuit settlements | Car insurance | Flood recovery | Water damage restoration | Rehab doctors | Online degree | Online master’s degree | Doctoral programs | Hail car insurance

