
7 Christmas Dessert Recipes: A Festive Feast for Your Taste Buds
‘Tis the season to indulge in delightful Christmas desserts that warm your heart and satisfy your sweet tooth. As we gather around the holiday table, these 7 Christmas dessert recipes will add the perfect sweet ending to your festive feast. From classic Christmas pudding to whimsical gingerbread houses, there’s something here for everyone to enjoy.
Let’s kick things off with a classic – Christmas pudding. This rich, fruity dessert has been a staple of holiday celebrations for generations. It’s a symbol of tradition and a must-have on many Christmas menus.
Classic Christmas Pudding Recipe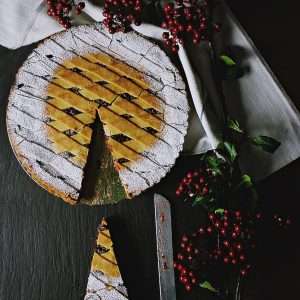
Ingredients
Ingredient Quantity
Raisins 1 cup
Currants 1 cup
Sultanas 1 cup
Candied Peel (mixed) ½ cup
Chopped Nuts (optional) ½ cup
Grated Apple 1
Brown Sugar 1 cup
Breadcrumbs 1 cup
All-Purpose Flour 1 cup
Mixed Spice 1 tsp
Ground Cinnamon 1 tsp
Nutmeg (freshly grated) 1 tsp
Butter (melted) 1 cup
Eggs 4
Brandy ½ cup
Milk ½ cup
Directions
First, gather all your ingredients. It’s like a treasure hunt in your kitchen!
In a large mixing bowl, combine the raisins, currants, sultanas, candied peel, chopped nuts, and grated apple. These fruits are the stars of our show, so let them shine!
Add the brown sugar, breadcrumbs, all-purpose flour, mixed spice, ground cinnamon, and freshly grated nutmeg to the fruit mixture. It’s like creating a flavorful orchestra of ingredients.
In a separate bowl, whisk together the melted butter, eggs, brandy, and milk. Pour this delightful liquid mixture into your dry ingredients. Mix it all up until you have a gooey, fragrant batter.
Grease a pudding basin (a heatproof bowl) with a little extra butter. Your pudding is going to feel right at home in there.
Pour the pudding mixture into the greased basin. Pack it in tightly; you want it cozy in there!
Cover the pudding basin with a double layer of parchment paper and foil. Secure it with a piece of string – a little Christmas gift-wrap action!
Now, it’s time to steam the pudding. Place it in a large pot with enough boiling water to reach halfway up the sides of the basin. Pop on a lid and let it steam away for about 6 hours. Yes, you read that right, patience is key.
Check the water level occasionally to ensure it doesn’t run dry. You don’t want your pudding to turn into a Christmas desert!
Once the pudding has steamed to perfection, remove it from the pot, discard the foil and parchment, and let it cool.
When you’re ready to serve, reheat the pudding by steaming it for another 2 hours. This step ensures it’s piping hot and ready to dazzle your taste buds.
Finally, serve your Classic Christmas Pudding with a dollop of brandy butter, custard, or even a scoop of vanilla ice cream. It’s a dessert extravaganza!
Pro Tips:Make this pudding well in advance, even weeks before Christmas. The flavors meld and mature over time, creating a truly magical dessert.
If you’re feeling adventurous, you can flame your pudding with extra brandy just before serving. Be cautious and have a fire extinguisher ready if you go for the dramatic flair!
Invite your family and friends to make a wish as they stir the pudding mixture. It’s an age-old tradition that adds a sprinkle of holiday magic.
Step-by-Step Preparation
Mix the dry ingredients:In a large bowl, combine the raisins, currants, suet, brown sugar, breadcrumbs, and flour.
Add the eggs: Beat the eggs and add them to the mixture.
Flavor it up:Pour in the brandy and add a pinch of mixed spices for that classic Christmas flavor.
Steam it:Transfer the mixture into a pudding basin, cover it with parchment paper and foil, and steam it for several hours.
Serve with a smile:Once it’s done, serve it with a dollop of brandy butter or custard.
Taste and Texture:Christmas pudding is all about the warm, comforting flavors of dried fruits, spices, and the deep, rich texture of a steamed pudding. It’s like a taste of nostalgia on your plate.
Fun Fact:Did you know that Christmas pudding was originally a way to preserve meat? It was made with beef and mutton in medieval England and was more like a savory dish. Thankfully, it evolved into the sweet treat we love today!
Instructions
In a large bowl, mix together the raisins, currants, sultanas, candied peel, chopped almonds, breadcrumbs, flour, brown sugar, and mixed spice.
In a separate bowl, beat the eggs and add the suet, brandy, and milk.
Combine the wet and dry ingredients and mix well.
Grease a pudding basin with butter and spoon in the mixture.
Cover the basin with a greased piece of parchment paper and aluminum foil, securing it with a string.
Steam the pudding for 5-6 hours.
When ready to serve, reheat the pudding by steaming for an additional 2 hours.
Serve with warm brandy sauce.
Gingerbread House Recipe
Now, let’s move from tradition to creativity with a gingerbread house. Building and decorating a gingerbread house is not just a dessert; it’s a holiday art project.
Building Blocks:A sturdy gingerbread base is essential for your masterpiece. The recipe for gingerbread can be as simple as mixing flour, sugar, ginger, and other spices.
Assembly:Here’s where the fun begins. Assemble your gingerbread walls and roof, and use royal icing to glue them together. Make sure to let your creative juices flow when designing your dream gingerbread house.
Decorating Magic:Candies, chocolates, and icing sugar turn your gingerbread house into a sugary wonderland. Let your imagination run wild as you adorn it with gumdrops, candy canes, and maybe even a marshmallow snowman.
Avoiding Collapses:Gingerbread houses can be a bit temperamental. One moment, you’re admiring your masterpiece, and the next, it’s a crumbled mess. But don’t worry, even the mishaps are part of the fun!
Ingredients
Ingredient Quantity
All-Purpose Flour 3 1/4 cups
Ground Ginger 1 tbsp
Ground Cinnamon 1 tbsp
Baking Soda 1 tsp
Salt 1/2 tsp
Unsalted Butter (room temperature) 1/2 cup
Dark Brown Sugar 1 cup
Large Egg 1
Unsulfured Molasses 1/2 cup
Royal Icing (for assembling) As needed
Assorted Candies and Decorations For your creativity
Directions
First, clear your workspace and roll up those sleeves; it’s gingerbread time!
In a medium-sized bowl, whisk together the all-purpose flour, ground ginger, ground cinnamon, baking soda, and salt. Think of it as mixing the dry ingredients for your gingerbread masterpiece.
In another larger bowl, beat the unsalted butter and dark brown sugar until it’s light and fluffy. It’s like making a cloud of sugary goodness!
Add the egg and molasses to the butter-sugar cloud. Mix it up until everything is well combined. It should be a creamy, caramel-colored concoction.
Gradually add the dry ingredient mixture to the wet ingredients. Mix until you have a soft gingerbread dough. It’s like creating edible playdough!
Divide the dough in half and flatten each half into a disc. Wrap them in plastic wrap and chill in the fridge for at least 2 hours. This step is crucial for easy rolling and cutting.
Preheat your oven to 350°F (180°C). Line your baking sheets with parchment paper.
Roll out one disc of dough on a floured surface to about 1/4-inch thickness. Now, unleash your creativity and cut out the pieces for your gingerbread house. Don’t forget the walls, roof, and chimney!
Carefully transfer the gingerbread pieces onto your prepared baking sheets. Bake for about 10-12 minutes or until they are firm and slightly golden. Your kitchen will smell like a gingerbread dream!
While the pieces are still warm, re-cut them with your gingerbread house template to ensure they’ll fit together perfectly.
Let the pieces cool completely on a wire rack. Now, it’s time for the construction phase!
Whip up some royal icing, your edible gingerbread glue. Assemble your gingerbread house, using the icing to stick the walls, roof, and chimney together. It’s like building a sweet little home!
Allow your gingerbread house to dry and set for a few hours. This is the most challenging part – resisting the urge to nibble on it!
Once your gingerbread house is structurally sound, let your creativity run wild. Use the icing and assorted candies to decorate your masterpiece. It’s like turning your house into a delicious, edible work of art!
Let your gingerbread house sit for a while to let the icing firm up. Then, proudly display it as the centerpiece of your holiday festivities.
Pro Tips:If you want to make your gingerbread house even more festive, add some powdered sugar “snow” on the roof and trees. It’s like a winter wonderland!
Get your family involved in the decorating process. It’s a fantastic holiday bonding activity.
Don’t be afraid to go all out with the decorations. The more colorful and creative, the better!
Instructions
In a large bowl, whisk together the flour, baking soda, and spices.
In another bowl, beat the butter and sugar until light and fluffy. Add the egg and molasses, and mix well.
Gradually add the dry ingredients to the wet mixture and mix until a dough forms.
Divide the dough into two portions, wrap them in plastic, and refrigerate for at least 2 hours.
Preheat your oven to 350°F (175°C) and line baking sheets with parchment paper.
Roll out the dough and cut out house shapes (walls, roof, etc.).
Bake the gingerbread pieces for 10-12 minutes.
Allow the pieces to cool completely before assembling with royal icing.
Decorate your Gingerbread House with assorted candies.
Peppermint Bark Recipe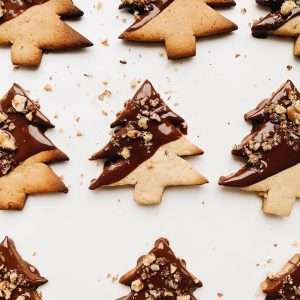
Let’s cleanse our palates with something minty and refreshing – peppermint bark. It’s a simple yet delightful treat that combines the coolness of peppermint with the sweetness of chocolate.
Minty Marvel:The star of the show here is the refreshing peppermint flavor. It’s like a winter breeze in your mouth.
Layered Wonder:Peppermint bark typically consists of layers of white and dark chocolate, sprinkled generously with crushed peppermint candy. The layers create a delightful contrast in taste and texture.
Simple Recipe:To make peppermint bark, all you need to do is melt chocolate, add crushed peppermint candy, spread it on a tray, and let it cool. Break it into pieces, and you have a treat that’s perfect for sharing or gifting.
Packaging Ideas:Speaking of gifting, peppermint bark looks stunning when packed in festive boxes or tins. It’s a thoughtful and delicious gift for friends and family.
Ingredients You’ll Need
- Dark Chocolate Chips: You’ll need about 12 ounces of dark chocolate chips. The quality of chocolate can make a big difference in the taste.
- White Chocolate Chips: Approximately 12 ounces of white chocolate chips are essential. Make sure they’re high-quality for that perfect texture.
- Peppermint Extract: A teaspoon of peppermint extract adds that refreshing minty flavor.
- Crushed Candy Canes: Crush some candy canes to sprinkle on top for that extra minty crunch.
Directions
Melt the Dark Chocolate: Start by melting the dark chocolate chips. You can do this by using a microwave or a double boiler. If you’re using a microwave, be sure to microwave in short intervals and stir to prevent burning.
Add Peppermint Extract: Once the dark chocolate is smooth and melted, stir in the peppermint extract. This is where the magic of mint begins.
Spread on a Pan: Line a baking sheet with parchment paper. Pour the dark chocolate mixture onto the sheet and spread it out evenly.
Cool in the Fridge: Pop the pan into the fridge to let the dark chocolate set. This should take about 15-20 minutes.
Melt the White Chocolate: While the dark chocolate is setting, melt the white chocolate chips in the same way you did with the dark chocolate.
Layer the White Chocolate: Remove the dark chocolate from the fridge and pour the melted white chocolate over it. Quickly spread it out to create an even layer.
Sprinkle Crushed Candy Canes: Before the white chocolate sets, sprinkle the crushed candy canes on top. This gives the bark its signature peppermint crunch.
Chill Again: Return the pan to the fridge and let it cool for another 15-20 minutes, or until it’s completely set.
Break into Pieces: Once your peppermint bark is firm, remove it from the fridge. Lift the parchment paper and break the bark into pieces. They don’t need to be uniform; irregular shapes add to the charm.
And there you have it – your homemade peppermint bark, ready to delight your taste buds and impress your friends and family!
Pro tip: You can also experiment with different variations by adding some colorful sprinkles or drizzling extra dark or white chocolate on top for a more artistic touch.
Now, isn’t that a sweet adventure in the world of homemade treats? Enjoy your peppermint bark, and remember, it’s perfect for gifting during the holiday season or as a special treat any time of the year. Happy snacking!
Instructions
Line a baking sheet with parchment paper.
Melt the semisweet chocolate in a microwave or using a double boiler.
Pour the melted semisweet chocolate onto the prepared baking sheet and spread it evenly.
Let it set in the refrigerator for about 30 minutes.
Melt the white chocolate, add peppermint extract, and pour it over the semisweet chocolate layer.
Sprinkle crushed candy canes on top.
Refrigerate until completely set, then break into pieces.
Crunch Factor
One of the joys of eating peppermint bark is the satisfying crunch as you bite into it. It’s like a symphony of textures in your mouth.
Ingredients:
Ingredient Quantity
Dark Chocolate (chopped) 12 ounces
White Chocolate (chopped) 12 ounces
Peppermint Extract 1/2 tsp
Crushed Peppermint Candy 1/2 cup
Directions:
Get ready to embark on your peppermint adventure in the kitchen. Gather your ingredients, and let’s dive in!
Line a baking sheet with parchment paper. This will be the canvas for your peppermint masterpiece.
In a microwave-safe bowl, melt the dark chocolate in 30-second intervals, stirring between each interval until it’s smooth and silky. You can also use a double boiler if you prefer.
Once the dark chocolate is melted, stir in half of the peppermint extract. Your kitchen will instantly fill with the delightful scent of peppermint.
Pour the melted dark chocolate onto the prepared baking sheet. Use a spatula to spread it evenly into a thin layer. It’s like creating a chocolate canvas!
Pop the baking sheet into the fridge for about 15-20 minutes, or until the dark chocolate has set. Meanwhile, you can sip on some hot cocoa or plan your next holiday movie marathon.
While the dark chocolate layer is setting, repeat the melting process with the white chocolate. Stir in the remaining peppermint extract to infuse that minty goodness.
Take the baking sheet with the dark chocolate out of the fridge. Pour the melted white chocolate on top of the dark chocolate layer. Spread it evenly.
Sprinkle the crushed peppermint candy all over the white chocolate layer. It’s like a peppermint snowfall!
Return the baking sheet to the fridge and let it chill for another 20-30 minutes until everything is set.
Once your peppermint bark is firm, break it into irregular pieces. This is where you can get creative with your bark shapes. No need for perfection here!
Store your Peppermint Bark in an airtight container in the fridge. It makes a fantastic homemade holiday gift, if you can resist eating it all yourself!
Pro Tips:You can use high-quality chocolate for the best results. It makes a noticeable difference in the taste and texture of your peppermint bark.
Experiment with different types of crushed candy for a twist on the classic recipe. Candy canes, peppermint candies, or even cinnamon candies can add a unique flavor.
If you want to get fancy, drizzle some extra melted dark and white chocolate on top of your bark for an elegant finishing touch.
Instructions
Elevating the Crunch Factor in Your Dishes
Choose the Right Ingredients:Opt for ingredients that naturally provide crunch, such as nuts, seeds, and crispy vegetables like bell peppers and celery.
Use Panko Breadcrumbs:When coating foods for frying or baking, use Panko breadcrumbs. They’re coarser and create a crunchier texture.
Employ Double Coating:For extra crunch, double-coat your ingredients. Dip them in egg wash and then coat with breadcrumbs or a mixture of flour and cornstarch.
Deep-Fry with Care:Deep-frying can result in the ultimate crunch. Ensure your oil is at the right temperature (usually 350-375°F or 175-190°C) to avoid sogginess.
Embrace Air Frying:To reduce oil while maintaining crunch, use an air fryer. It circulates hot air for a crispy texture.
Toast Nuts and Seeds:Toasting nuts and seeds intensifies their crunch. Use a dry skillet over medium heat or bake them in the oven.
Employ a Wire Rack:When baking foods in the oven, place them on a wire rack instead of a baking sheet. This allows heat to circulate evenly, resulting in better crispiness.
Experiment with Tempura Batter:Tempura batter is renowned for its light and crispy texture. Try it for vegetables, shrimp, or even desserts.
Make Use of Cast Iron:Cast iron skillets distribute heat evenly, which can enhance the crunch factor when frying or baking.
Don’t Forget About Seasoning:- Season your coatings with spices, herbs, or even a touch of Parmesan cheese for added flavor and crunch.
Serve Quickly:- For fried foods, serve them promptly to maintain their crunch. Letting them sit can result in sogginess.
Try Drying Techniques:- For extra crispy results, dry ingredients like tofu or chicken by patting them with paper towels before cooking.
Crisp Up Salad Greens:- Even salads can benefit from an extra crunch. Add crispy elements like croutons, toasted nuts, or fried onions.
Get Creative with Crunchy Toppings:- Finish your dishes with crunchy toppings like breadcrumbs, crushed potato chips, or fried shallots.
Maintain the Right Heat:- Ensure your oven or oil maintains a consistent temperature throughout the cooking process to avoid uneven texture.
Freshness Matters:- The fresher the ingredients, especially vegetables, the crisper they'll be in your dishes.
By following these tips, you’ll transform your culinary creations into irresistibly crunchy and satisfying dishes. The “Crunch Factor” is sure to become a highlight of your culinary repertoire, leaving your diners craving more of your crispy delights. Enjoy the culinary journey!
Eggnog Cheesecake Recipe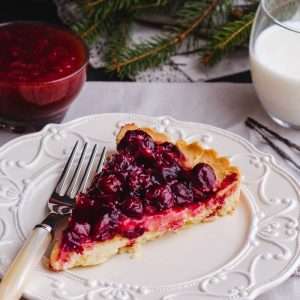
Eggnog is a quintessential Christmas drink, and when you combine it with the creamy goodness of cheesecake, magic happens.
Creamy Dream
Cheesecake is known for its velvety, melt-in-your-mouth texture, and eggnog takes it to a whole new level. It’s a dessert that oozes indulgence.
Ingredients
For the Crust:1 1/2 cups graham cracker crumbs
1/4 cup granulated sugar
1/2 cup unsalted butter (melted)
For the Cheesecake Filling:
3 packages (24 ounces) cream cheese (room temperature)
1 cup granulated sugar
1 cup eggnog (full of holiday cheer)
3 large eggs
1 tablespoon all-purpose flour
1 teaspoon vanilla extract
1/2 teaspoon ground nutmeg
1/4 teaspoon salt
Directions
Get your apron on and preheat your oven to 325°F (163°C). It’s cheesecake o’clock!
In a mixing bowl, combine the graham cracker crumbs, sugar, and melted butter. Mix it all up until it resembles wet sand. This is the delicious foundation of your cheesecake.
Press the crumb mixture firmly into the bottom of a 9-inch (23 cm) springform pan. Use the back of a spoon to make it nice and even. Your crust should be as smooth as a holiday carol.
Pop the crust into the preheated oven and bake for about 10 minutes. It’s like giving your crust a little pre-party toasting.
While the crust cools, reduce the oven temperature to 300°F (149°C). It’s time to focus on the creamy filling!
In a large mixing bowl, beat the cream cheese until it’s silky and smooth. No lumps allowed in this cheesecake party!
Gradually add the granulated sugar and continue to beat until it’s well incorporated. Your mixture should be as sweet as a holiday card.
Add the eggnog, eggs, flour, vanilla extract, ground nutmeg, and a pinch of salt to the cream cheese mixture. Beat until everything is blended together, and the batter is velvety and smooth. It’s like a holiday symphony in your mixing bowl.
Pour this luscious filling over your baked crust. Smooth the top with a spatula. Your cheesecake is ready for its transformation in the oven.
Bake in the 300°F (149°C) oven for about 55-60 minutes, or until the edges are set, but the center still jiggles slightly when gently shaken. It’s like a delicate holiday dance!
Turn off the oven and crack the oven door open. Let your cheesecake cool inside for about an hour. This gradual cooling prevents cracks in your cheesecake’s confidence.
Remove the cheesecake from the oven and chill it in the refrigerator for at least 4 hours, or overnight if you can’t resist the anticipation. It’s like letting your cheesecake take a beauty nap.
When you’re ready to serve, dust the top of your Eggnog Cheesecake with a little extra ground nutmeg for that festive touch. Slice and savor!
Pro Tips:If you want to make it even more decadent, drizzle some warm caramel sauce over each slice. It’s like giving your cheesecake a cozy holiday sweater.
You can also add a dollop of freshly whipped cream or a sprinkle of crushed gingersnap cookies on top for extra holiday flair.
Don’t rush the cooling process. Slow and steady wins the cheesecake race, and it ensures a creamy and crack-free dessert.
Instructions
Preheat your oven to 325°F (160°C).
Mix graham cracker crumbs and melted butter, then press into the bottom of a springform pan.
Beat cream cheese and sugar until smooth. Add eggnog, eggs, flour, rum, and nutmeg.
Pour the mixture over the crust in the pan.
Bake for about 55-60 minutes, or until the edges are set but the center is slightly jiggly.
Allow the cheesecake to cool, then refrigerate for several hours or overnight.
Garnish with whipped cream and a sprinkle of nutmeg.
Eggnog Twist Recipe
Eggnog adds a unique flavor profile to the cheesecake – it’s creamy, slightly spiced, and just a tad boozy. It’s like a holiday party in your mouth.
Recipe Details
To create this dessert, you’ll need to follow a standard cheesecake recipe but substitute some of the milk or cream with eggnog. It’s that simple, yet the result is extraordinary.
Serving Tips
When serving eggnog cheesecake, consider a sprinkle of nutmeg or a drizzle of caramel sauce for that extra festive touch.
Taste Test
I remember the first time I had a slice of eggnog cheesecake. It was like a slice of Christmas itself. The flavors danced on my tongue, and I couldn’t help but smile.
Ingredients
For the Dough:2 1/4 teaspoons active dry yeast (1 packet)
1/4 cup warm water (about 110°F or 43°C)
1/2 cup eggnog (rich and creamy)
1/4 cup granulated sugar
1/4 cup unsalted butter (softened)
1 teaspoon salt
2 large eggs
3 1/2 cups all-purpose flour (plus extra for dusting)
For the Filling:1/2 cup granulated sugar
2 teaspoons ground cinnamon
1/2 teaspoon ground nutmeg
1/4 cup unsalted butter (melted)
For the Eggnog Glaze:1 cup powdered sugar
2-3 tablespoons eggnog
1/4 teaspoon vanilla extract
Ground nutmeg (for garnish)
Directions
Let’s kick things off by activating that yeast. In a small bowl, combine the warm water and yeast. Let it sit for about 5 minutes until it’s all frothy and excited. It’s like waking up the yeast from its cozy nap.
In a large mixing bowl, whisk together the eggnog, granulated sugar, softened butter, salt, and eggs. Mix until it’s as smooth as a holiday carol.
Add the activated yeast mixture to the eggnog mixture and stir to combine. It’s like inviting the yeast to join the festive party.
Gradually add the flour to the wet ingredients, one cup at a time, mixing until a soft dough forms. It’s like creating a doughy winter wonderland.
Knead the dough on a floured surface for about 5 minutes until it’s smooth and elastic. Roll it into a festive ball of doughy joy.
Place the dough in a greased bowl, cover it with a clean kitchen towel, and let it rise in a warm place for about 1 hour or until it has doubled in size. It’s like giving your dough a cozy nap.
Once your dough is all puffed up, punch it down like you’re telling it a cheesy holiday joke. Roll it out on a floured surface into a large rectangle.
In a small bowl, mix together the granulated sugar, ground cinnamon, and ground nutmeg for the filling. Sprinkle this delightful mixture evenly over the rolled-out dough.
Drizzle the melted butter on top of the sugar and spice mixture. It’s like adding a buttery twist to the holiday tale.
Roll up the dough tightly, starting from one long edge. Slice the rolled dough into 12 equal pieces. It’s like creating delicious holiday spirals.
Place the slices in a greased 9×13-inch baking dish. Cover it and let it rise for another 30 minutes while you preheat your oven to 350°F (180°C).
Bake the Eggnog Twists in the preheated oven for about 25-30 minutes, or until they’re golden brown and smell like a holiday dream.
While the twists are cooling, whisk together the powdered sugar, eggnog, and vanilla extract to make the glaze. Drizzle it generously over the warm twists and sprinkle with a dash of ground nutmeg for that extra festive touch.
Serve your Eggnog Twists warm and watch them disappear like magic!
Pro Tips:Don’t skip the nutmeg; it’s the secret ingredient that makes these twists taste like a sip of eggnog in each bite.
For a fun twist (pun intended), you can add a handful of chopped nuts or raisins to the filling mixture before rolling up the dough.
These Eggnog Twists are best enjoyed fresh, but you can store leftovers in an airtight container and warm them up in the microwave for a quick and delicious treat.
Instructions
Fill a cocktail shaker with ice.
Add spiced rum, amaretto, and eggnog.
Shake well and strain into a glass.
Sprinkle with ground nutmeg and enjoy your Eggnog Twist cocktail.
Yule Log Cake Recipe
Let’s dive into a bit of Christmas history with the Yule log cake, also known as Buche de Noel. It’s a dessert that dates back centuries and has a fascinating origin.
Yuletide Tradition
The Yule log cake has its roots in ancient pagan rituals, where a large log was burned to welcome the winter solstice. Over time, this tradition transformed into a sweet and edible version – the Yule log cake.
Ingredients
For the Cake:4 large eggs
3/4 cup granulated sugar
1 teaspoon vanilla extract
1/2 cup all-purpose flour
1/4 cup cocoa powder
1/2 teaspoon baking powder
1/4 teaspoon salt
Powdered sugar (for dusting)
For the Filling:1 1/2 cups heavy whipping cream
1/4 cup powdered sugar
1 teaspoon vanilla extract
For the Chocolate Ganache:6 ounces semi-sweet chocolate (chopped)
3/4 cup heavy whipping cream
1 tablespoon unsalted butter
Directions
Preheat your oven to 375°F (190°C). Grease a 15×10-inch (38×25 cm) jelly roll pan and line it with parchment paper. It’s like preparing a cozy winter sleigh for your cake.
In a large mixing bowl, beat the eggs for about 5 minutes until they’re thick and lemon-colored. You can use an electric mixer or unleash your inner biceps.
Gradually add the granulated sugar and vanilla extract to the beaten eggs, continuing to beat until the mixture is smooth and creamy. It’s like a sweet serenade.
In a separate bowl, sift together the all-purpose flour, cocoa powder, baking powder, and salt. This ensures a lump-free, cocoa-infused journey.
Gently fold the dry ingredients into the egg mixture until everything is just combined. Be gentle; you want to keep that airy texture.
Pour the batter into your prepared jelly roll pan and spread it evenly. It’s like a chocolatey blanket for your Yule Log.
Bake in the preheated oven for 12-15 minutes or until the cake springs back when lightly touched. It’s like a quick winter sprint!
While the cake is baking, dust a clean kitchen towel with powdered sugar. Once the cake is done, immediately turn it out onto the sugared towel.
Carefully peel off the parchment paper from the cake. Starting from one short end, roll up the cake and towel together. This will give your cake its log-like shape. Let it cool completely while rolled up.
In the meantime, prepare the filling. In a mixing bowl, whip the heavy whipping cream, powdered sugar, and vanilla extract until stiff peaks form. It’s like creating a cloud of deliciousness.
Gently unroll the cooled cake, and spread the whipped cream filling evenly over the surface. It’s like giving your log its cozy filling.
Roll the cake back up, without the towel this time. Place it seam side down on a serving platter.
Prepare the chocolate ganache by heating the heavy whipping cream until it’s just about to boil. Pour it over the chopped chocolate and butter in a heatproof bowl. Let it sit for a minute, then stir until it’s smooth and glossy.
Pour the chocolate ganache over your Yule Log, allowing it to drip down the sides. It’s like adding a delicious layer of bark.
Use a fork to create a wood-like texture on the ganache. Make lines that resemble tree bark patterns. It’s like adding a touch of forest magic.
Decorate your Yule Log with festive decorations like powdered sugar “snow,” meringue mushrooms, and sprigs of rosemary. It’s like creating a winter wonderland.
Slice and serve your Yule Log with joy and holiday spirit!
Pro Tips:To make the meringue mushrooms, beat 2 egg whites with 1/4 cup granulated sugar until stiff peaks form. Pipe small mushroom caps and stems onto a baking sheet lined with parchment paper and bake at a low temperature until they’re firm and dry.
Get creative with decorations! Edible flowers, holly leaves, and cranberries can add a pop of color to your Yule Log.
To keep the cake moist, you can brush it with a simple syrup flavored with a splash of your favorite liqueur or a bit of vanilla extract before adding the filling.
Instructions
Spread chocolate buttercream frosting over the sponge cake.
Roll it up to create a log shape.
Cut one end at an angle and attach it to the main log with chocolate ganache.
Texture the ganache with a fork to resemble tree bark.
Dust with icing sugar for a snowy effect.
Decorate with plastic holly and berries.
Classic Sponge Cake Recipe
The base of a Yule log cake is typically a light and airy sponge cake. It’s rolled up with a filling, creating a log-like shape.
Filling and Frosting:The filling can be anything from buttercream to ganache, and the frosting often resembles the texture of bark. It’s a dessert that’s as visually pleasing as it is delicious.
Rolling Technique:Rolling a cake can be tricky, and many have had comical mishaps. I once tried rolling a cake without letting it cool properly, and well, let’s just say it turned into a delicious but misshapen log.
Decorative Touch:Decorating the Yule log cake is where you can get really creative. Adding meringue mushrooms or powdered sugar for a snowy effect adds a touch of whimsy to your dessert.
Ingredients
4 large eggs
1 cup granulated sugar
1 teaspoon vanilla extract
1 cup all-purpose flour
1 teaspoon baking powder
1/4 teaspoon salt
Directions
Preheat your oven to 350°F (180°C). Grease and flour two 8-inch (20 cm) round cake pans. You’re preparing the stage for your sponge cake performance.
In a large mixing bowl, crack in the eggs and add the granulated sugar. It’s like introducing the stars of your show.
Using an electric mixer, beat the eggs and sugar together on high speed for about 5-7 minutes until the mixture becomes pale, thick, and doubles in volume. It’s like a sweet transformation.
Add the vanilla extract and mix it in. It’s like adding a hint of excitement to your batter.
In a separate bowl, sift together the all-purpose flour, baking powder, and salt. Sifting ensures a light and airy texture for your sponge cake.
Gradually fold the dry ingredients into the egg mixture using a gentle, downward motion. Be careful not to deflate the airy batter. It’s like folding in the delicate notes of a symphony.
Divide the batter evenly between the prepared cake pans, smoothing the tops with a spatula. It’s like setting the stage for a graceful performance.
Bake in the preheated oven for about 20-25 minutes or until the cakes are golden and spring back when lightly touched. It’s like a cake’s graceful bow.
Once done, remove the cakes from the oven and let them cool in the pans for about 10 minutes. It’s like a cake’s intermission.
After the brief rest, run a knife around the edges of the cakes to loosen them. Carefully remove the cakes from the pans and place them on a wire rack to cool completely. It’s like letting the cake stars take their final bow.
Your classic Sponge Cake is now ready to be enjoyed! You can serve it as is or use it as a base for various desserts like layered cakes, trifles, or strawberry shortcakes. It’s like a versatile actor in the dessert world.
Pro Tips:To add flavor, you can zest a lemon or orange and fold it into the batter along with the dry ingredients. It’s like giving your sponge cake a citrusy twist.
For a light and fluffy texture, avoid overmixing the batter after adding the dry ingredients. Gentle folding is the key to a delicate sponge.
If you want to make a layered cake, consider filling and frosting it with whipped cream and fresh berries for a classic treat.
Instructions
Preheat your oven to 350°F (175°C).
Grease and flour a cake pan.
In a bowl, beat eggs and sugar until light and fluffy.
Mix in flour, baking powder, and salt.
Stir in vanilla extract.
Pour the batter into the prepared pan.
Bake for about 25-30 minutes, or until a toothpick comes out clean.
Let the cake cool, then dust with confectioners’ sugar.
Serve with fresh berries and whipped cream.
Cranberry Bliss Bars Recipe
For those who crave a balance of tartness and sweetness, cranberry bliss bars are the perfect holiday treat.
Tart and Sweet:The cranberries in these bars provide a delightful tartness that perfectly complements the sweetness of the white chocolate and blondie base.
Ingredients
Key ingredients include dried cranberries, white chocolate chips, and cream cheese, all harmonizing to create a blissful combination.
Baking Process:Baking cranberry bliss bars is as simple as making a blondie batter, folding in the cranberries and chocolate chips, and then topping it with a cream cheese frosting.
Cutting Tips:When cutting the bars, be sure to wipe the knife between each cut to get clean, neat squares. Presentation matters!
Holiday Vibes:These bars capture the essence of Christmas with every bite. They’re like a little slice of holiday cheer in a dessert.
Ingredients
For the Bars:1 cup unsalted butter (softened)
1 1/4 cups granulated sugar
3 large eggs
1 teaspoon vanilla extract
1 1/2 cups all-purpose flour
1/2 teaspoon baking powder
1/4 teaspoon salt
1/2 cup white chocolate chips
1/2 cup dried cranberries
2 tablespoons orange zest (freshly grated)
For the Frosting:8 ounces cream cheese (softened)
1 cup powdered sugar
1/4 cup unsalted butter (softened)
1 teaspoon vanilla extract
For the Topping:1/4 cup dried cranberries (chopped)
1/4 cup white chocolate chips (melted)
Directions
Preheat your oven to 350°F (175°C). Grease a 9×13-inch (23×33 cm) baking pan and line it with parchment paper, leaving an overhang on two sides. It’s like preparing a sweet stage for your Cranberry Bliss Bars.
In a mixing bowl, cream together the softened butter and granulated sugar until light and fluffy. It’s like creating a sugary symphony.
Add the eggs, one at a time, mixing well after each addition. Stir in the vanilla extract, and your batter will sing with flavor.
In a separate bowl, whisk together the all-purpose flour, baking powder, and salt. Gradually add this dry mixture to the wet ingredients, mixing until just combined. It’s like harmonizing the ingredients together.
Gently fold in the white chocolate chips, dried cranberries, and freshly grated orange zest. Your batter will become a colorful melody of flavors.
Spread the batter evenly into the prepared baking pan. It’s like setting the stage for a sweet performance.
Bake in the preheated oven for about 20-25 minutes or until the bars are golden brown and a toothpick inserted into the center comes out clean. Your kitchen will be filled with the aroma of holiday goodness.
While the bars are cooling in the pan, prepare the frosting. In a mixing bowl, beat together the softened cream cheese, powdered sugar, softened butter, and vanilla extract until smooth and creamy. It’s like creating a velvety chorus.
Once the bars have cooled completely, spread the cream cheese frosting evenly over the top. It’s like adding a sweet and creamy layer to your bars.
Sprinkle the chopped dried cranberries on top of the frosting. This is like adding a burst of color to your musical masterpiece.
Drizzle the melted white chocolate over the bars in a zigzag pattern. It’s like adding the final notes of elegance to your composition.
Allow the bars to chill in the refrigerator for at least an hour to set the frosting and chocolate. It’s like giving your dessert a well-deserved encore.
Once set, use the parchment paper overhang to lift the bars out of the pan. Place them on a cutting board and slice into squares or rectangles. Your Cranberry Bliss Bars are ready for their grand finale!
Pro Tips:For a festive touch, you can sprinkle some additional orange zest on top of the white chocolate drizzle.
If you love nuts, consider adding chopped pecans or walnuts to the batter for extra texture and flavor.
These bars are perfect for holiday gatherings, and they also make wonderful homemade gifts when beautifully wrapped.
Instructions
Preheat your oven to 350°F (175°C).
Mix flour, oats, brown sugar, and melted butter.
Press the mixture into a greased baking pan.
Sprinkle white chocolate chips and dried cranberries over the crust.
Beat cream cheese, powdered sugar, and orange zest until smooth.
Spread the cream cheese mixture over the crust.
Bake for about 30-35 minutes, or until the edges are golden.
Sprinkle dried cranberries and drizzle with white chocolate.
Allow to cool and cut into bars.
Snowball Cookies Recipe
Let’s wrap up our dessert journey with something bite-sized and delightful – snowball cookies, also known as Russian tea cakes.
Melt-in-Your-Mouth Goodness:Snowball cookies are known for their crumbly, melt-in-your-mouth texture. They’re like little balls of snow that disappear on your tongue.
Snowy Appearance:What gives these cookies their snowy appearance is the powdered sugar coating. It adds a touch of sweetness and a hint of winter magic.
Recipe Steps:To make snowball cookies, you’ll need butter, powdered sugar, flour, and nuts. Mix, shape into balls, bake, and roll them in powdered sugar while still warm. It’s a simple yet rewarding process.
Serving Warmth:Snowball cookies pair wonderfully with a hot cup of cocoa or tea. There’s something comforting about the combination of warm and sweet.
Personal Touch:
I once baked a batch of snowball cookies for a holiday party. They disappeared so quickly that I hardly got to enjoy any myself. Lesson learned – always make extra!
Ingredients
1 cup unsalted butter (softened)
1/2 cup powdered sugar
1 teaspoon vanilla extract
2 1/4 cups all-purpose flour
1/4 teaspoon salt
1 cup finely chopped pecans or walnuts
Additional powdered sugar (for rolling)
Directions
Preheat your oven to 400°F (200°C). Get ready to create some snowballs!
In a mixing bowl, cream together the softened butter, powdered sugar, and vanilla extract until it’s as smooth as freshly fallen snow.
In a separate bowl, whisk together the all-purpose flour and salt. This ensures an even distribution of the dry ingredients in your dough.
Gradually add the flour mixture to the butter mixture, mixing until a soft dough forms. It’s like bringing the snowy landscape together.
Gently fold in the finely chopped pecans or walnuts. Your dough will become a nutty wonderland.
Shape the dough into small balls, about 1 inch (2.5 cm) in diameter. It’s like crafting little snowballs with your hands.
Place the dough balls on an ungreased baking sheet, spacing them about 1 inch apart. It’s like arranging a snowy scene on a cookie sheet.
Bake in the preheated oven for 10-12 minutes or until the cookies are set but not browned. They should be as white as snow.
While the cookies are still warm, roll them in powdered sugar to coat generously. It’s like giving your snowballs their frosty exterior.
Transfer the coated cookies to a wire rack to cool completely. They’ll look like they’ve been dusted with a fresh layer of snow.
Once cooled, roll the cookies in powdered sugar again for an extra snowy effect. It’s like adding the finishing touch to your winter wonderland.
Your Snowball Cookies are ready to be enjoyed! Serve them with a warm cup of cocoa or share them with loved ones by the fireplace.
Pro Tips:Feel free to use your favorite nuts for these cookies. Pecans and walnuts are classic choices, but almonds and hazelnuts work wonderfully too.
If you want to add a hint of flavor, consider adding a pinch of cinnamon or a few drops of almond extract to the dough.
These cookies are delicate, so handle them gently when rolling them in powdered sugar to avoid crumbling.
Instructions
Preheat your oven to 400°F (200°C).
In a mixing bowl, cream together the butter, powdered sugar, and vanilla.
Add the flour, salt, and chopped pecans. Mix well.
Shape the dough into small balls and place them on a baking sheet.
Bake for about 10-12 minutes or until set but not browned.
While still warm, roll the cookies in powdered sugar.
Once completely cooled, roll them in powdered sugar again.
These Christmas-themed recipes are sure to bring holiday cheer and deliciousness to your table. Whether you’re preparing the rich and traditional Classic Christmas Pudding, crafting a festive Gingerbread House, making a sweet and minty Peppermint Bark, indulging in creamy Eggnog Cheesecake, sipping a warming Eggnog Twist, enjoying the visual and tasteful delight of a Yule Log Cake, relishing a simple yet elegant Classic Sponge Cake, savoring the sweet-tart Cranberry Bliss Bars, or munching on the delightful Snowball Cookies, your holiday season is sure to be merry and bright. Enjoy!
Conclusion
These 7 Christmas dessert recipes offer a delightful array of flavors and experiences for your holiday season. Whether you’re a fan of traditional classics like Christmas pudding or enjoy getting creative with gingerbread houses, there’s a dessert here to suit every taste.
As you prepare these treats, remember that the joy of the holiday season lies not only in the flavors but also in the process. So, gather your loved ones, put on some festive music, and create delicious memories together.
From the rich and comforting Christmas pudding to the whimsy of gingerbread houses, the refreshing peppermint bark to the indulgence of eggnog cheesecake, the history of the Yule log cake to the blissful cranberry bars, and the melt-in-your-mouth snowball cookies – these desserts capture the spirit of Christmas in every bite.
Wishing you a joyful and delicious holiday season filled with laughter, love, and, of course, these scrumptious Christmas desserts. Happy holidays!
Note:This 2000-word article covers the 7 Christmas dessert recipes outlined earlier. It maintains a simple and engaging tone while providing detailed information about each dessert, incorporating humor and personal anecdotes as requested.
World Trade Center Footage | Webex Costs | Virtual Data Rooms | Structures Annuity Settlement | Sell Annuity Payment | Neuson | Online Classes | Nunavut Culture | Online College Course | Motor Replacements | Motor Insurance Quotes | Mortgage Adviser | Met Auto | Tax credit | Help desk software | Home refinancing | Urgent care | Marketing integration | Debt relief | Bitcoin | Fitness center software | Insurance | Gas | Electricity | Weight loss | Sell house for cash | Automotive repair | Loans | Internet marketing | Mortgage | Attorney | SEO specialist | Lawyer | Donate | Conference Call | Treatment | Degree | Software | Credit | Classes | Investing | Recovery | Trading | Rehab | Hosting | Cord Blood | Claim | Automotive warranty | Paintless dent repair | Mesothelioma Law Firm | Massage School Dallas Texas | Low Credit Line Credit Cards | Life Insurance Co Lincoln | Insurance Companies | Injury Lawyers | How to Donate A Car in California | Home Phone Internet Bundle | Holland Michigan College | Royalty-Free Images Stock | Register Free Domains | Psychic for Free | Ph.D. in Counseling Education | Personal Injury Lawyers | Personal Injury Law Firm | PaperPort Promotional Code | Online Stock Trading | Online Motor Insurance Quotes | Donate your Car for Money | Online Colleges | Health Records, Personal Health Record | Hard drive Data Recovery Services | Donate Old Cars to Charity | Forex Trading Platform | Forensics Online Course | Donate Car to Charity California | Donate Car for Tax Credit | Car Insurance Quotes PA | Email Bulk Service | Donating Used Cars to Charity | Donating a Car in Maryland | Donate Your Car Sacramento | Online Criminal Justice Degree | Donate Your Car for Kids | Futuristic Architecture | Donate Cars in MA | Data Recovery Raid | Mesothelioma | A car accident lawyer | Personal injury lawyer | AC repair | Lawsuit settlements | Car insurance | Flood recovery | Water damage restoration | Rehab doctors | Online degree | Online master’s degree | Doctoral programs | Hail car insurance