
7 More Halloween Baking Recipes to Spookify Your Kitchen
Halloween is the perfect time to let your culinary creativity shine. These seven delightful Halloween baking recipes will not only satisfy your sweet cravings but also add a spooky twist to your celebrations.
Halloween is that time of the year when the air is filled with excitement, the streets adorned with eerie decorations, and the scent of spooky treats wafts through the air. It’s the perfect occasion to get creative in the kitchen and whip up some delicious Halloween-themed baked goods. In this article, we’re going to explore seven delightful Halloween baking ideas that will not only satisfy your sweet tooth but also add a spooky twist to your celebrations.
Monster Eyeball Cookies Recipe
Ingredients
1 cup of butter (2 sticks), softened
1 cup of granulated sugar
1 cup of brown sugar, packed
2 large eggs
1 teaspoon of vanilla extract
2 1/2 cups of all-purpose flour
1 teaspoon of baking soda
1/2 teaspoon of salt
2 cups of semi-sweet chocolate chips
1 cup of candy eyeballs (edible, of course!)
Cooking spray
Directions
Preheat the Oven:Start by preheating your oven to a monstrous 350°F (180°C).
Cream the Butter and Sugars:In a large mixing bowl, combine the softened butter, granulated sugar, and brown sugar. Beat them together until they form a creamy, sugary concoction.
Add Eggs and Vanilla:Crack in the eggs and pour in the vanilla extract. Mix until the batter is so smooth it’s spook-tacular.
Dry Ingredients:In another bowl, whisk together the flour, baking soda, and salt. Slowly add this dry mixture to the wet ingredients, blending them together until they become a fearsome dough.
Chocolate Chips:Now, fold in those semi-sweet chocolate chips. Your dough should be filled with sweet surprises.
Shape the Cookies:Using your hands, form the dough into 1-inch (2.5 cm) balls. Place them on a baking sheet lined with parchment paper or lightly greased with cooking spray.
Bake ‘Em Up:Pop those cookie dough balls into the preheated oven for about 10-12 minutes. Keep an eye on them, so they don’t become cookie monsters themselves. They should be golden around the edges.
Eyeballs Time:As soon as you take the cookies out of the oven, press a candy eyeball into the center of each one. It’s like giving them their monstrous eyes!
Cool Down:Allow the cookies to cool on the baking sheet for a few minutes before transferring them to a wire rack to cool completely.
Serve and Scare:Once they’re cooled and ready, serve these Monster Eyeball Cookies to your unsuspecting guests. Watch their faces light up with delicious fright!
Enjoy your monstrous creation, and remember, these cookies are best enjoyed with a side of spooky stories and laughter. Happy baking!
Instructions
Roll out sugar cookie dough and cut into circles.
Bake until edges are golden brown.
Once cool, use red icing to create a bloodshot effect on the cookies.
Add a mini chocolate chip in the center of each cookie.
Use blue icing to draw squiggly lines around the chocolate chip to resemble veins.
Dab a tiny amount of red gel food coloring for extra spookiness.
Absolutely, I can help you spin up a unique and SEO-friendly Spiderweb Cupcakes recipe. Get ready to weave some delicious treats!
Spiderweb Cupcakes Recipe
Ingredients
1 1/2 cups all-purpose flour
1 1/2 teaspoons baking powder
1/2 teaspoon salt
1/2 cup unsalted butter, softened
1 cup granulated sugar
2 large eggs
1 teaspoon vanilla extract
1/2 cup whole milk
1/4 cup unsweetened cocoa powder
Black gel food coloring
12 chocolate cupcakes (prepared and cooled)
For the Spiderweb Decoration:1/2 cup white chocolate chips
1/4 cup heavy cream
Black gel food coloring
Directions
Preheat the Oven:Preheat your oven to 350°F (180°C) and line a cupcake pan with paper liners.
Mix Dry Ingredients:In a medium-sized bowl, whisk together the flour, baking powder, and salt. Set this dry mixture aside.
Cream Butter and Sugar:In a separate large bowl, cream together the softened butter and granulated sugar until it’s light and fluffy.
Add Eggs and Vanilla:Beat in the eggs one at a time, and then add the vanilla extract. Mix until it’s all well incorporated.
Alternate Dry and Wet:Gradually add the dry mixture to the wet ingredients, alternating with the milk. Begin and end with the dry mixture, mixing until just combined.
Chocolate Time:In a small bowl, mix the cocoa powder with a bit of black gel food coloring until it reaches a spooky black hue. Add this cocoa mixture to the cupcake batter and mix until it’s completely black and eerie.
Fill the Liners:Fill each cupcake liner about 2/3 full with the eerie black batter.
Bake Away:Pop them in the oven for about 18-20 minutes, or until a toothpick inserted into the center of a cupcake comes out clean. Let them cool completely.
Spiderweb Magic:For the spiderweb decoration, heat the white chocolate chips and heavy cream in the microwave in 20-second intervals until it’s smooth. Add a touch of black gel food coloring and mix until it’s as dark as the night.
Weave the Webs:Using a piping bag or a ziplock bag with a tiny hole cut at the tip, pipe concentric circles on top of each cupcake. Then, take a toothpick and drag it from the center to the outer edge of the cupcake to create the spiderweb effect.
Serve Spookiness:Once your spiderweb cupcakes are complete, serve them up to your ghoulish guests and watch them get tangled in the deliciousness.
These Spiderweb Cupcakes are a creepy-crawly delight, perfect for Halloween or any spooky-themed event. Enjoy, and don’t be surprised if you find yourself entangled in their web of flavor! ️️
Instructions
Bake chocolate cupcakes and let them cool.
Spread chocolate ganache on top of each cupcake.
Use white icing to pipe a spiral on the ganache.
Use black icing gel to draw lines from the center of the spiral outward to create a spiderweb pattern.
Caramel Apple Mummies Recipe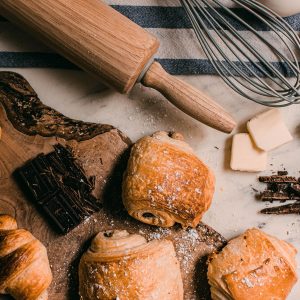
Ingredients
6 apples (any variety you prefer)
1 (14 oz) package of caramels
2 tablespoons of water
12 small candy eyes
White chocolate chips (for drizzling)
Wooden sticks or popsicle sticks
Directions
Prepare the Apples:Start by washing and thoroughly drying your apples. Remove the stems and insert wooden sticks into the tops of each apple. Set them aside on a parchment-lined baking sheet.
Melt the Caramels:Unwrap the caramels and place them in a microwave-safe bowl. Add 2 tablespoons of water. Microwave in 30-second intervals, stirring in between, until the caramels are completely melted and smooth.
Dip the Apples:Holding the wooden sticks, dip each apple into the melted caramel, swirling and turning to coat the entire apple. Allow any excess caramel to drip off.
Cool and Set:Place the caramel-coated apples back onto the parchment-lined baking sheet and let them cool for about 10-15 minutes. The caramel should become slightly firm but not hard.
Create the Mummy Wraps:Now, it’s time to give these caramel apples their mummy look! Take a spoon and drizzle melted white chocolate over the caramel-coated apples in a zigzag pattern, creating the appearance of mummy bandages. Leave a small opening for the eyes.
Add Candy Eyes:While the white chocolate is still slightly wet, gently press two candy eyes onto each apple where you left the opening. This gives your mummies their spooky eyes.
Chill and Set:Place the caramel apple mummies in the refrigerator for about 15-20 minutes to allow the white chocolate to set.
Serve and Scare:Once the mummies are set, serve them up to your eager goblins and ghouls. These caramel apple mummies are a perfect blend of sweet and spooky!
Enjoy your frightfully delicious Caramel Apple Mummies, and remember, the best part is sinking your teeth into that gooey caramel beneath their mummy wraps. It’s a mummy-tastic experience!
Instructions
Insert a wooden stick into each apple.
Dip the apples in warm caramel sauce and let excess drip off.
Melt white chocolate and drizzle it over the caramel-covered apples to create mummy bandages.
Attach candy eyes to the white chocolate while it’s still soft.
Let them cool and set before serving.
Witches’ Finger Breadsticks Recipe
Ingredients
1 tube (11 oz) refrigerated breadstick dough
1/4 cup sliced almonds
1 tablespoon butter, melted
1/4 teaspoon garlic powder
1/4 teaspoon salt
Ketchup or marinara sauce (for “bloody” dipping)
Directions
Preheat the Oven:
Start by preheating your oven to 375°F (190°C) and line a baking sheet with parchment paper.
Prepare the “Nails”:
Take the sliced almonds and use a sharp knife to carefully split them in half lengthwise. These will become the spooky “nails” for your witches’ fingers.
Shape the Dough:
Unroll the refrigerated breadstick dough and separate it into individual strips. Take each strip and roll it slightly to give it the appearance of a finger.
Add the “Nails”: Gently press one almond slice onto the tip of each breadstick to create the “witches’ nails.” Make sure they’re secure.
Shape the Fingers:
Use your fingers to bend and twist the dough in various places, creating a gnarled and spooky look for your witches’ fingers. These don’t need to be perfect; the more twisted and creepy, the better!
Brush with “Blood”:
In a small bowl, mix together the melted butter, garlic powder, and salt. Brush this mixture over each breadstick to give them a sinister shine.
Bake Away:
Place your witchy creations on the prepared baking sheet and bake in the preheated oven for 12-15 minutes or until they’re golden brown and delightfully eerie.
Serve with “Bloody” Dip:
While the witches’ fingers are still warm, arrange them on a platter, and serve them with a side of ketchup or marinara sauce for dipping. This is your “bloody” dipping sauce!
Scare and Satisfy:
Present your Witches’ Finger Breadsticks to your fellow witches and warlocks. Watch as they reach for these spooky snacks and dip them in the “bloody” sauce.
Click Here To Buy Our Healthy Cookbook For Only $27 Today!Enjoy your spooktacular Witches’ Finger Breadsticks, and remember, they’re perfect for Halloween parties or any time you want to add a little witchy fun to your meal. ♀️️
Instructions
Roll out the breadstick dough and shape it into finger-sized logs.
Use a knife to create knuckle marks.
Place an almond slice at one end to resemble a fingernail.
Bake as per dough instructions.
Once cooled, add a drop of red gel food coloring at the fingertip to create a spooky effect.
Haunted Oreo Cheesecake Bars Recipe
Ingredients
1 package (36 cookies) Oreo cookies
1/2 cup unsalted butter, melted
2 packages (8 oz each) cream cheese, softened
1/2 cup granulated sugar
2 large eggs
1 teaspoon vanilla extract
1 cup white chocolate chips
Purple and orange gel food coloring
Candy eyes
Directions
Preheat the Oven:
Begin by preheating your oven to 325°F (163°C). Line an 8×8-inch (20×20 cm) baking pan with parchment paper, leaving some overhang on the sides for easy removal.
Crush the Oreos:
Place 24 Oreo cookies in a large zip-top bag and crush them into fine crumbs using a rolling pin or a mallet. You can also use a food processor for this step.
Mix with Butter:
In a mixing bowl, combine the crushed Oreos with the melted butter. Mix until the crumbs are evenly coated with butter.
Press into Pan:
Press the Oreo mixture firmly into the bottom of the prepared baking pan to form the crust. Set it aside.
Prepare the Cheesecake Filling:
In a separate mixing bowl, beat the softened cream cheese and granulated sugar until it’s smooth and creamy.
Add Eggs and Vanilla:
Add the eggs, one at a time, beating well after each addition. Mix in the vanilla extract until the cheesecake filling is velvety and well combined.
Divide and Color:
Split the cheesecake batter into two equal portions. Tint one portion with purple gel food coloring and the other with orange gel food coloring. Mix until you achieve vibrant Halloween colors.
Layer the Colors:
Drop spoonfuls of the purple and orange cheesecake batter alternately onto the Oreo crust in the baking pan. Use a knife or skewer to create a marbled pattern by swirling the colors together.
Bake to Perfection:
Bake in the preheated oven for 35-40 minutes, or until the edges are set, and the center is slightly jiggly. Turn off the oven and leave the cheesecake bars inside for an additional 10 minutes to prevent cracking.
Cool and Chill:
Remove the pan from the oven and let the cheesecake bars cool to room temperature. Then, refrigerate for at least 2 hours or until they’re well chilled and set.
Add Spooky Eyes: Once chilled, use the overhanging parchment paper to lift the cheesecake bars out of the pan. Cut them into squares. Decorate each square with candy eyes to give them a spooky haunted look.
Serve with a Smile:Present your Haunted Oreo Cheesecake Bars to your eager Halloween party guests, and watch them disappear in delight!
These hauntingly delicious cheesecake bars are perfect for adding a touch of spookiness to your dessert table. Enjoy, and may your Halloween be filled with tasty treats and eerie delights!
Instructions
Crush Oreo cookies and press them into the bottom of a baking pan to create the crust.
In a separate bowl, mix cream cheese, sugar, eggs, and vanilla extract until smooth.
Pour the cream cheese mixture over the Oreo crust.
Crumble more Oreo cookies on top.
Bake until set and slightly golden.
Once cooled, use Halloween-themed cookie cutters to create spooky shapes.
Ghostly Mini Cheesecakes Recipe
Ingredients
For the Cheesecake:
1 1/2 cups graham cracker crumbs
1/4 cup unsalted butter, melted
2 (8 oz) packages cream cheese, softened
1/2 cup granulated sugar
2 large eggs
1 teaspoon vanilla extract
1/4 cup sour cream
For the Ghostly Topping:
1 cup heavy whipping cream
1/4 cup powdered sugar
1 teaspoon vanilla extract
Mini chocolate chips (for the ghost eyes)
Directions
Preheat the Oven:Start by preheating your oven to 325°F (163°C). Line a 12-cup muffin tin with paper liners.
Prepare the Crust:In a bowl, combine the graham cracker crumbs and melted butter. Mix until the crumbs are evenly coated. Spoon a heaping tablespoon of the mixture into each muffin cup, pressing it down firmly to form the crust.
Beat the Cheesecake Filling:In a separate mixing bowl, beat the softened cream cheese and granulated sugar until it’s smooth and creamy.
Add Eggs and Flavor:Add the eggs one at a time, mixing well after each addition. Stir in the vanilla extract and sour cream until the cheesecake filling is velvety and well combined.
Fill the Cups:Divide the cheesecake mixture evenly among the muffin cups, filling them almost to the top.
Bake to Perfection:Bake in the preheated oven for 18-20 minutes, or until the cheesecakes are set but still slightly jiggly in the center. Remove them from the oven and let them cool in the muffin tin for about 10 minutes.
Chill Out:Transfer the mini cheesecakes to the refrigerator and let them chill for at least 2 hours or until they’re well set.
Whip the Ghostly Topping:In a mixing bowl, whip the heavy whipping cream, powdered sugar, and vanilla extract until stiff peaks form.
Decorate Like Ghosts:Using a piping bag or a ziplock bag with a small hole cut at the tip, pipe swirls of the whipped cream on top of each mini cheesecake. Make them look like ghostly figures with flowing “ghost tails.”
Add Spooky Eyes:Place mini chocolate chips as “eyes” on each ghostly cheesecake. You can use two for a pair of eyes or just one for a winking ghost – get creative!
Serve with a Smile:Present your Ghostly Mini Cheesecakes to your thrilled guests, and watch them disappear like apparitions in the night!
These hauntingly adorable mini cheesecakes are perfect for a spooky-themed party or any time you want to indulge in a ghostly treat. Enjoy, and may your dessert table be filled with deliciously eerie delights!
Instructions
Top mini cheesecake tarts with a dollop of whipped cream.
Add mini chocolate chips as eyes and a mouth for a ghostly face.
Crush chocolate wafer cookies and sprinkle them around the ghost for a graveyard effect.
Pumpkin Spice Rice Krispie Treats Recipe
Ingredients
4 tablespoons (1/2 stick) unsalted butter
1/2 cup pumpkin puree
1 teaspoon pumpkin pie spice
10 cups mini marshmallows
8 cups Rice Krispies cereal
1/2 cup white chocolate chips
Orange and green food coloring (optional)
Directions
Prepare a Pan:Start by greasing a 9×13-inch (23×33 cm) baking dish and set it aside.
Melt the Butter:In a large saucepan, melt the unsalted butter over low heat. Once melted, add the pumpkin puree and pumpkin pie spice. Stir to combine, and cook for a few minutes until the mixture is well blended and aromatic.
Add Marshmallows:Add the mini marshmallows to the saucepan and continue to stir until they’re completely melted and the mixture is smooth. This will take about 5-7 minutes.
Add Rice Krispies:Remove the saucepan from the heat and quickly stir in the Rice Krispies cereal. Make sure they’re well coated with the marshmallow and pumpkin mixture.
Press into Pan:Transfer the mixture into the greased baking dish. Use a greased spatula or your hands (careful, it’s sticky!) to press it evenly into the pan.
Cool Slightly:Allow the Pumpkin Spice Rice Krispie Treats to cool for about 10-15 minutes.
Create the Pumpkin Topping:If you want to add a fun pumpkin design, melt the white chocolate chips in a microwave-safe bowl in 20-second intervals, stirring in between until smooth. You can also add a few drops of orange food coloring to give it a pumpkin color. Transfer the melted chocolate to a piping bag or a ziplock bag with a small hole cut at the tip.
Decorate Like Pumpkins:Pipe pumpkin shapes onto the top of the Rice Krispie Treats using the white chocolate. Add a small dot of green food coloring (or use green sprinkles) for the pumpkin stems.
Chill and Set:Place the pan in the refrigerator for at least 30 minutes to allow the treats to cool and set.
Cut and Enjoy:Once they’re set, cut the Pumpkin Spice Rice Krispie Treats into squares and serve them up to your delighted guests. These treats capture the essence of autumn in every bite!
These Pumpkin Spice Rice Krispie Treats are a delightful way to celebrate the fall season. Enjoy the warm, spiced flavor and the festive pumpkin design. They’re perfect for Halloween or any cozy autumn gathering!
Instructions
Prepare Rice Krispie treats as per the cereal box instructions, but add pumpkin spice and orange food coloring to the marshmallow mixture.
Press the mixture into a greased pan and let it set.
Cut the treats into pumpkin shapes.
Use green icing to create pumpkin stems on top.
These Halloween baking recipes are not only delicious but also a blast to make. Feel free to get creative and add your own twists to these spooky delights. Happy Halloween baking!
Conclusion
There you have it—seven spine-tingling Halloween baking ideas to make your celebrations extra special. Whether you’re a seasoned baker or a beginner, these recipes are simple enough to follow and spooktacular enough to impress your family and friends. So, roll up your sleeves, don your apron, and get ready to create some wickedly delicious treats that will haunt taste buds and memories for years to come.
Remember, the essence of Halloween is all about having fun, so let your creativity run wild. Happy Halloween baking, and may your treats be as sweet as the spookiness of the season!
Bonus Tips and Tricks:To add an extra layer of flavor to your desserts, consider incorporating Halloween-themed spices like pumpkin spice or cinnamon into your recipes.
Don’t forget to take pictures of your creations and share them on social media with spooky captions to inspire others.
If you’re short on time, you can always use pre-made cookie dough or cake mix to simplify the baking process.
Experiment with different food coloring and edible glitter to make your Halloween treats even more eye-catching.
Get the whole family involved in the baking process; it’s a fantastic way to bond and create lasting memories together.
World Trade Center Footage | Webex Costs | Virtual Data Rooms | Structures Annuity Settlement | Sell Annuity Payment | Neuson | Online Classes | Nunavut Culture | Online College Course | Motor Replacements | Motor Insurance Quotes | Mortgage Adviser | Met Auto | Tax credit | Help desk software | Home refinancing | Urgent care | Marketing integration | Debt relief | Bitcoin | Fitness center software | Insurance | Gas | Electricity | Weight loss | Sell house for cash | Automotive repair | Loans | Internet marketing | Mortgage | Attorney | SEO specialist | Lawyer | Donate | Conference Call | Treatment | Degree | Software | Credit | Classes | Investing | Recovery | Trading | Rehab | Hosting | Cord Blood | Claim | Automotive warranty | Paintless dent repair | Mesothelioma Law Firm | Massage School Dallas Texas | Low Credit Line Credit Cards | Life Insurance Co Lincoln | Insurance Companies | Injury Lawyers | How to Donate A Car in California | Home Phone Internet Bundle | Holland Michigan College | Royalty-Free Images Stock | Register Free Domains | Psychic for Free | Ph.D. in Counseling Education | Personal Injury Lawyers | Personal Injury Law Firm | PaperPort Promotional Code | Online Stock Trading | Online Motor Insurance Quotes | Donate your Car for Money | Online Colleges | Health Records, Personal Health Record | Hard drive Data Recovery Services | Donate Old Cars to Charity | Forex Trading Platform | Forensics Online Course | Donate Car to Charity California | Donate Car for Tax Credit | Car Insurance Quotes PA | Email Bulk Service | Donating Used Cars to Charity | Donating a Car in Maryland | Donate Your Car Sacramento | Online Criminal Justice Degree | Donate Your Car for Kids | Futuristic Architecture | Donate Cars in MA | Data Recovery Raid | Mesothelioma | A car accident lawyer | Personal injury lawyer | AC repair | Lawsuit settlements | Car insurance | Flood recovery | Water damage restoration | Rehab doctors | Online degree | Online master’s degree | Doctoral programs | Hail car insurance