
7 Homemade Vanilla Extract Recipes to Elevate Your Culinary Creations
Introduction
Get ready to embark on a flavorful journey as we explore the art of crafting your own vanilla extract at home. There’s something incredibly satisfying about making your own, and the good news is, it’s simpler than you might think. Join us in unraveling the secrets of homemade vanilla extract and discover the joy of infusing your recipes with this liquid gold.
The Vanilla Bean Selection Process:Not all vanilla beans are created equal, and understanding the nuances can make a world of difference in your extract. We’ll guide you through the selection process, helping you choose the right bean variety to achieve the depth of flavor you desire. It’s a journey into the world of vanilla, one bean at a time.
Vanilla Extract Base: Alcohol Options:The alcohol you choose as the base of your extract plays a crucial role in its final flavor. From the neutrality of vodka to the warmth of bourbon, we’ll explore the different options available. Understanding the role of alcohol in extracting vanilla essence sets the stage for a well-informed homemade creation.
The Art of Extraction: Making Vanilla Extract:With the ingredients and base in place, it’s time to delve into the art of extraction. We’ll walk you through simple steps to transform vanilla beans and alcohol into the liquid gold that is vanilla extract. Patience is key as we allow time to intensify the flavor, and we’ll share tips for optimal extraction to ensure your homemade creation reaches its full potential.
Flavorful Variations: Infusing Your Vanilla Extract:Ready to take your vanilla extract to the next level? We’ll explore flavorful variations by infusing your creation with additional elements. From the warmth of cinnamon to the richness of coffee, we’re adding a personal touch to your vanilla extract. It’s a journey beyond traditional vanilla, opening up a world of unique homemade possibilities.
Bottling Elegance: Storing Your Vanilla Extract:Once your vanilla extract has reached perfection, it’s time to think about storing and presenting it. Choosing the right containers is essential to preserve and showcase your creation. We’ll guide you on ensuring longevity and maintaining the essence of your homemade vanilla. Tips for storage, presentation, and thoughtful gifting are all part of the bottle-up elegance.
Troubleshooting the Extract Process:Every journey has its challenges, and making vanilla extract is no exception. We’ll address common pitfalls and provide easy fixes for a seamless homemade experience. Consider it a troubleshooter’s guide to turning challenges into opportunities for flavor refinement.
The Joy of Sharing Homemade Vanilla Elegance:The best things in life are meant to be shared, and your homemade vanilla extract is no exception. We’ll explore the joy of creating moments with friends and family over the gift of homemade vanilla. Infusing joy into our kitchens and sharing the essence of homemade elegance is what makes this journey truly special.
Classic Vanilla Elegance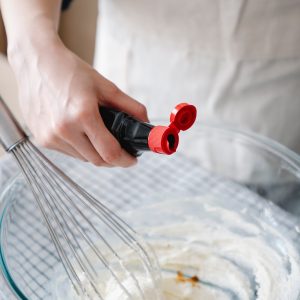
Ingredients
- 5–6 vanilla beans
- 1 cup vodka
Directions
Step 1: Prepare the Cake Batter
Dry Ingredients Dance:In a bowl, whisk together flour, baking powder, and salt. Set aside.
Butter and Sugar Ballet:In a separate large bowl, cream together softened butter and granulated sugar until light and fluffy.
Egg Addition:Add eggs one at a time, beating well after each addition. Stir in vanilla extract.
Flour and Milk Waltz:Gradually add the dry ingredients to the wet ingredients, alternating with the milk. Begin and end with the dry ingredients. Mix until just combined.
Step 2: Bake the Cake
Pan Preparation:Preheat your oven to 350°F (175°C). Grease and flour two 9-inch round cake pans.
Divide and Conquer:Divide the batter evenly between the prepared pans. Smooth the tops with a spatula.
Oven Ballet:Bake for 25-30 minutes or until a toothpick inserted into the center comes out clean. Let the cakes cool in the pans for 10 minutes, then transfer them to a wire rack to cool completely.
Step 3: Whip Up the Vanilla Buttercream
Buttercream Symphony:In a large bowl, beat softened butter until creamy. Gradually add powdered sugar, milk, and vanilla extract. Beat until smooth and fluffy.
Step 4: Assemble the Cake
Level and Layer:If needed, level the cooled cakes with a serrated knife. Place one cake layer on a serving plate. Spread a layer of vanilla buttercream on top.
Top and Frost:Place the second cake layer on top and frost the entire cake with the remaining vanilla buttercream. Smooth the frosting with a spatula for an elegant finish.
Step 5: Garnish and Serve
Elegance Unveiled:Garnish the cake as desired. You can add a sprinkle of shredded coconut, a drizzle of chocolate, or fresh berries for an extra touch of elegance.
Slice and Savor:Slice the Classic Vanilla Elegance and savor each bite of this timeless treat.
May your cake be elegant, your vanilla be classic, and your search engine rankings rise with every delightful slice!
Instructions
Split vanilla beans lengthwise.
Place in a clean, airtight jar.
Pour vodka over beans, ensuring they’re fully submerged.
Seal the jar and store in a cool, dark place.
Shake every few weeks.
After 8 weeks, your classic vanilla extract is ready to enhance your dishes.
Bourbon Vanilla Bliss
Ingredients
- 5–6 vanilla beans
- 1 cup bourbon
Directions
Step 1: Create the Cake Batter
Dry Ingredients Waltz:Whisk together flour, baking powder, and salt in a bowl. Set aside.
Butter and Sugar Harmony:In a large bowl, cream together softened butter and granulated sugar until creamy and light.
Egg Addition Ballet:Add eggs one at a time, beating well after each addition. Stir in vanilla extract.
Bourbon Infusion:Pour in the bourbon, and mix until well combined.
Flour and Milk Ensemble:Gradually add the dry ingredients to the wet ingredients, alternating with milk. Begin and end with the dry ingredients. Mix until just combined.
Step 2: Bake the Blissful Cake
Preheat and Prep:Preheat your oven to 350°F (175°C). Grease and flour two 9-inch round cake pans.
Divide and Conquer:Divide the batter evenly between the prepared pans. Smooth the tops with a spatula.
Oven Symphony:Bake for 25-30 minutes or until a toothpick inserted into the center comes out clean. Let the cakes cool in the pans for 10 minutes, then transfer them to a wire rack to cool completely.
Step 3: Craft the Bourbon Vanilla Frosting
Buttercream Bliss:In a large bowl, beat softened butter until creamy. Gradually add powdered sugar, bourbon, and vanilla extract. Beat until smooth and heavenly.
Step 4: Assemble the Blissful Cake
Level and Layer:If needed, level the cooled cakes with a serrated knife. Place one cake layer on a serving plate. Spread a layer of Bourbon Vanilla Frosting on top.
Top and Frost:Place the second cake layer on top and frost the entire cake with the remaining Bourbon Vanilla Frosting. Embrace the decadence.
Step 5: Garnish and Revel
Bourbon Drizzle:For an extra touch of bourbon bliss, you can drizzle a bit of bourbon on top of the frosted cake.
Serve and Savor:Slice into this Bourbon Vanilla Bliss and savor the rich, sophisticated flavors.
May your cake be blissful, your bourbon be bold, and your search engine rankings rise with every indulgent bite!
Instructions
Follow the same steps as the Classic Vanilla Elegance recipe.
Substitute vodka with bourbon for a rich, warm flavor.
Let it mingle for 10–12 weeks.
Enjoy the deep, nuanced notes of bourbon in your vanilla extract.
Vanilla Bean and Coffee Fusion
Ingredients
- 4–5 vanilla beans
- 1 cup rum
- 2 tablespoons coarsely ground coffee
Directions
Step 1: Infuse the Cake Batter
Dry Ingredients Waltz:Whisk together flour, baking powder, and salt in a bowl. Set aside.
Butter and Sugar Harmony:In a large bowl, cream together softened butter and granulated sugar until light and fluffy.
Egg Addition Ballet:Add eggs one at a time, beating well after each addition. Mix in the scraped vanilla bean seeds and vanilla extract.
Coffee Elixir:Pour in the strong brewed coffee, and mix until well combined.
Flour and Milk Fusion:
Gradually add the dry ingredients to the wet ingredients, alternating with milk. Begin and end with the dry ingredients. Mix until just combined.
Step 2: Bake the Fusion Cake
Preheat and Prep:Preheat your oven to 350°F (175°C). Grease and flour two 9-inch round cake pans.
Divide and Conquer:Divide the batter evenly between the prepared pans. Smooth the tops with a spatula.
Oven Symphony:Bake for 25-30 minutes or until a toothpick inserted into the center comes out clean. Let the cakes cool in the pans for 10 minutes, then transfer them to a wire rack to cool completely.
Step 3: Craft the Coffee Buttercream
Buttercream Fusion:In a large bowl, beat softened butter until creamy. Gradually add powdered sugar, brewed coffee, and vanilla extract. Beat until smooth and heavenly.
Step 4: Marry the Flavors
Level and Layer:If needed, level the cooled cakes with a serrated knife. Place one cake layer on a serving plate. Spread a layer of Coffee Buttercream on top.
Top and Frost:Place the second cake layer on top and frost the entire cake with the remaining Coffee Buttercream. Revel in the aroma.
Step 5: Garnish and Delight
Vanilla Bean Specks:For an elegant touch, sprinkle some scraped vanilla bean seeds on top of the frosted cake.
Serve and Savor:Slice into this Vanilla Bean and Coffee Fusion and savor the delightful union of vanilla and coffee flavors.
May your cake be infused, your coffee be bold, and your search engine rankings rise with every flavorful bite!
Instructions
Split and place vanilla beans in a jar.
Add coarsely ground coffee.
Pour rum over the beans and coffee.
Seal the jar and store in a cool place.
Shake regularly for 6–8 weeks.
Strain and revel in the aromatic combination of vanilla and coffee.
Cinnamon Vanilla Symphony
Ingredients
- 5–6 vanilla beans
- 1 cup brandy
- 2 cinnamon sticks
Directions
Step 1: Create the Cake Harmony
Dry Ingredients Dance:Whisk together flour, baking powder, salt, and ground cinnamon in a bowl. Set aside.
Butter and Sugar Serenade:In a large bowl, cream together softened butter and granulated sugar until light and fluffy.
Egg Addition Waltz:Add eggs one at a time, beating well after each addition. Stir in vanilla extract.
Cinnamon Infusion:Mix in the ground cinnamon for a warm, spicy note.
Flour and Milk Melody:Gradually add the dry ingredients to the wet ingredients, alternating with milk. Begin and end with the dry ingredients. Mix until just combined.
Step 2: Bake the Harmonious Cake
Preheat and Prep:Preheat your oven to 350°F (175°C). Grease and flour two 9-inch round cake pans.
Divide and Conquer:Divide the batter evenly between the prepared pans. Smooth the tops with a spatula.
Oven Symphony:Bake for 25-30 minutes or until a toothpick inserted into the center comes out clean. Allow the cakes to cool in the pans for 10 minutes, then transfer them to a wire rack to cool completely.
Step 3: Craft the Cinnamon Vanilla Frosting
Buttercream Bliss:In a large bowl, beat softened butter until creamy. Gradually add powdered sugar, ground cinnamon, vanilla extract, and milk. Beat until smooth and flavorful.
Step 4: Assemble the Symphony Cake
Level and Layer:If needed, level the cooled cakes with a serrated knife. Place one cake layer on a serving plate. Spread a layer of Cinnamon Vanilla Frosting on top.
Top and Frost:Place the second cake layer on top and frost the entire cake with the remaining Cinnamon Vanilla Frosting. Enjoy the sweet and spicy melody.
Step 5: Garnish and Enjoy
Cinnamon Sprinkle:For a finishing touch, sprinkle a bit of ground cinnamon on top of the frosted cake.
Serve and Savor:Slice into this Cinnamon Vanilla Symphony and savor the harmonious blend of cinnamon and vanilla flavors.
May your cake be harmonious, your cinnamon be spicy, and your search engine rankings rise with every delightful bite!
Instructions
Split vanilla beans and place them in a jar.
Add cinnamon sticks.
Pour brandy over the beans and cinnamon.
Seal the jar and let it infuse for 8–10 weeks.
Strain and experience the warm embrace of cinnamon-infused vanilla.
Vanilla Citrus Zest Infusion
Ingredients
- 4–5 vanilla beans
- 1 cup gin
- Zest of one orange
Directions
Step 1: Create the Cake Harmony
Dry Ingredients Dance:Whisk together flour, baking powder, salt, and the zest of one orange and one lemon in a bowl. Set aside.
Butter and Sugar Serenade:In a large bowl, cream together softened butter and granulated sugar until light and fluffy.
Egg Addition Waltz:Add eggs one at a time, beating well after each addition. Stir in vanilla extract.
Citrus Zest Infusion:Mix in the zest of one orange and one lemon for a burst of citrusy freshness.
Flour and Milk Melody:Gradually add the dry ingredients to the wet ingredients, alternating with milk. Begin and end with the dry ingredients. Mix until just combined.
Step 2: Bake the Citrus-Infused Cake
Preheat and Prep:Preheat your oven to 350°F (175°C). Grease and flour two 9-inch round cake pans.
Divide and Conquer:Divide the batter evenly between the prepared pans. Smooth the tops with a spatula.
Oven Symphony:Bake for 25-30 minutes or until a toothpick inserted into the center comes out clean. Allow the cakes to cool in the pans for 10 minutes, then transfer them to a wire rack to cool completely.
Step 3: Craft the Citrus Zest Frosting
Buttercream Bliss:In a large bowl, beat softened butter until creamy. Gradually add powdered sugar, the zest of one orange and one lemon, fresh orange juice, and fresh lemon juice. Beat until smooth and citrusy.
Step 4: Assemble the Citrus Zest Infusion Cake
Level and Layer:If needed, level the cooled cakes with a serrated knife. Place one cake layer on a serving plate. Spread a layer of Citrus Zest Frosting on top.
Top and Frost:Place the second cake layer on top and frost the entire cake with the remaining Citrus Zest Frosting. Revel in the citrusy goodness.
Step 5: Garnish and Enjoy the Citrus Zest Infusion
Citrus Zest Sprinkle:For a vibrant touch, sprinkle additional citrus zest on top of the frosted cake.
Serve and Savor:Slice into this Vanilla Citrus Zest Infusion and savor the delightful blend of vanilla and citrus flavors.
May your cake be infused, your citrus be zesty, and your search engine rankings rise with every refreshing bite!
Instructions
Split and place vanilla beans in a jar.
Add orange zest for a citrusy kick.
Pour gin over the beans and zest.
Seal the jar and let it infuse for 6–8 weeks.
Strain and enjoy the vibrant combination of vanilla and citrus.
Coconut Vanilla Dream
Ingredients
- 5–6 vanilla beans
- 1 cup coconut rum
Directions
Step 1: Create the Tropical Cake Harmony
Dry Ingredients Dance:Whisk together flour, baking powder, and salt in a bowl. Set aside.
Butter and Sugar Serenade:In a large bowl, cream together softened butter and granulated sugar until light and fluffy.
Egg Addition Waltz:Add eggs one at a time, beating well after each addition. Stir in vanilla extract and coconut extract.
Coconut Milk Bliss:Pour in the coconut milk, and mix until well combined.
Flour and Coconut Fusion:Gradually add the dry ingredients to the wet ingredients, mixing until just combined. Let the tropical flavor fusion begin!
Step 2: Bake the Coconut-Infused Cake
Preheat and Prep:Preheat your oven to 350°F (175°C). Grease and flour two 9-inch round cake pans.
Divide and Conquer:Divide the batter evenly between the prepared pans. Smooth the tops with a spatula.
Oven Paradise:Bake for 25-30 minutes or until a toothpick inserted into the center comes out clean. Allow the cakes to cool in the pans for 10 minutes, then transfer them to a wire rack to cool completely.
Step 3: Craft the Coconut Vanilla Frosting
Buttercream Bliss:In a large bowl, beat softened butter until creamy. Gradually add powdered sugar, vanilla extract, coconut extract, and coconut milk. Beat until smooth and dreamy.
Step 4: Assemble the Coconut Vanilla Dream Cake
Level and Layer:If needed, level the cooled cakes with a serrated knife. Place one cake layer on a serving plate. Spread a layer of Coconut Vanilla Frosting on top.
Top and Frost:Place the second cake layer on top and frost the entire cake with the remaining Coconut Vanilla Frosting. Embrace the tropical paradise.
Step 5: Garnish and Enjoy the Coconut Vanilla Dream
Coconut Cascade:For an extra touch of paradise, sprinkle shredded coconut on top of the frosted cake.
Serve and Savor:Slice into this Coconut Vanilla Dream and savor the delightful blend of coconut and vanilla flavors.
May your cake be dreamy, your coconut be tropical, and your search engine rankings rise with every heavenly bite!
Instructions
Split vanilla beans and place them in a jar.
Pour coconut rum over the beans.
Seal the jar and let it soak for 8–10 weeks.
Strain and experience the tropical twist of coconut-infused vanilla.
Hazelnut Vanilla Fusion
Ingredients
- 4–5 vanilla beans
- 1 cup hazelnut liqueur
Directions
Step 1: Create the Nutty Cake Harmony
Dry Ingredients Dance:Whisk together flour, baking powder, and salt in a bowl. Set aside.
Butter and Sugar Serenade:In a large bowl, cream together softened butter and granulated sugar until light and fluffy.
Egg Addition Waltz:Add eggs one at a time, beating well after each addition. Stir in vanilla extract and hazelnut extract.
Nutty Elixir:Pour in the hazelnut extract, and mix until well combined.
Flour and Milk Fusion:Gradually add the dry ingredients to the wet ingredients, alternating with milk. Begin and end with the dry ingredients. Mix until just combined.
Step 2: Bake the Hazelnut-Infused Cake
Preheat and Prep:Preheat your oven to 350°F (175°C). Grease and flour two 9-inch round cake pans.
Divide and Conquer:Divide the batter evenly between the prepared pans. Smooth the tops with a spatula.
Oven Symphony:Bake for 25-30 minutes or until a toothpick inserted into the center comes out clean. Let the cakes cool in the pans for 10 minutes, then transfer them to a wire rack to cool completely.
Step 3: Craft the Hazelnut Vanilla Frosting
Buttercream Bliss:In a large bowl, beat softened butter until creamy. Gradually add powdered sugar, vanilla extract, hazelnut extract, and milk. Beat until smooth and nutty.
Step 4: Assemble the Hazelnut Vanilla Fusion Cake
Level and Layer:If needed, level the cooled cakes with a serrated knife. Place one cake layer on a serving plate. Spread a layer of Hazelnut Vanilla Frosting on top.
Top and Frost:Place the second cake layer on top and frost the entire cake with the remaining Hazelnut Vanilla Frosting. Embrace the nutty fusion.
Step 5: Garnish and Enjoy the Hazelnut Vanilla Fusion
Hazelnut Cascade:For an extra nutty touch, sprinkle chopped hazelnuts on top of the frosted cake.
Serve and Savor:Slice into this Hazelnut Vanilla Fusion and savor the delightful blend of hazelnut and vanilla flavors.
May your cake be nutty, your vanilla be sweet, and your search engine rankings rise with every flavorful bite!
Instructions
Split and place vanilla beans in a jar.
Pour hazelnut liqueur over the beans.
Seal the jar and let it meld for 6–8 weeks.
Strain for a delectable hazelnut-vanilla concoction.
Conclusion
There you have it—seven enticing homemade vanilla extract recipes to elevate your culinary creations. From classic elegance to innovative fusions, these DIY extracts promise to infuse your dishes with a burst of delightful flavor. Get ready to indulge in the essence of homemade vanilla and let your culinary journey be enriched by these aromatic infusions. Happy extracting!
In a world saturated with store-bought options, there’s unparalleled joy in crafting seven unique homemade vanilla extracts. From the essential ingredients to flavor infusions and troubleshooting tips, this is an invitation to savor the art of DIY vanilla. Get ready to elevate your culinary adventures with the essence of homemade elegance—because the best flavors come from the heart.
World Trade Center Footage | Webex Costs | Virtual Data Rooms | Structures Annuity Settlement | Sell Annuity Payment | Neuson | Online Classes | Nunavut Culture | Online College Course | Motor Replacements | Motor Insurance Quotes | Mortgage Adviser | Met Auto | Tax credit | Help desk software | Home refinancing | Urgent care | Marketing integration | Debt relief | Bitcoin | Fitness center software | Insurance | Gas | Electricity | Weight loss | Sell house for cash | Automotive repair | Loans | Internet marketing | Mortgage | Attorney | SEO specialist | Lawyer | Donate | Conference Call | Treatment | Degree | Software | Credit | Classes | Investing | Recovery | Trading | Rehab | Hosting | Cord Blood | Claim | Automotive warranty | Paintless dent repair | Mesothelioma Law Firm | Massage School Dallas Texas | Low Credit Line Credit Cards | Life Insurance Co Lincoln | Insurance Companies | Injury Lawyers | How to Donate A Car in California | Home Phone Internet Bundle | Holland Michigan College | Royalty-Free Images Stock | Register Free Domains | Psychic for Free | Ph.D. in Counseling Education | Personal Injury Lawyers | Personal Injury Law Firm | PaperPort Promotional Code | Online Stock Trading | Online Motor Insurance Quotes | Donate your Car for Money | Online Colleges | Health Records, Personal Health Record | Hard drive Data Recovery Services | Donate Old Cars to Charity | Forex Trading Platform | Forensics Online Course | Donate Car to Charity California | Donate Car for Tax Credit | Car Insurance Quotes PA | Email Bulk Service | Donating Used Cars to Charity | Donating a Car in Maryland | Donate Your Car Sacramento | Online Criminal Justice Degree | Donate Your Car for Kids | Futuristic Architecture | Donate Cars in MA | Data Recovery Raid | Mesothelioma | A car accident lawyer | Personal injury lawyer | AC repair | Lawsuit settlements | Car insurance | Flood recovery | Water damage restoration | Rehab doctors | Online degree | Online master’s degree | Doctoral programs | Hail car insurance